
Drie keer is scheepsrecht, zeggen ze. Met het Maya beha patroon is dat voor mij zeker het geval!
Third time’s a charm, so they say. Well, for the Maya bra that’s the case for me!
Ik maakte het al twee keer eerder. Eén in het prille begin van mijn beha-maak-carrière, en even later nog een keer. Die allereerste keer maakte ik een 75D en die paste toen niet goed. Later maakte ik de 75C en die was veel te klein. Terugkijkend denk ik dat ik die eerste keer geen goede materialen heb gebruikt en dat daardoor de pasvorm niet goed was. Een goed excuus om het nogmaals te proberen.
I made it twice before. Once when I had just started bra-making and again shortly after. The first time I made a 75D and it didn’t do anything for the ladies. The second time I made a 75C and that was way too small. Looking back I now see that the materials I used for that first version weren’t suitable for a bra and therefore the result wasn’t good. A good reason to try again.
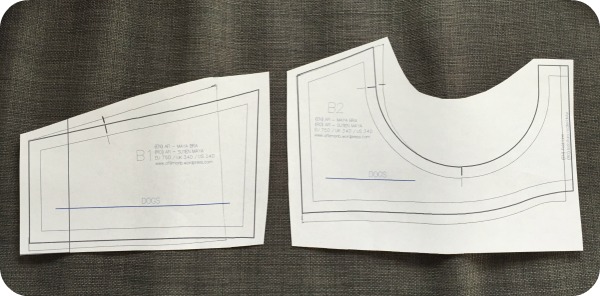
Omdat de band van die eerste Maya te lang was en de middenvoor te breed besloot ik om de cup van de Maya in de band van de Makebra DL04 te zetten. Op de foto hierboven zie je in potlood wat dat deed met het patroon.
Because the band of the first Maya was too long and the bridge too wide, I decided to put the cups of the Maya in the band of the Makebra DL04. In the picture above you can see the changes in the pattern. The pencil lines are the lines I used.


Ik probeerde het patroon eerst uit in deze groene badpakkenlycra. De band is gevoerd met een tricotvoering met één kant op rek en de achterkant is van powernet. Onlangs heb ik al mijn in de winkel gekochte beha’s weggegooid, maar natuurlijk pas nadat ik er wat onderdelen vanaf had geprutst. Toen zag ik dat bij die beha’s het beugelband pas dichtgestikt was na het vastzetten van het elastiek aan de bovenrand. Dat deed ik bij deze beha ook en dat is dus oneindig veel gemakkelijker dan andersom!
First I tried out the pattern in this green swimsuit lycra. The cradle is lined with a thin jersey lining with two-way stretch and the wings are made of powernet. Recently I tossed out all my store bought bras, after I took out some of the re-usable parts of course. I saw that those bras had the elastic on the top sewn on first and after that the underwire casing. I did that too with this bra and it’s infinitely easier than the other way around!
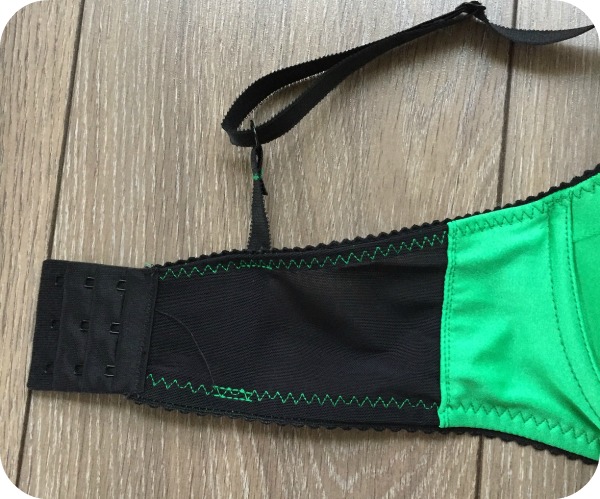

De pasvorm bleek tot mijn grote verbazing precies goed. Ik gebruikte dit keer een andere beugel, iets groter en ook een stuk langer. Ik naaide ook de sluiting er verkeerd om aan maar dat mocht de pret niet drukken 🙂
Much to my surprise the fit was spot on. I used different underwires, a little bit bigger and a lot longer. I also sewed on the hooks and eyes the wrong way around but I don’t really care 🙂
Met hernieuwde beha-maak-mojo dook ik mijn voorraadje lingeriestoffen in en werd pardoes overmand door keuzestress…
With newfound bra-making-mojo I dove into my bra-making stash and was immediately struck with choice overload…

Uiteindelijk koos ik de dierenprint in grijstinten en het mintgroene kantje die op mijn knie liggen.
Eventually I chose the gray animal print and the minty green lace that are on my knee.
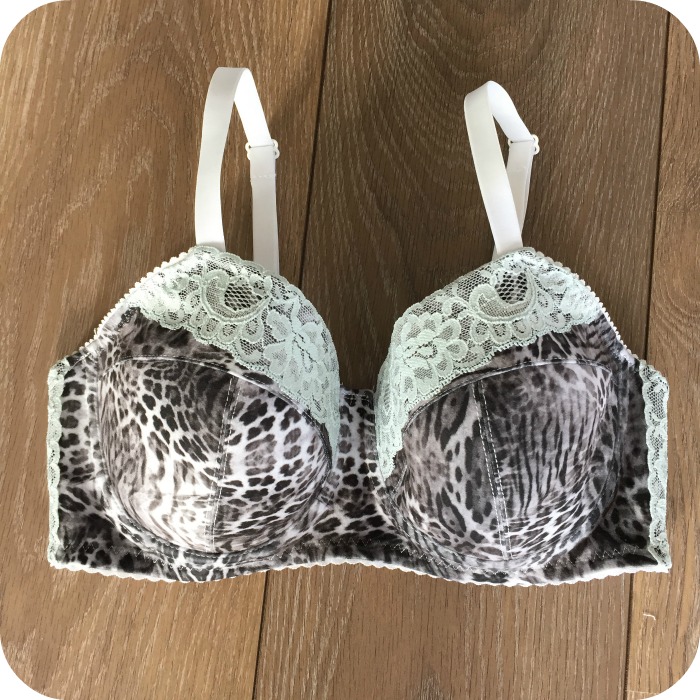

De band is gevoerd met dezelfde stof (die superzacht is van de buitenkant) en de achterkant is gevoerd met powernet. Jammer dat ik geen mintgroene schouderband had, want dit witte vind ik toch niet helemaal geslaagd geloof ik. Ach, je kant ook niet alles hebben. Ook deze beha past perfect en ik denk dat dit ook de netste is die ik tot nu toe genaaid heb. Ik dacht er zelfs aan om het schouderband eerst ondersteboven vast te zetten en vervolgens terug te slaan:
The cradle is self-lined (this fabric is very soft on the outside) and the wings are lined with powernet. It’s a shame that I don’t have minty green shoulder straps because I’m not that fond of these white ones. Oh well. This bra fits perfectly too and I think it’s the neatest sewn one so far. I even remembered to sew the shoulder straps to the bottom elastic nicely folded back:

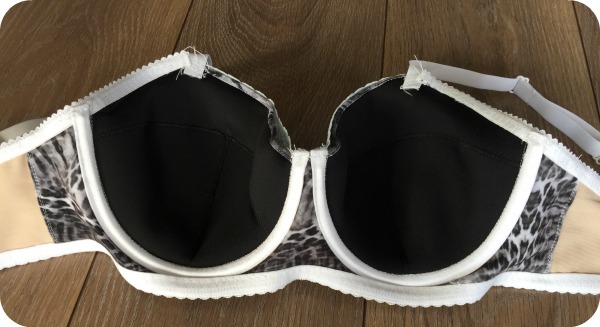
Alleen kun je dat niet heel goed zien op deze foto 🙂 Wel de zwarte sluiting. Ik had geen witte en dus gebruikte ik deze maar. Met wit draad, zodat ik hem straks makkelijk kan vervangen voor een witte.
You can’t really see it on this photo though 🙂 You can see the black closure. I didn’t have a white one and so I used this one. With white thread, so it will be easy to swap it out for a white one eventually.
Ik heb nu met behulp van de Craftsy cursus van Beverly Johnson een ‘partial band’ gemaakt van dit patroon (wat is daar de Nederlandse term voor, weet iemand dat?), dus ik ga vrolijk door met uitproberen!
Following Beverly Johnsons desiger techniques Craftsy class I’ve now changed this pattern into an partial band one. Experimenting is fun!

This is a good skill to have and so empowering to sew your own lingerie. I’m on the same learning curve as you are with bras. Yours look great!
It is really empowering! I popped into town today to get some books from the bookstore and as I rode my bike through the centre I realised that there are so many stores that I don’t have to visit anymore. No more bra shopping, yay! And they’re fun to make too, I love all the little touches you can give them with lace, different fabrics, etcetera 🙂
Feel free to check out my IG feed. I typed it incorrectly the first round.
Wauw, ziet er supergoed uit! Die Maya, dat is echt een leukerd. Ligt hier ook al klaar, toch maar gauw eens proberen 😊
Ik denk dat een partial band trouwens zwevende cups zijn in het Nederlands. Gaaf vind ik dat!
Dank je 🙂 Ik ben benieuwd hoe die van jou wordt! Zwevende cups, daar had ik nog nooit van gehoord, maar ik ben dan ook (nog) niet zo thuis in de terminologie haha. Hij is inmiddels af, en het is even pielen met het beugelband maar het is niet heel ingewikkeld. En weer eens wat anders!
Pingback: 2016: top ehm, more than 5 | IngeMaakt
Zou heel graag dit patroon willen maar hoe kan ik dit verkrijgen
Hi Yoland, als je Googlet op Maya bra sewing pattern of iets in die trant dan kom je hem vast tegen!