Inge and Eve

Ehm.. hoi! Ik leef nog 😂
Het is echt een hele poos geleden dat hier een post verscheen. Ik moet zeggen dat ik ook niet kan garanderen dat dat nog heel vaak gaat gebeuren 🙈 Bloggen is best veel werk: foto’s maken, een beetje fatsoeneren, post schrijven… Lange tijd had ik daar niet zoveel zin in. Vooral het foto’s maken, dat voelde opeens een beetje maf, en nog steeds. Daarnaast heb ik het idee dat ik steeds hetzelfde typte: dit maakte ik, hier ben ik blij mee, hier wat minder, hoera weer een nieuw kledingstuk. De glans was er wat vanaf. Maar goed, ik heb nu twee jurken gemaakt waar ik zó blij mee ben dat ik de blogstilte ervoor doorbreek, haha.

Well… hello! I’m still alive 😂
It’s been quite a while since I posted something. And I must say, I can’t guarantee it’ll happen a lot again 🙈 Blogging is quite a bit of work: taking pictures, editing them so they look presentable, writing… For a long time I didn’t feel like it. Especially the picture taking bit, which suddenly felt awkward and still does. Besides that I feel like I keep on saying the same things: hey, here’s something I made, this is what I like, this is what I like less and hurray, a new garment. The shine was gone. But hey, I now made two dresses that I like so much, I’m breaking the blogsilence, haha.


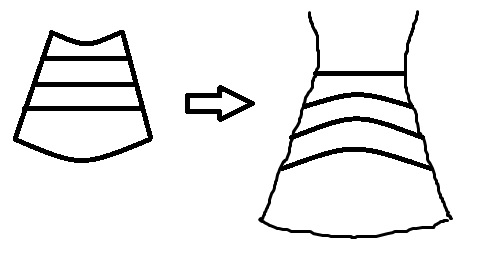
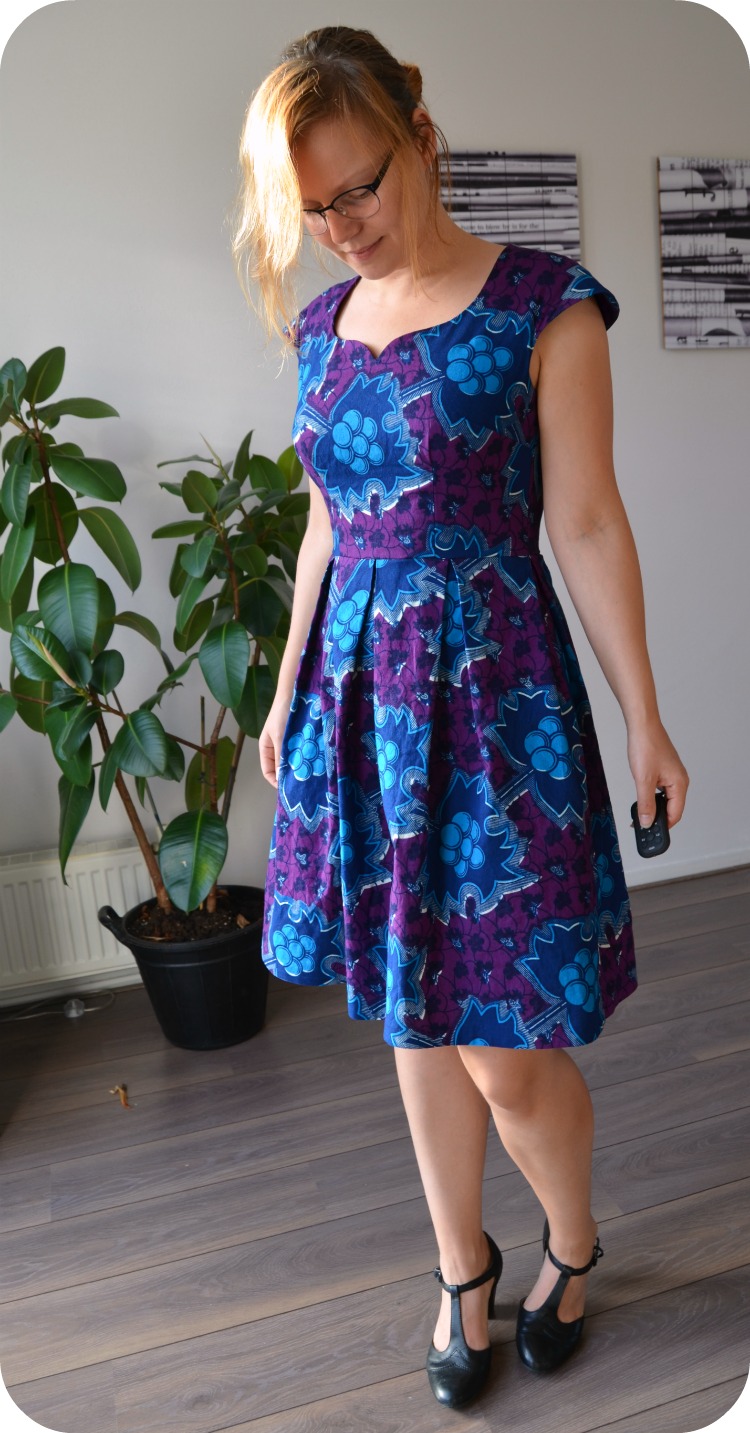
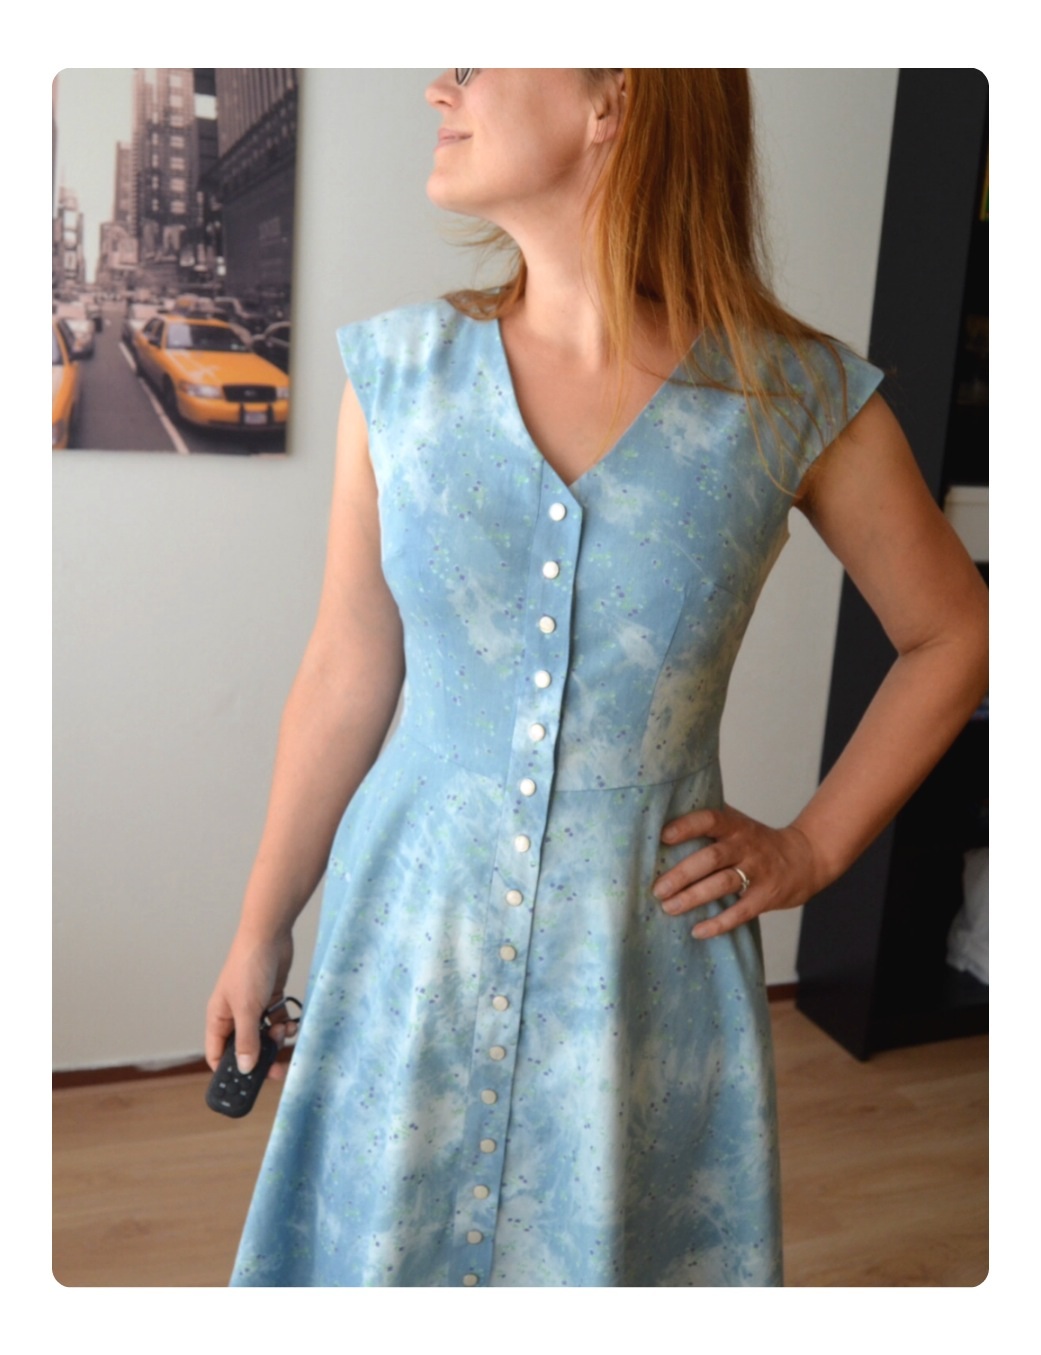
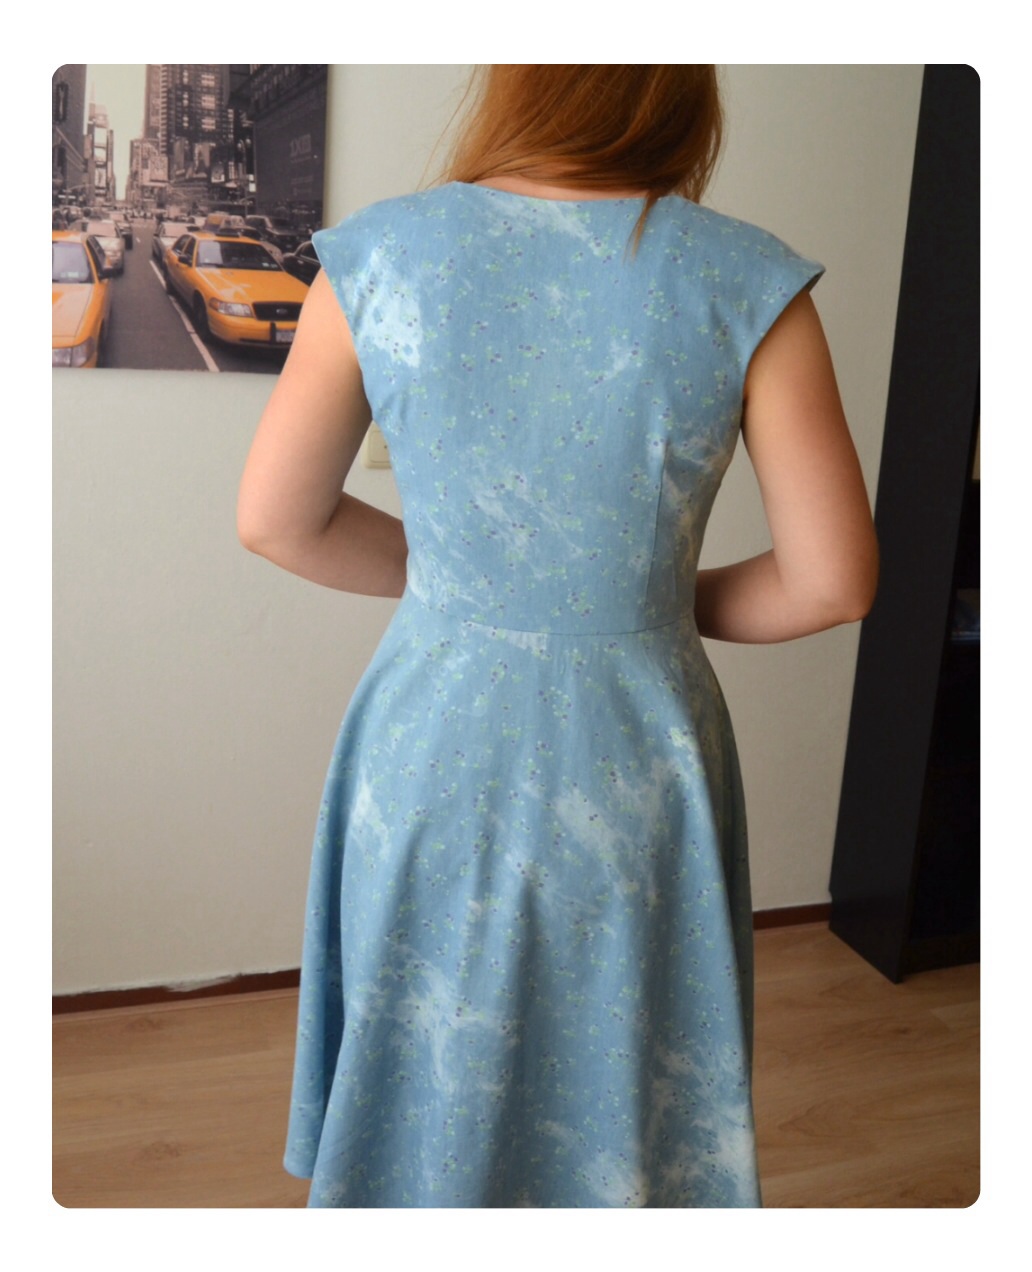
Dit is nummer 1. Het is een beetje van de Sew over it Eve dress en een beetje van mezelf. De Eve dress heeft ook een versie met vlindermouwtjes en die maakte ik al twee keer. De versie met een gewone mouw wilde ik ook altijd nog een keertje maken, maar het armsgat was voor mij niet een goede vorm. Dat is bij zo’n vlindermouwtje niet zo’n probleem, want dat past wel. Maar bij een gewone mouw is dat toch anders, en ik ben nogal pietluttig als het gaat om de pasvorm in het schouder-en-arm gebied… De mouw zelf was ook een probleem, want de mouw was inclusief naadtoeslag smaller dan de omtrek van mijn bovenarm 💪 En dus zat er maar één ding op: het bovenlijfje en mouw zelf tekenen en de rok van het patroon gebruiken.

This is the first one. It’s a little bit of the Sew over it Eve dress and a little bit of me. The Eve dress also has a version with flutter sleeves. I made that one twice, but also wanted to make the regular sleeved version. The armhole as drafted was not a good shape for me, and I’m kind of nitpicky when it comes to shoulder and armhole fit. Also, the sleeve was problematic: the sleeve width, including seam allowances, was smaller than my bicep circumference 💪 So there really was only one thing to do: drafting the bodice and sleeves myself and using the skirt pattern piece.


En omdat je dan toch bezig bent kun je ook nog wat kleine andere aanpassingen aanbrengen 🙂 de schouderpas is iets lager dan op het originele patroon, dat vind ik mooier. En mijn versie heeft een coupenaad, voor een goede pasvorm.

So while you’re at it you can also add some slight improvements 🙂 the shoulder yoke ends a bit lower than in the original pattern, because I think it looks better. Also my version has a bust dart for a good fit.


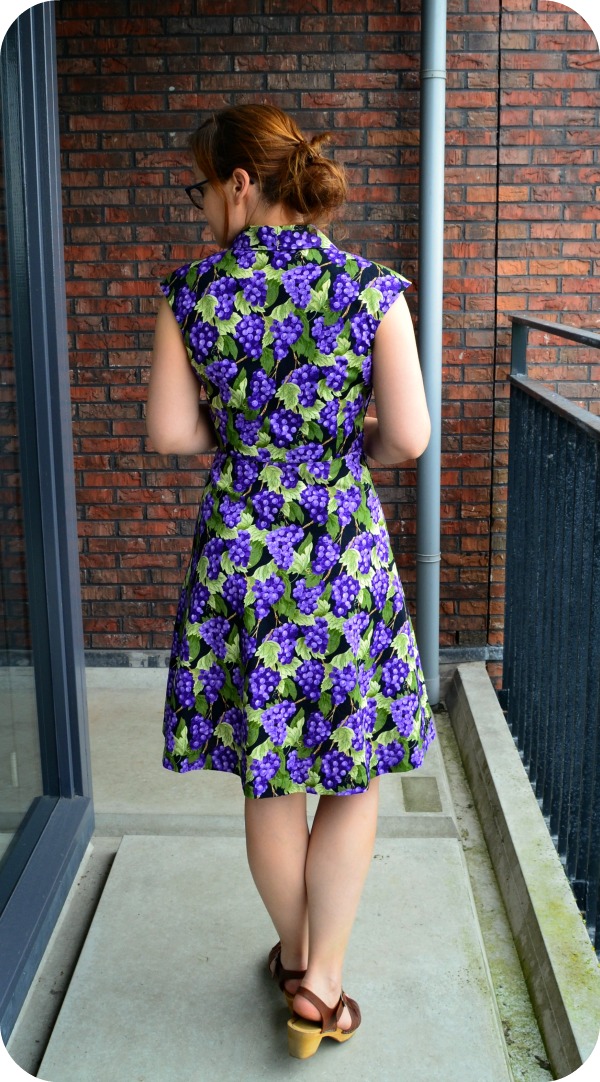
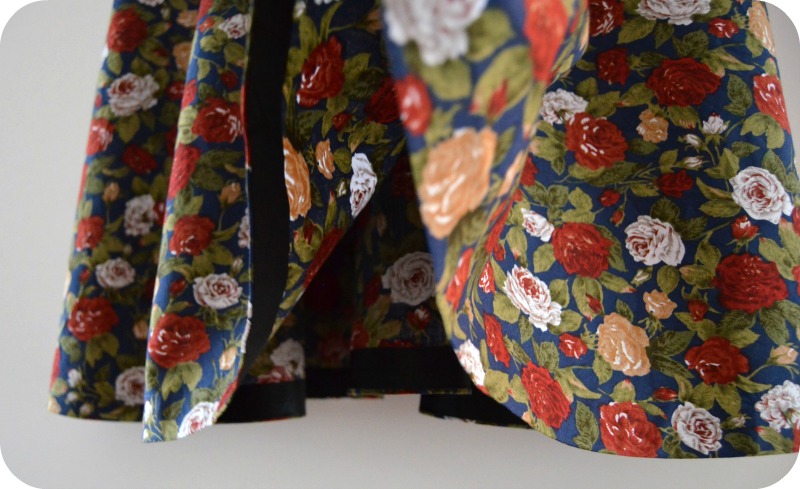
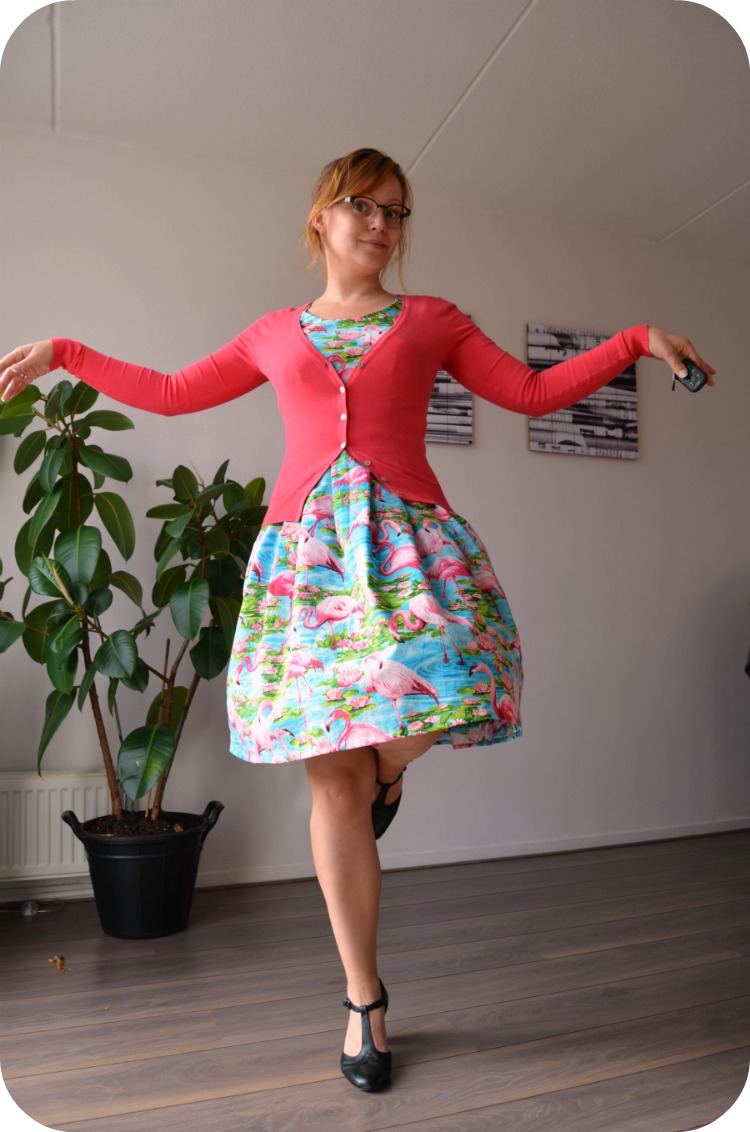
Behalve dat is het ontwerp eigenlijk hetzelfde. Ik maakte de high-low rok omdat ik die het mooiste vind. Het is misschien niet de meest flatteuze lengte voor mijn kuiten maar het voelt zo fijn, die wapperende stof als ik loop.

Other than that the design is basically the same. I used the high-low skirt. It may not be the most flattering length on my calves but I looove the feeling of the swishy fabric when walking.


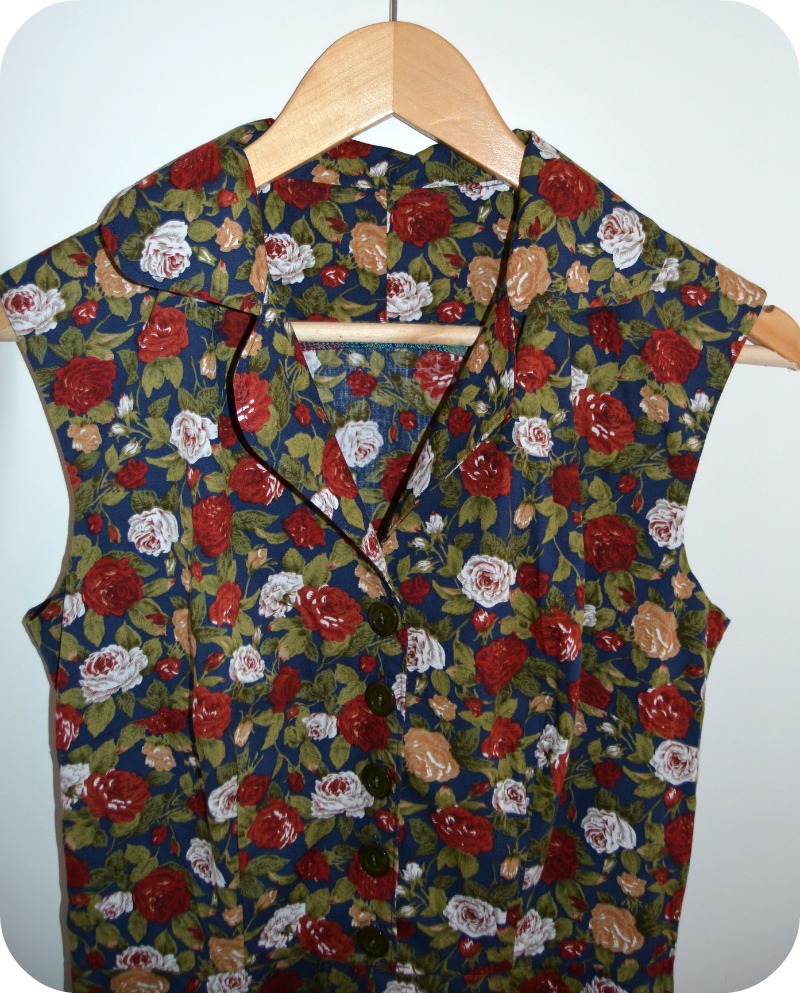
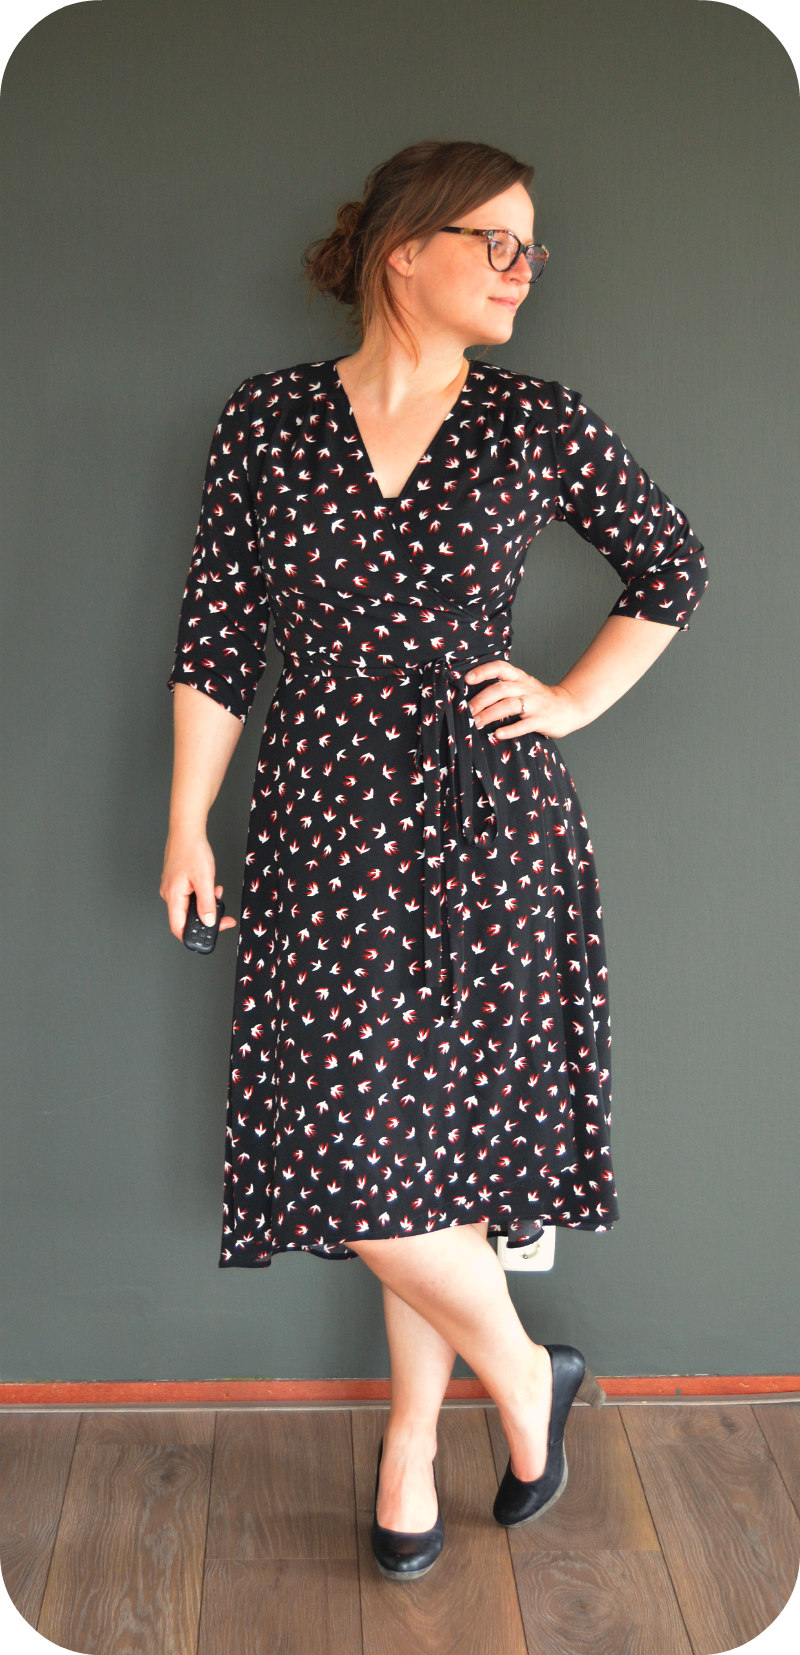
Deze versie in zwarte chiffon crèpe was eigenlijk de testversie, maar zoals je kan zien hoefde er weinig aan aangepast te worden. het enige dat ik veranderde was de vorm van de halslijn, die heb ik een half centimetertje uitgediept ter hoogte van de pas. Ik moet zeggen dat ik met deze versie minstens zo blij ben als met de definitieve, het is een hele comfortabele jurk en ik voel me vrij sjiek en elegant als ik ‘m aan heb.

This black chiffon crèpe version was actually a wearable muslin but as you can see there was no need for adjustments. The only one I made was widening the neckline with like a half centimetre at the yoke. I must say, I’m as happy with this one as I am with the final dress, it’s comfy and makes me feel chique and elegant and confident when I wear it.


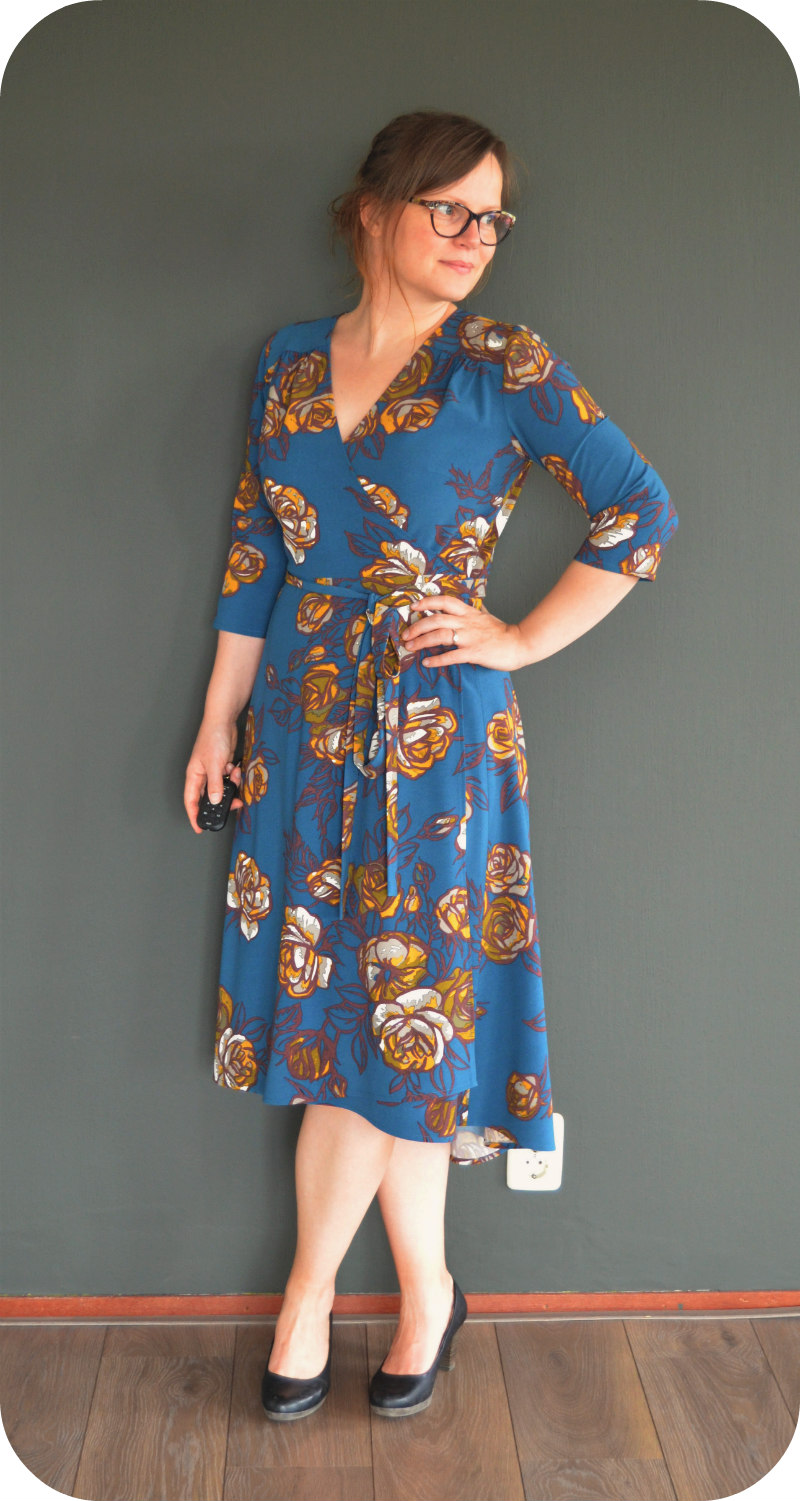
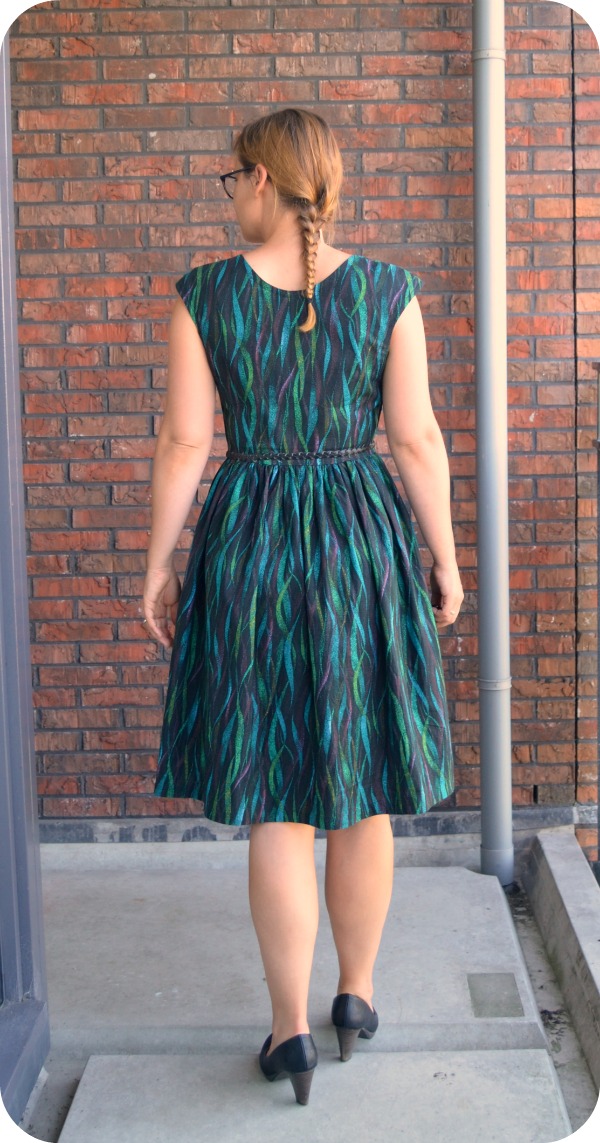
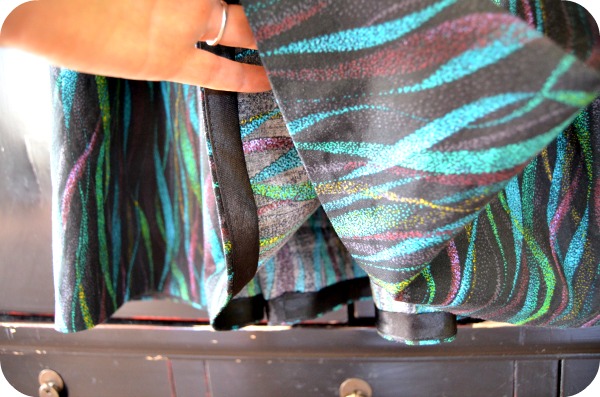
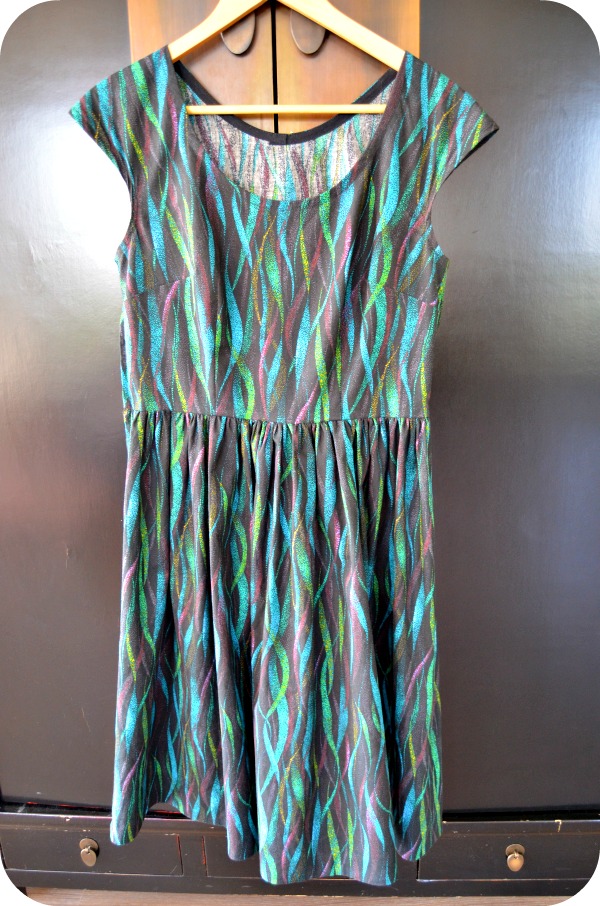
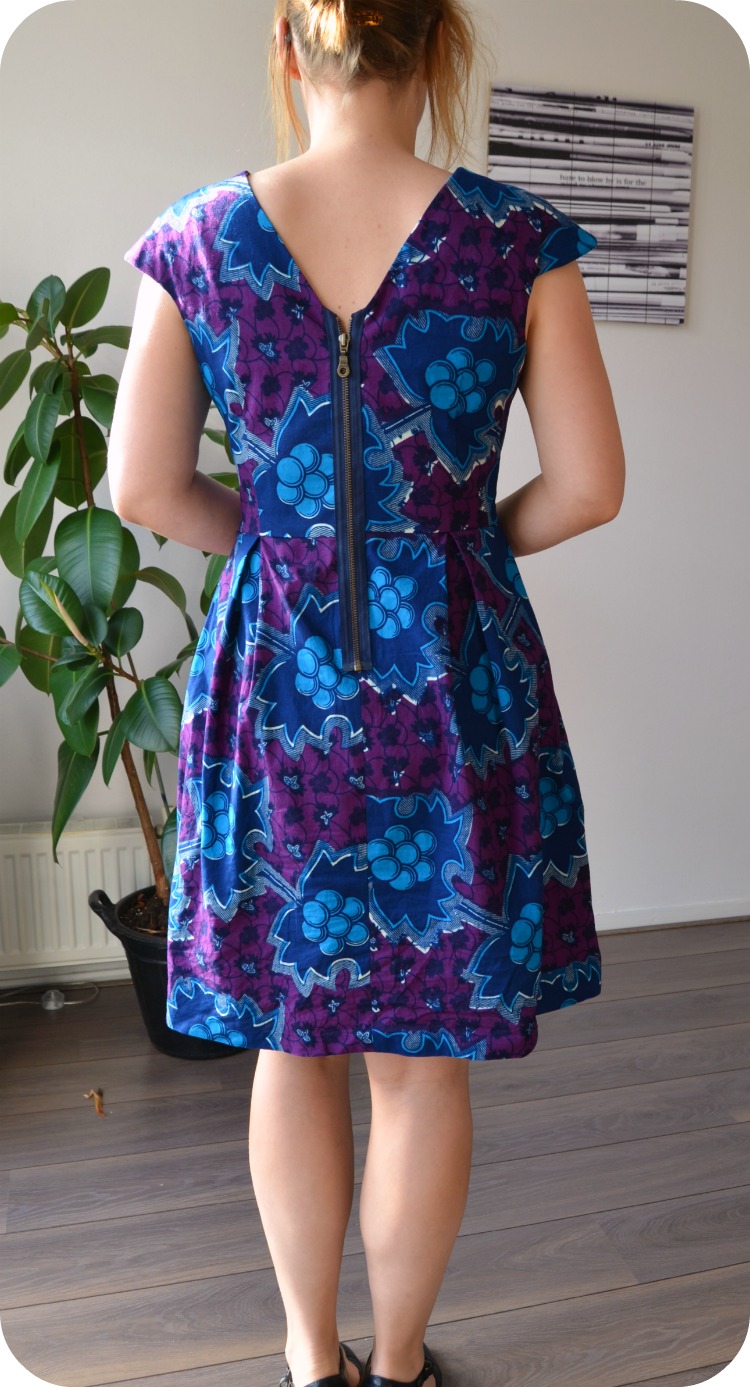
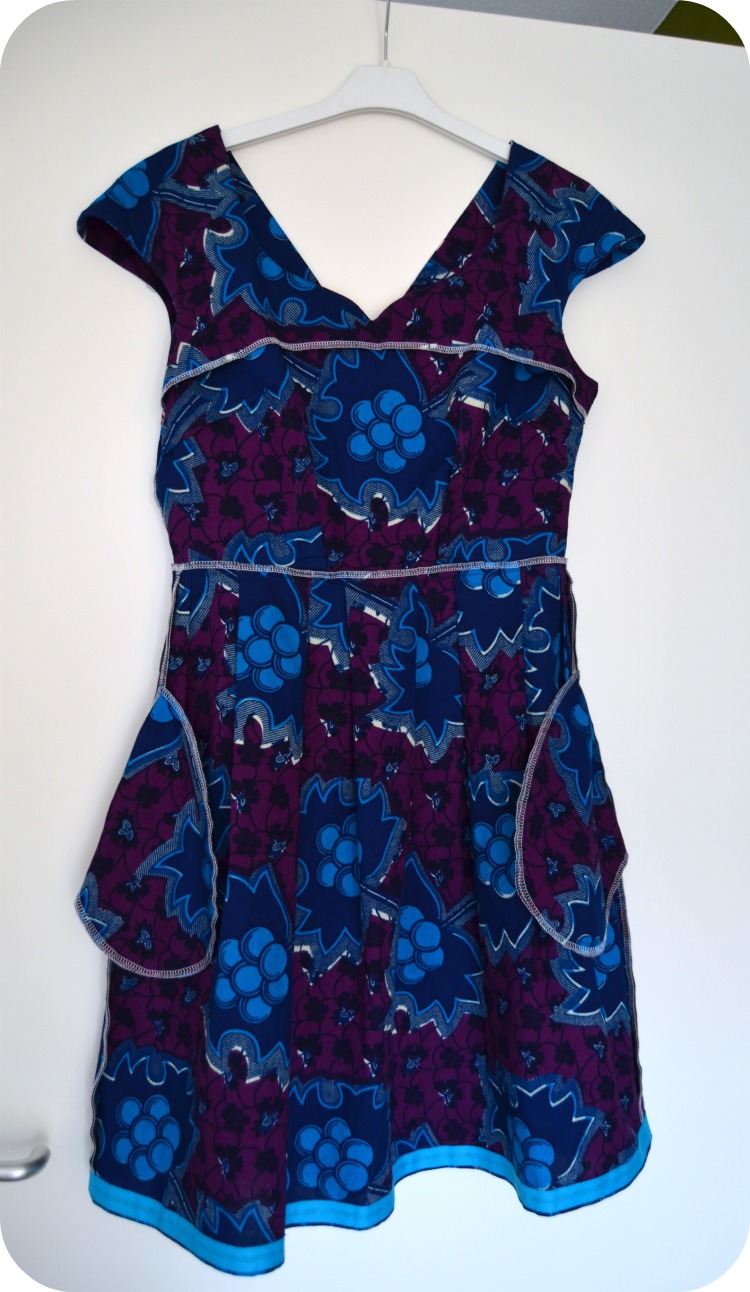
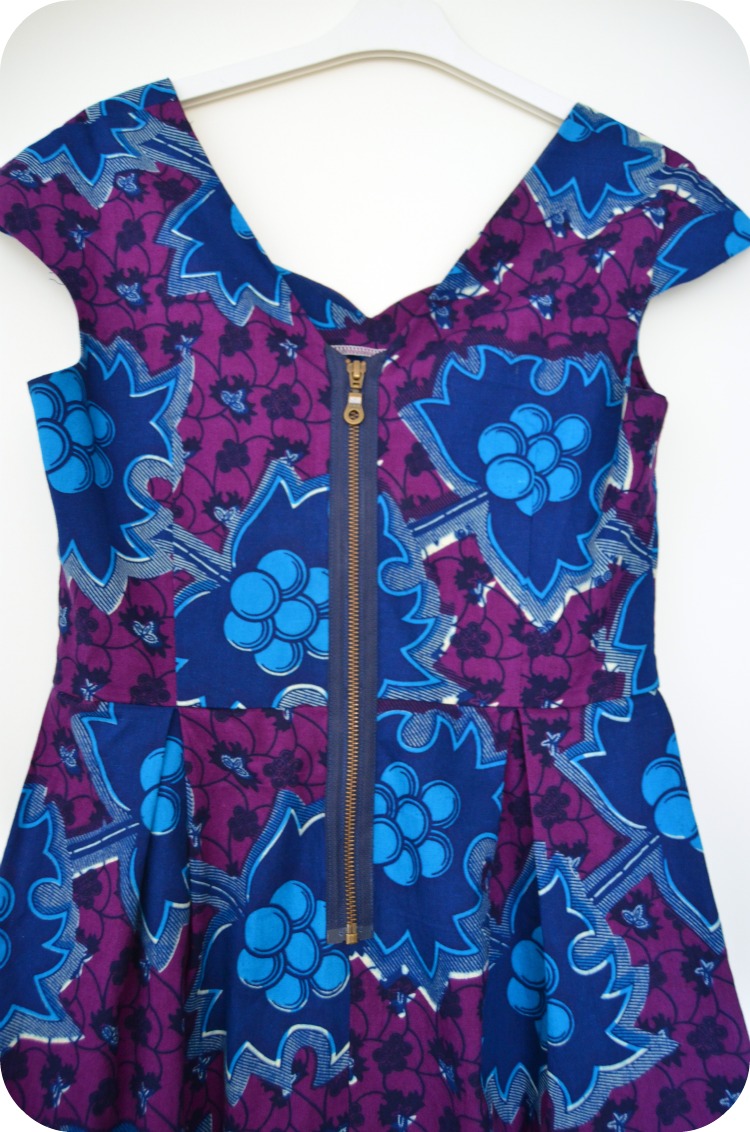
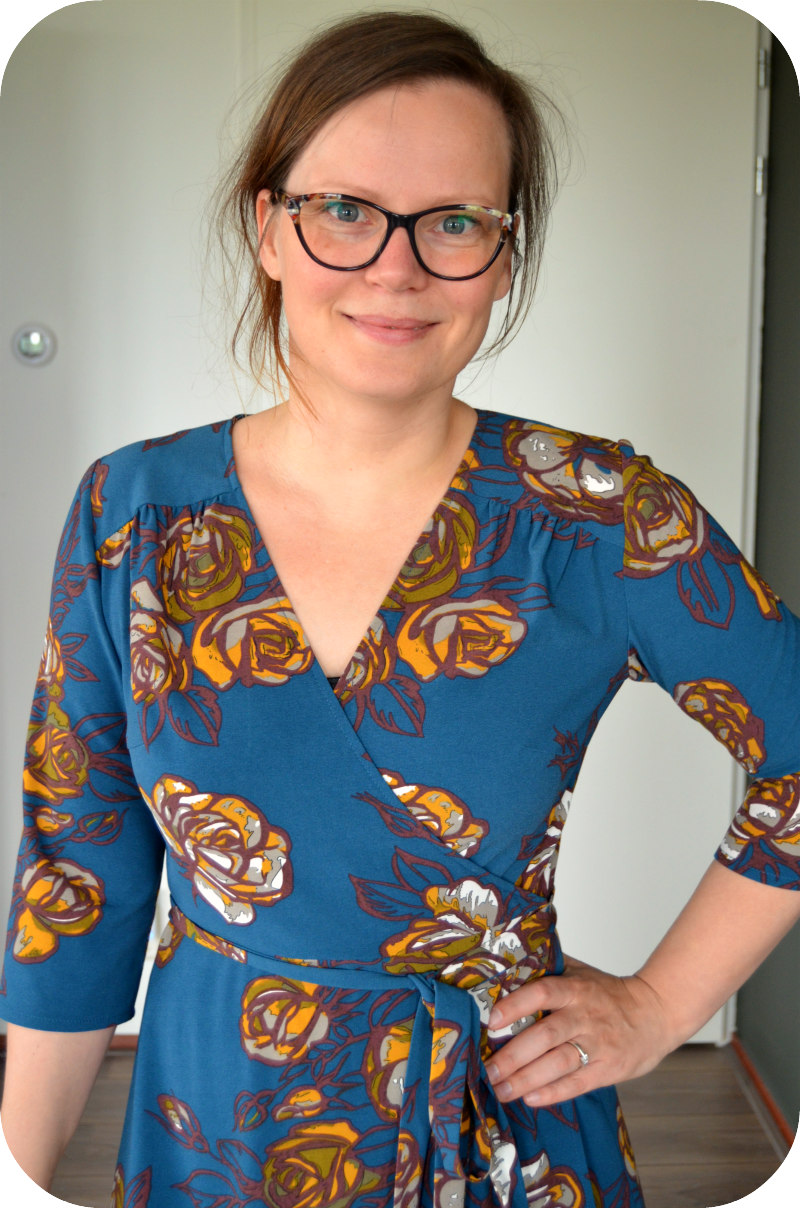
En dit is dan de ‘definitieve’ versie! Deze stof is wat zwaarder, een gewone crèpe, waardoor de rimpels bij de pas wat anders vallen. Ik ben er super blij mee! Ik vind de stof zo gaaf, de kleuren, de print… Het enige nadeel is dat de stof aan de achterkant wit(tig) is en dat je dat een beetje ziet door de high-low rok maar ja, je kan niet alles hebben en ik denk dat het niet heel erg opvalt.

So here it is, the final dress! The fabric is a bit heavier, a regular crèpe, which makes the gathers at the shoulder yoke look a bit different. I’m super happy with it! I love the fabric, the colour, the print… The only downside is that it’s white(ish) on the wrong side and it shows a little because of the high-low hem. But oh well, you can’t win them all and I don’t think it’s that obvious in real life.


Dat was eigenlijk alles wel wat ik te vertellen heb 🙂 Hoera voor twee toffe nieuwe jurken, én driewerf hoera voor patroontekenen! Want iets precies zó maken als dat je in gedachten had, dat is toch wel super tof.

So that was all I have to say about it 🙂 Hurray for two fabulous new dresses and three cheers for pattern drafting! Because making something exactly like you had in mind, that’s awesome.

I heard it through the grapevine

In september ga ik samen met Antje beginnen aan een serieuze naaiopleiding. En omdat een goede voorbereiding het halve werk is hebben we de boeken al in huis 🙂 Het gaat om het Danckaerts patroontekenboek. Om het uit te proberen tekende ik al het basispatroon maar daar moet ik nog wat aan futselen voor het helemaal goed zit. Om nog wat meer uit te proberen besloot ik de sjaalkraag te tekenen. Ik wilde al een poosje een jurk met een sjaalkraag maken en dit leek me het ideale moment.

In september, Antje and I are going to do some serious sewing education. And because a good start is half the work, we’ve already ordered the books 🙂 The method is called Danckaerts. To test the waters I drafted their basic bodice pattern, but it needs a bit more work. To try a bit more I decided to draft a shawl collar. I’ve been wanting to make a dress with a shawl collar for a while so this seemed like a good time.


Als uitgangspunt nam ik mijn favoriete bovenlijfje-patroon met aangeknipte kapmouwtjes. Net als bij de vorige jurk is de stof eigenlijk veels te druk om de details goed te laten zien. Ik bespeur een patroon hier… De stof, een katoentje, komt uit de uitverkoop-afdeling van de Jan Sikkes hier in Leeuwarden, voor 2,50 per meter kon ik ‘m niet laten liggen.

As starting point I took my favourite 4-dart bodice with cut on cap-sleeves. Just like my last dress, the print is too loud to really show the collar. I’m noticing a pattern here… The fabric, a pretty nice cotton, is from the clearance section of my local fabric shop. At 2,50 eur a metre, I couldn’t pass it by. 


De rok is een kwart cirkel met twee plooien in het voorpand. Ik heb heel veel jurken met halve cirkelrokken en alhoewel ik de vorm daarvan erg mooi vind, waaien ze nogal eens omhoog als het waait. En het waait hier nogal vaak. Vandaar dat ik eens met een kwart wilde experimenteren, om te kijken hoe dat bevalt.

The skirt is a quarter circle one, with two pleats in the front part. I have a lot of dresses with half circle skirts and while I like the shape of them, they are not very practical when it’s windy. And the Netherlands is a notoriosly windy country. So I wanted to experiment with a quarter circle, to see how that goes.


Tot nu toe vind ik het experiment met zowel de kraag als de rok wel geslaagd. Ik heb nog eventjes getwijfeld of ik de kraag met een smal zwart biaisbandje zou afwerken, zodat de kraag wat meer af zou steken ten opzichte van de rest, maar uiteindelijk besloot ik dat niet te doen. Het lijkt me echter wel de ideale kraag voor een paspelbandje!

So far I think both the experiments with the skirt and the collar are a succes. I did contemplate finishing the collar with some thin black bias binding to make it stand out a bit more, but in the end decided not to. However, I do think a collar like this is perfect for piping!


De armsgaten zijn wel afgewerkt met zwarte biais, aan de binnenkant. De rits zit in de zijnaad en is aan de ene kant met de machine genaaid, en aan de andere kant met de hand vastgezet. Je ziet hem in de foto hierboven net een beetje piepen. Omdat ik geen geschikte knoopjes kon vinden heb ik parelmoeren drukknoopjes gebruikt. Die had ik nog in huis.

The armholes are faced with black bias. There’s a zip in the side seam and it’s half machine stitched, and half hand stitched. You can just see it peeking out in the picture above. Because I didn’t have any buttons that looked good, I decided to use pearl snaps from my stash.


Meer heb ik eigenlijk niet te zeggen over deze jurk 🙂 ik hoop dat het snel en veel mooi weer wordt zodat ik hem vaak kan dragen, en kijk nu al uit naar september als de opleiding gaat beginnen!

There’s not much more to say about this dress really 🙂 I hope there will be nice, warm weather soon so I can wear this, and I’m already looking forward to september and the start of the courses!

Another dress

Ik ben een beetje door de blogpost-titels heen voor dit patroon 🙂 Het is één van mijn favoriete patronen: mijn basispatroon met ronde hals en aangeknipte kapmouwtjes. Zie ook de flamingo-jurk en de Japanse katten-jurk, en dit ongeblogde exemplaar:

I kind of ran out of blogpost titles for this pattern 🙂 It’s one of my favourite: my basic bodice with scoop neck and cut on cap sleeves. Also known as the flamingo dress, the Japanese Kitty dress, and this un-blogged wax print one:


wax-print


En er was er nog één, in het lichtblauw met kleine bloemetjes, maar die kleur stond mij niet zo goed. Die is naar de kringloop gegaan.

And there was another one, light blue with a small floral print, but it wasn’t a good cololut for me. It ended up at the thrift store.


jurk-01


Dit bovenlijfje dus, met een halve cirkelrok, een geplooide rok of zoals hier, een gerimpelde rok. De stof kocht ik in Japan, het is een beetje een stugge katoen. Ik was meteen verliefd op de print en de kleuren.

This bodice, with a half circle skirt, a pleated one or, as pictured here, a gathered one. I bought the fabric in Japan, it’s a cotton and a bit on the stiffer side. The print and the colours were what drew me to it.


jurk-03


Het bovenlijfje is denk ik een klein beetje uitgerekt tijdens het naaien want het is nét wat aan de ruime kant in de taille en ook een heel klein beetje aan de lange kant, de taillenaad piept net een stukje onder de riem uit. Omdat ‘ie een beetje ruim in de taille is draag ik dat riempje, anders steekt de rok een beetje raar uit naar voren.

The bodice probably stretched a bit when sewing this dress. It’s a smidge wide at the waist and also a tiny bit too low. You can see it in the picture above, where the waist seam peeks out under the belt. I’m wearing the belt because of the slightly too wide waist and the gathered skirt: without the belt the skirt sticks out funnily at the front.


jurk-04


Er hangt niks raars onder mijn rok uit, dat is een stopcontact 🙂

Nothing is escaping my skirt there, it’s just a power outlet 🙂

jurk-08

jurk-06


De voor- en achterpanden van de rok bestaan uit een volledige stofwijdte. De zelfkant liet ik eraan zitten, dat ziet er wel grappig uit vind ik. Daarnaast staan er van die handige bolletjes op met de kleuren die in de stof zitten, handig voor het uitzoeken van bijpassende vesten.

Both the front and the back of the skirt are the full width of the fabric. I kept the selvedges on, because it looks funny. They also have these little dots in the colours of the print, which is very usefull for finding matching cardigans.

De zoom is zoals gewoonlijk met een satijnen biaislintje afgewerkt. Dat geeft een beetje gewicht aan de zoom en voor mijn gevoel blijft de zoom dan minder ‘hangen’ op een panty.

The hem has a satin bias facing as usual. It adds a bit of weight to the hem and I feel like it also makes it cling to tights less.


jurk-07


jurk-05


Dat was eigenlijk alles wel wat ik te zeggen heb over deze naamloze jurk, ik ben er blij mee 🙂

That’s pretty much all I have to say about this dress without a name, I’m quite pleased with it 🙂

Butterick 6501 knockoff

butterick-6501-knockoff-collage


Toen ik Butterick 6501 zag op Etsy was ik meteen verliefd. Maar helaas, het patroon was niet in mijn maat, verre van zelfs. Op zulke momenten ben ik heel blij dat ik kant patroontekenen, én dat bij vintage patronen de patroondelen op de achterkant staan afgebeeld. De twee jurken die ik voor de Vintage pledge maakte draag ik vaak en dus besloot ik om te proberen dit patroon na te maken.

When I saw Butterick 6501 on Etsy I immediately fell in love. Unfortunately the pattern was nowehere near my size. On moments like this I’m really happy I can do a bit of patterndrafting, and that vintage patterns show the shape of the pattern pieces on the back of the envelope. The two dresses I made for Vintagde pledge get worn a lot and so I decided to try to knock off this pattern.


butterick-6501-knockoff-01


En zo heb ik toch mijn Butterick 6501, al is het een knockoff versie, en zijn de details totaal onzichtbaar door de stof die ik gebruikte.

And so I now have a Butterick 6501 knockoff dress, with completely invisible details due to my fabric choice.


butterick-6501-knockoff-02


Eigenlijk is dit een proefversie. Ik maakte het patroon, een toile van het bovenlijfje, nog wat patroonaanpassingen en toen deze jurk. De stof die ik voor de ‘echte’ jurk wil gebruiken vind ik zó gaaf, dat ik echt nul risico wilde lopen op een jurk die niet mooi zit of staat.

This is actually a wearable muslin. I made the pattern, a toile of the bodice, some pattern adjustments, and then this dress. The fabric I have in mind for the ‘real’ dress is so nice that I didn’t want to risk a dress that doesn’t fit well or look good.

Voor het patroon gebruikte ik Butterick 6869 als basis, omdat dat patroon dezelfde soort kraag heeft. Ik maakte de kraag wat kleiner en roteerde de rimpels vanuit de schouder naar de figuurnaad. Toen maakte ik de pas in de taille, en veranderde ik de figuurnaad in een stolpplooi. Na de toile verlegde ik de schoudernaad nog iets naar voren en versmalde hem een beetje, en deed ik een broad upper back adjustment. Het patroon past nu prima, maar er ‘moeten’ nog twee kleine dingen aangepast worden voor een perfecte pasvorm: een beetje wijdte uit het bovenlijfje ter hoogte van de kraag verwijderen en er moet iets aan de mouwkop aangepast worden. Die hangt niet goed als ik mijn armen langs mijn lijf laat hangen, maar pas als ik mijn armen iets naar voren doe. Eigenlijk is dat best handig, want het grootste deel van de dag breng ik in die houding door (in de auto, achter het bureau), dus misschien laat ik het ook wel zo.

As starting point I used Butterick 6869, because it already had the wing collar. I made the collar smaller and rotated the shoulder gathers to the bust dart. Then I made the waist yoke and changed the bust dart into a box pleat. After making the toile I adjusted the pattern for a forward shoulder and a broad upper back. I also removed a bit of width from the shoulders. This resulted in a pretty well fitting garment, but it needs a few small adjustments before it’s perfect. I need to remove a small amount of width from the upper bodice where the collar folds over, and I should change the sleeve head. It doesn’t hang right with my arms down, but it does when I reach forward a bit. I’m not sure wheter or not to adjust for this, because I spend a lot of time with my arms in that position (in the car and at my desk). I might leave it like this.


butterick-6501-knockoff-pattern


De rok is een halve cirkel. Toch wel mijn favoriet. Waar ik even geen rekening mee had gehouden was dat bij dit patroon het voorpand iets breder is dan het achterpand. Daardoor sloten de rokdelen niet goed aan op het bovenlijfje. Ik loste het op door achter een paar kleine plooitjes te maken en de voorkant wat uit te rekken. Omdat de bovenkant van de rok min of meer schuin van draad is kon ik het genoeg uitrekken om het passend te krijgen. De taille is daardoor wel ietsje krapper dan anders maar hee, het past nog dus who cares.

The skirt is a half circle, my favourite shape. When making the dress I kind of forgot that the front of the bodice is slightly smaller than the back, so the skirt pieces didn’t fit the bodice pieces. I fixed this by making two small pleats at the skirt back and stretching the skirt front. The top of the skirt is more or less cut on the bias so fortunately it had enough give. The waist is a bit smaller than intended because of this but it still fits so who cares.


butterick-6501-knockoff-06


De stof, katoen, kocht ik in Japan toen we daar voor het eerst waren in 2013. Deep stash dus! Ik was er eerst helemaal weg van, maar later vond ik hem toch niet meer zo mooi. Nu ben ik blij dat ik het gebruikt heb voor deze jurk want ik ben heel blij met hoe ‘ie geworden is!

This fabric, cotton, was bought in Japan in 2013, on our first holiday there. Deep stash! At first I loved it, but then I fell a little out of love with it. Now I’m happy I used it for this dress because I love how it turned out!


butterick-6501-knockoff-08


Ter verduidelijking nog even een foto van de lijnen in het bovenlijfje 🙂

This is where the seam and pleats are on the bodice 🙂


Al met al een geslaagde test dus!

So I guess I can call this a succesfull test!


butterick-6501-knockoff-07


the perfect t-shirt…dress!

Dat is dus het doel, het perfecte t-shirt patroon. De eerste testversie zie je hier. Op basis daarvan paste ik het patroon wat aan. En om die aanpassingen te testen maakte ik een jurk. Logisch toch 🙂

So, the perfect t-shirt pattern, that’s the goal. You can see the first try here. Based on that one I adjusted the pattern a bit. And to test those changes I made a dress. Makes sense, right? 🙂


tshirtdress3


Om een jurk te maken van het patroon verlengde ik het voor- en achterpand vanaf de taille met 60 cm, zodat de zoom net boven mijn knie valt. De zijnaden deed ik vanaf de taille wijd uitlopen en maakte ik ook 60 cm lang. Vervolgens een zoom tekenen met een flauw boogje en klaar is Kees.

To make a dress from the pattern I lengthened the front and back bodice by 60 cm, starting at the waist. For me that’s the perfect length to make it end just above the knees. The side seams flare out from the waist down and are also lengthened bij 60 cm. Then I added a hemline with a slight curve et voila!


tshirtdress4


De stof komt van de Jan Sikkes hier in Leeuwarden. Deze maand hadden ze een aanbieding waarbij je bij aankoop van minimaal 5 meter stof 25% korting kreeg. Aangezien ik begin januari jarig was vond ik dat ik daar wel gebruik van mocht maken 🙂 Ik kocht deze stof met de Lady Skater in gedachten, maar omdat er een vrij duidelijke horizontale lijn in de stof zit zag ik daar toch maar vanaf. Door de vorm van het rokdeel krijg je dan namelijk dit effect en dat vind ik niet zo mooi:


paint

The fabric is from my local fabric store. They have a january sale: buy at least 5 metres of fabric and get 25% off all of them. Since my birthday was at the beginning of january I figured the only thing to do was to take advantage of that! I bought this fabric with the Lady Skater in mind but because the print has a horizontal line in it, I decided wasn’t the right pattern for this fabric. The shape of the skirt causes what you can see in the above image and I don’t like that.


tshirtdress5


Hier zie je de stof wat beter. Het donkere is heel donkerblauw. Het is een soort jaquard jersey, van buiten heel zacht, maar aan de binnenkant zit een soort gaas en dat is wat stugger. Wel heel lekker warm!

You can see the fabric a bit better here. The dark is a very dark blue. It’s some kind of jaquard jersey, very soft on the outside but the inside is a bit more rigid. It’s nice and warm!


tshirtdress1


tshirtdress2


Er zit een naad middenachter, dat kon niet anders vanwege de stoflengte. Het was heel goed gelukt om het patroon te laten doorlopen, maar ik moest de onderrug een beetje innemen en daardoor valt er op dat stuk net een stukje weg. Ik probeerde om het patroon ook door te laten lopen op de mouwen maar zoals je ziet was die poging minder geslaagd 🙂

There is a center back seam, because I didn’t have enough fabric to cut it on the fold. I patternmatched the CB seam and it worked out great, but then I had to take in the lower back a bit and that threw it a bit off. I also tried to pattern match the sleeves but as you can see that attempt was less succesfull 🙂


De jurk zelf vind ik wel erg geslaagd en de patroonaanpassingen die ik aan mijn t-shirt patroon deed (iets bredere schouder, iets meer wijdte bij de buste) ook. Ik kan weer verder met de T-shirts en als klap op de vuurpijl heb ik er een fijne jurk bij!

The dress in itself and the alterations to the t-shirt pattern however (little bit wider shoulders and a little extra width at the bust) were succesfull. I can carry on with the tees and have a nice new dress to boot, yay!

Sew it up: baby it’s cold outside

Laatst droeg ik een spijkerbroek naar het werk. Een aantal collega’s waren erg verbaasd mij in een broek te zien. Ik vond dat dan weer raar: ik draag toch regelmatig een broek? Tot ik bedacht dat dat vooral ’s avonds en op vrije dagen is, en dan met name een pyjamabroek. En dat zien mijn collega’s natuurlijk niet! Pyjamabroeken zijn erg favoriet hier in huize Ingemaakt, dus toen ik het Sew it up-thema van januari zag wist ik meteen wat ik ging maken: een pyjamabroek!

Recently I wore a pair of jeans to work. Several co-workers were surprised to see me in pants. That was a surprise to me: it feels like I’m wearing pants quite regularly. Untill I realised that those pants are actually PJ pants which I obviously don’t wear at work! Clearly PJ pants are a favorite chez Ingemaakt. So when I read the january theme at Sew it up, I knew immediately what to make: PJ pants!


not this cold fortunately!

not this cold fortunately! it was very pretty here though.


Het thema is ook wel toepasselijk: vorige week hadden we hier in Friesland 4 dagen code rood vanwege ijzel. Daardoor kon ik de hele week niet naar het werk. Thuiswerken is dan een prima oplossing maar op een gegeven moment had ik toch echt niet veel meer te doen. Mooie gelegenheid om nog maar even achter de naaimachine te kruipen dus. En wat maak je dan? Iets met rood natuurlijk.

It’s a very appropriate theme: last week we had code red for four days due to freezing rain and dangerously slippery roads. There was no way to get to work. Working from home was a perfect solution but at some point all work I could do was done. So a perfect opportunity to get some more sewing done. And what do you make then? Something in red, ofcourse.


pyjamabroek1


Goed, een pyjamabroek dus. Ik had deze stof nog liggen, een lekker zachte katoen-polyester mengeling. Een patroon voor een pyjamabroek had ik echter niet en dus sloeg ik zelf aan het tekenen. Mijn patroon-teken-cursus-instructieboek vertelde me dat overwijdte niet nodig is voor een pyjamabroek. Dat leek me sterk en dus rekende ik wel wat mee. Toch is deze broek best strak geworden bij de heupen. Dat zie je niet, want de twee dagen voorafgaand aan deze foto’s heb ik volledig doorgebracht in deze broek en daardoor is ie een beetje uitgezakt.

On to the PJ pants. This fabric was in my stash, it’s a cotton/polyester mix and is nice and soft. I didn’t own a PJ pattern and so I made my own. The instruction book of the pattern drafting class I took told me that there was no need for ease in these pants. I thought that was a bit weird so I added a little. Still they turned out a bit snug in the hips. You probably can’t tell from these pictures because I have been wearing these puppies the two days before I took the pictures and they bagged out a bit.


pyjamabroek3


Ruiten matchen like a boss is gemakkelijk als ze zo groot zijn.

Pattern matching like a boss is easy with a giant plaid like this.


pyjamabroek4


En de achterkant. Het lijkt een beetje op een tafelkleed, deze broek. Dat kan mij niet schelen. Wat mij betreft geldt voor pyjamabroeken: hoe lelijker, hoe beter 🙂

And the back. It looks a bit like a table cloth. I don’t care. When it comes to PJ pants, I say the uglier, the better 🙂


pyjamabroek6


De taille is afgewerkt met een elastiek in een tunnel. Het zwarte shirt is trouwens de eerste poging om het perfecte t-shirt te maken. Er moet nog wel wat aan geschaafd worden maar voor een eerste poging ben ik helemaal niet ontevreden.

The waist is an elastic in a casing. The shirt is the first step towards making the perfect t-shirt pattern. It needs some tweaking but all in all it’s not bad for a first try.


pyjamabroek5


Hier nog een plaatje van de pyjamabroek in zijn natuurlijke habitat 😉 Kijk hoe comfortabel. Hoera voor de pyjamabroek!

Here’s a picture of the PJ pants in their natural habitat 😉  They are so comfy. Hurray for PJ pants!


Pop your collar

Hét voordeel van patroontekenen? Iets dat je ziet kunnen namaken 🙂 Deze jurk is gebaseerd op de jurk die Deborah droeg tijdens aflevering 2 van de Great British Sewing Bee. Op Twitter las ik dat ‘ie niet zelfgemaakt was en dus maakte ik zelf maar een patroon.

The number one advantage of pattern drafting? Copying something you see 🙂 This dress was inspired by the dress Deborah wore on episode 2 of the Great British Sewing Bee. I read on Twitter that it wasn’t handmade and so I made a pattern for it myself.

collar2

Ik veranderde mijn basispatroon in eentje met een knoopsgatenbies en maakte er een reverskraagje met afgeronde punten aan. Voor het tekenen van de kraag gebruikte ik mijn cursusboek en deze tutorial met duidelijke plaatjes.

I changed my basic pattern to one with a button placket and a notched collar with rounded edges. For dradting the collar I used my course book and this tutorial with some clear diagrams.

collar5

De rok is een halve cirkel. Moet ik dat er nog bij vertellen? Ik maak ze zo vaak, maar het is ook zo’n fijne vorm. En snel klaar, en kost weinig stof. Deze hele jurk maakte ik van een coupon van 1.80 bij 1.40. Hij kostte wel 6 hele euro’s 🙂

The skirt is a half circle. Should I even mention that? It’s my preferred shirt shape. It’s fast and takes little fabric. I made this dress from a remnant, 180 by 140. It cost me a whopping 6 euros 🙂

collar6

De zijkant. Met een petticoat eronder zodat de rok lekker wijd valt. Waarom dragen we die tegenwoordig eigenlijk niet meer? ik draag de mijne alleen maar voor blogfoto’s. En één keertje naar een trouwerij. Jammer eigenlijk, want ik vind het wel mooi.

Side view. With a petticoat to give the skirt some body. Why don’t we wear those anymore? I wear mine only for blog pictures. And to a wedding once. Such a shame, I like the way it looks.

collar7

De kleuren van de foto’s zijn een beetje raar. Na een paar warme en zonnige dagen was het vandaag weer tijd voor regen kennelijk…

The colours of the pictures are a bit off. After a few warm and Sunny days apparently it was time for rain again…

collar1

Deze foto geeft de kleuren in de stof het beste weer. De knopen vond ik wel mooi passen bij het groen in de stof. Door de drukke print valt de kraag niet eens zo op, terwijl dat juist hetgene was wat ik zo leuk vond in de jurk van Deborah. Ach, je kan niet alles hebben he? Ik ben er wel heel trots op dat die kraag zo goed gelukt is, het was de eerste keer dat ik er eentje tekende.

This picture shows the colours in the print the most accurate. I like how the buttons bring out the green in the print. Because the print is so busy the collar doesn’t really stand out, which is a bit of a shame since the collar was what I liked the most about Deborah’s dress. Ah well, can’t win them all I guess. I am pretty proud of the fact that my first ever self drafted collar worked out this well!

collar4

Mijn favoriete manier om de zoom af te werken: met een satijnen biaislintje. En met de hand. In de zijnaad zit nog een rits, die natuurlijk eigenlijk nét een centimeter te kort is zodat aan- en uittrekken een beetje wurmen is 🙂

My favourite way to sew a hem: with some satin bias binding. And hand-finished. There is also a zipper in the side seam, which of course is about a centimeter short so getting this dress on and off requires some wiggling 🙂

collar9

Dus, weer wat geleerd 🙂 Ik ben wel iemand die leert door te doen, gewoon proberen. Ooit las ik in een boek dat proberen nooit kan mislukken. Want als je iets probeert, dan doe je het al, en ongeacht de uitkomst is het proberen an sich dan al gelukt. Vond ik wel een mooie benadering en het haalt de druk van het ‘moeten lukken’ eraf. Hoe leer jij het beste nieuwe dingen?

So, another trick learned 🙂 I’m someone who learns by doing, just give it a try. I once read a book that said that you can never fail at trying. Because if you try someting you are already doing it, and regardless of the result, you succeeded at trying. I quite like this approach because for me, it takes away the pressure of having to succeed. What is your way of learning new things?


Me-main

Soms heb je ineens zo’n vlaag van inspiratie en weet je opeens precies wat je wilt gaan maken, en van welke stof. Dat had ik al eerder een keer bij mijn maxirok, en ook na het maken van de flamingo jurk bij deze jurk. Opeens zat het idee in mijn hoofd en het liet me niet meer los. En dus ging ik maar aan de slag, want wat moet je anders?

Do you know how you sometimes get a whiff of inpsiration and you suddenly know exactly what to make and with which fabric? This happened with my maxi skirt and after finishing the flamingo dress it happened with this dress too. The idea was stuck in my head and wouldn’t go away. So I went for it, what else was there to do?


waxprint01


Het is weer een versie van mijn basispatroon. De inspiratie voor de halslijn kwam van een afbeelding op de achterkant van “Gerties new book for better sewing“. De kapmouwtjes zijn iets wijder gemaakt, het leek me leuk als de vloeiende vorm van de halslijn daarin terug zou komen. De rok komt van de Mortmain jurk van Gather (vandaar ook de naam van deze post). Dat patroon gebruikte ik al eerder voor een wax print stof en door de stijfheid van de stof komen de plooien mooi uit. Om toch een beetje variatie aan te brengen naaide ik de plooien dit keer andersom. En, omdat ik even geen rekening had gehouden met de tailleband in de Mortmain, is de rok een stukje korter dan de andere.

This is another adaptation of my basic bodice pattern. The inspiration for the neckline came from a picture on the back of “Gerties new book for better sewing“. The cap sleeves are a bit more exagerated because I thought it would be nice for them to have the same flowing line as the neckline. The skirt pattern is from Gather’s Mortmain dress (hence the name of this post). I used that pattern for another dress from wax print fabric and knew that the stiffness of the fabric would hold the pleats very well. This time I reversed the pleats, for a bit of variation. And, because I forgot to take into consideration that the Mortmain has a waistband, the skirt is a bit shorter.


Waxprint03


Aan de achterkant zette ik er een ‘exposed’ rits in, gewoon omdat het kan 🙂 Wel een goed idee om die de volgende keer even helemaal dicht te doen als ik foto’s maak…

It has an exposed zipper on the back, just because 🙂 And yes, I will check if it’s zipped up all the way to the top before taking pictures next time…


Waxprint02


De stof komt van een markt in Amsterdam, er was daar een stoffenkraam die allemaal wax prints verkocht voor 5 euro per meter. Ik snap achteraf niet zo goed waarom ik maar twee stoffen heb gekocht daar. Misschien omdat ik er nog de hele dag mee in een plastic tas moest sjouwen? Anyway, ik was meteen verliefd op de kleuren. Voor het bovenlijfje heb ik wel een beetje gelet op de plaatsing van de print. Ik kon me nog een bepaald tv-momentje herinneren…

The fabric was bought at a market in Amsterdam, there was this place that sold all kinds of wax prints for 5 euros a meter. Looking back I cannot believe I bought only two fabrics. Maybe because I had to carry them around with me all day? Anyway, I fell in love with those colours immediately. The print did cause me to be a bit carefull with the pattern placement, because there was a certain tv-moment I remembered…


http://instagram.com/p/rz5kjdEe8y/?modal=true


Juist, het leek me beter om dat te voorkomen 😉

I figured it would be best to prevent such a thing 😉

 
Waxprint05

Zoals je ziet heeft de zoom een biaisbandje gekregen. Verder zijn alle naden met de lockmachine afgewerkt. Ik was te lui om de draden te wisselen wit leek me wel een geschikte kleur, er zit immers ook wit in de stof. Het beleg is een alles-in-één-beleg. Ik vind het zo tof dat het er dan zo netjes uit komt te zien.

As you can see the hem was made with some biastape. The seams have been finished witht the overlocker. I was too lazy to change the threads I thought white was an appropriate colour since there is some white in the fabric, too. The neckline and shoulders are finished with an all-in-one facing. I love how neat this looks.


Waxprint04


En nog een keer de achterkant. De rits kan heus tot bovenaan dicht 😉 Ik ben blij met deze jurk!

And the back side again. The zipper does go all the way up 😉 I am really happy with this dress!


Flamingo fakery

Één ding is zeker in het leven: als je gedurende het jaar een jurk maakt met flamingo’s, en je wacht lang genoeg met het bloggen ervan, dan wordt het vanzelf een keer Jungle January. En omdat mijn ‘officiële’ Jungle January jurk waarschijnlijk niet op tijd klaar is, moeten jullie het hier maar even mee doen 😉

In life, one thing is sure: if you make a dress with flamingos on it, and you wait long enough before you blog it, it will eventually become Jungle January. And because my ‘official’ Jungle January dress probably won’t be ready in time, you’ll just have to make do with this one 😉

Flamingo04

Goed, met een beetje valsspelen dus, want gemaakt in oktober: mijn flamingojurk. Zelfgemaakt patroon, met een geplooide rok. De stof komt van hier, al zie ik hem er nu niet meer tussen staan.

So, with a bit of cheating, it being made in october, here it is: my flamingo dress. I made the pattern too, it has a pleated skirt. The fabric is from here, but I think it has sold out because I can no longer see it on the site.

Flamingo06

Ik weet niet zo goed wat ik nog meer kan vertellen eigenlijk. Het is zo fijn om een patroon-op-maat te hebben wat je naar wens kunt aanpassen! Nu ik het al zo vaak heb gemaakt is het ook al zover bijgeschaafd dat het perfect past. Met kapmouwtjes dan. Volgende uitdaging: gewone mouwen tekenen.

I don’t really know what else to tell about this dress. It’s so nice to have a made-to-measure bodice pattern that you can adapt in any way you want. I have made it so many times and it has been refined to a perfect fit. With cap sleeves that is. Next challenge: drafting real sleeves.

Flamingo01

Bij de Hema vond ik zelfs nog een bijpassend vestje. Alhoewel, dat lijkt op de foto wat minder passend. Uiteraard komt dat door de belichting 😉

I have even found a matching cardigan. At least I thought it was, but it seems less matching on this photo. Let’s just blame the light for that 😉

Hoewel deze jurk al in oktober is gemaakt heb ik hem tot nu toe maar één keertje gedragen. Dat komt omdat ik ‘m niet mooi vind met een zwarte panty. En ik heb geen idee met welke kleur wel. Huidskleur misschien, maar is dat niet wat zomers? Wat voor kleur panty denk jij dat bij deze jurk staat?

Even though I made this dress in ocotber I have worn it just once. That’s because I don’t like tha way it looks with black tights. I have no idea wich colour of tights to wear this one with. Maybe sheer tights, but isn’t that a bit summery? Which colour of tights would you wear with a dress like this?

Flamingocollage


Nog een paar details: de halslijn en de mouwtjes zijn afgewerkt met een satijnen biaisbandje. Voor de zakken had ik niet genoeg stof, dus maakte ik die van witte katoen. De rits zit in de zijnaad en is met de hand ingezet. De zoom is ook handgenaaid.

A few details: the neckline and sleeves are finished with satin biastape. I didn’t have enough fabric for the pockets so I made them from some plain white cotton. The zipper is in the side seam and is hand stitched. The hem is also hand stitched.

Flamingo02

Een flamingojurk is niet compleet zonder flamingo pose toch? 😉

A flamingo dress is not complete without a flamingo pose right? 😉

Sunshine on a cloudy day

Dit hoef ik jullie vast niet meer te vertellen: ik ben een ontzettende fan van de shirtdress, oftewel de hemdjurk/doorknoopjurk. Waarom klinken de namen van kledingstukken in het nederlands vaak zo veel lomper dan in het engels? In dezelfde categorie: de broekrok 😦

Oke, terug naar het onderwerp. Tijdens het Stoffenspektakel afgelopen voorjaar kocht ik een heel licht en dun spijkerstofje met kleine bloemetjes en een soort tie-dye vlekken erop. Ik wilde er eigenlijk een mouwloze Camí van maken. Maar toen ik dit patroon had gemaakt besloot ik dat dit stofje perfect was voor dit model, maar dan wel met een knoopsluiting die ook doorloopt op de rok en een ‘echte’ knoopsgatenbies.


This is something I probably don’t have to tell you: I am a big fan of shirtdresses. During the bi-annual big fabric market last spring I bought this very light denim, with a tiny floral print and some tie-dye like stains. I intended to make a sleeveless Camí dress with it, but after making this pattern I decided this fabric was perfect for another version of it. This time one with a ‘real’ button placket that extends all the way down.


clouds08


Een knoopsgatenbies maken is heel makkelijk, vooral als je een beetje slim de breedte bepaalt. Mijn bies is twee keer de naadtoeslag breed, 3 cm in dit geval. Wat je doet is het volgende:

– maak een bies door de laatste 1,5 cm van middenvoor te kopiëren en nog 1,5 cm door te trekken.

– teken een lijn precies in het midden van de bies (op, jawel, 1,5 cm dus 🙂 ). Dit is je nieuwe middenvoor, hier komen de knopen.

– teken nog een keer precies dezelfde bies maar dan in spiegelvorm eraan vast, zodat je bies ook een achterkant heeft. Teken de naadtoeslag.

– herhaal bovenstaande bij de voorkant van je rokdeel.

– knip je bovenlijfje niet op de stofvouw maar twee keer, zonder extra naadtoeslag toe te voegen aan de middenvoor. De laatste 1,5 cm van je bovenlijfje zit nu immers in de knoopsgatenbies verwerkt en is daardoor de naadtoeslag geworden :). Hetzelfde geldt voor de voorkant van je rokdeel.

Zo ziet het eruit (woohoo, Paint skills haha):


knoopsgatenbies


Making a button placket is quite easy, especially if you use a clever width. I made mine twice the seam allowance, so in total 3 cm. What you need to do is this:

– create a placket by copying the last 1,5 cm from your center front bodice piece, and extend it another 1,5 cm.

– draw a line exactly in the middle of the placket (at, yes, 1,5 cm 🙂 ). That’s the new CF and that’s where your buttons go.

– draw a mirrored placket attatched to the one you just made, this will be the facing. Add seam allowances.

– repeat this process with you skirt front.

– when cutting out your pattern,  cut your front bodice out twice instead of on the fold. Don’t add extra seam allowance. The last 1,5 cm of the CF are now in the button placket and so they have become seam allowance :). This also goes for the CF skirt.

Your bodice front should look like the above drawing (woohoo Paint skills, haha)


clouds05

I really, really need a haircut…


Het is een heel fijn jurkje geworden, door de lichte stof draagt het erg prettig en het kreukt bijna niet. Ideaal ook om mee te nemen op vakantie straks! Toen ik de stof kocht dacht ik dat de lichte vlekken ge-tie-dye-d waren, maar tijdens het strijken na het voorwassen kwam ik erachter dat het van bleek was. Stinken!


This turned out to be a very comfortable dress, because of the lightweight fabric. And it almost doesn’t wrinkle, which makes it perfect for the upcoming holidays. When I bought the fabric I thought the stains were tie-dyed but when I ironed the fabric after prewashing it, it turned out it was bleached. It smelled horrible!


clouds03

Als ik dit jurkje opnieuw zou kunnen maken zou ik een aantal dingen anders doen:

– de figuurnaden aan de zijkant hebben een bobbeltje aan het eind. Dat was ook al zo bij het rode exemplaar van deze jurk. Ik heb gegoogeld waar dit door kan komen en ik denk dat ze te ‘breed’ zijn. Door in mijn patroon een cm van de figuurnaad aan de zijkant naar de figuurnaad bij de taille te roteren zou dit beter moeten worden

– ik ben vergeten om het beleg te ‘understitchen’ waardoor die soms wat zichtbaar is. Oeps. Ik ben dit keer overigens niet vergeten om de halslijn te ‘staystitchen’, en daardoor zit die een stuk beter. Hoera!

– de armsgaten toch een klein beetje uitdiepen. Ze zitten niet te strak maar bij het rode exemplaar van deze jurk komen er steeds deodorantvlekken in. Dat zal bij deze jurk wel iets minder opvallen door de kleur, maar jakkes!

– de drukknoopjes écht recht onder elkaar zetten in plaats van een beetje wiebelig scheef 🙂


clouds06


If I made this dress again I would change a couple of things:

– the side darts are a bit ‘nipply’. This is also the case in the red dress I made from this pattern. I googled this and I think this is due to the dart being too wide. I transfered about a cm from the side dart to the waist dart, which should fix this issue.

– I forgot to understitch the facing, they peek out a bit. Oops. However, this time I didn’t forget to staystitch the neckline and it turned out pretty good. Yay!

– lower the armscyes just a tad. It’s not too tight or anything but I noticed in my red dress that my deodorant stains on them. I don’t think it will be that bad in this dress because of the lighter colour but still, yuck!

– place the snaps in a straight line under each other instead of a wobbly one 🙂


clouds04


Dat is best veel kritiek, maar het is niet zo dat ik niet blij ben met deze jurk. Ik merk dat ik, doordat ik het patroon zelf heb gemaakt, veel kritischer ben dan wanneer ik iets maak van gekochte patronen. Dat hoort denk ik bij het leerproces, en maakt de resultaten uiteindelijk alleen maar beter.

Wat ook bij het leerproces hoort volgens mij is steeds beter letten op en de tijd nemen voor details. Zoals bijvoorbeeld de onzichtbare handgenaaide zoom en dichtgenaaide knoopsgatenbies, en de handgenaaide ritsen in mijn voorgaande jurken. Zou het zo zijn dat, als we de ‘basics’ onder de knie hebben, we ons steeds meer richten op het perfectioneren van de details? Hoe gaat dat bij jou, hoe loopt jouw leerproces?


That’s a lot of critical remarks. Does that mean I’m not happy with this dress? Not at all! However, because I made this pattern myself I am way more critical then when I’m using a bought pattern. I think that’s part of the learning process, and it only makes for better results in the end.

Something that’s probably also part of the learning process is having more of an eye for, and taking more time to pay attention to detail. Like the invisible, handsewn hem, the slipstitched button placket and the handpicked zippers in my previous dresses. Could it be that, when we’ve got the ‘basic’ skills covered, we tend to pay more and more attention to perfecting the little details? how does this work for you, how does your learning process go?


Details


clouds02

clouds01


Ook deze jurk is afgewerkt met een all-in-one beleg. Zonder vlieseline, omdat het zo’n lekker soepel stofje is en ik dat niet stijver wilde maken. En zonder ‘understitching’ dus, maar dat was niet helemaal zoals bedoeld.

Another all-in-one facing. Without fusible interfacing, because this fabric has such a nice drape and airyness and I didn’t want that to get lost. And without understitching, but that was not as intended.