Vintage pledge: Butterick 6869

butterick 6869 07


Een tijdje terug kocht ik dit patroon op Etsy. Ik wilde al een poos een jurk met een ‘wing collar’ (geen idee wat de Nederlandse naam daarvoor is, vast geen vleugelkraag 😉 ) maken, maar wist niet precies hoe ik daar een patroon voor moest maken. En dus kocht ik er maar eentje.

A while ago I bought this pattern on Etsy. I wanted to make a dress with a wing collar for some time now but didn’t know how to draft one myself. So I bought a pattern that has one.


Vervolgens lag het een poos te wachten op actie. Eigenlijk alle jurken van gewoven stoffen die ik de afgelopen tijd heb gemaakt zijn op basis van mijn basispatroon. Gegarandeerd passend dus. Van deze jurk wist ik dat niet en moest ik een proefmodelletje maken. In mijn hoofd Heul Erg Moeilijk (in werkelijkheid niet, uiteraard). Ook wist ik niet zo goed welke stof ik wilde gebruiken. Het liefst één met een klein bloemetje op een donkere of rode achtergrond, maar vind dat maar eens. Ik moest er uiteindelijk helemaal voor naar Antwerpen (hè, wat vervelend). Daar bezocht ik samen met Hanne Julija’s en kocht er deze prachtige Liberty print. De duurste stof die ik ooit kocht, maar dat mag de pret niet drukken.

Then it laid around for a while waiting for action. Pretty much every dress I’ve made from a woven fabric recently was based on my basic bodice. So I knew the fit would be good. This pattern would need a muslin and probably some adjustments, in my mind Very Difficult (but in reality not, of course). Also, choosing a fabric was difficult. I wanted a small scale floral with a dark or a red background, but that was impossible to find. In the end it took a trip to Antwerp to find it. I visited Julia’s shop with Hanne and bought this lovely Liberty print. The most expensive fabric I even bought but who cares (beside my bank account).


https://www.instagram.com/p/BCkjS9PEe6v/?taken-by=ingefrwrd


Uiteraard moest ik wat aanpassingen doen aan het patroon. Het verschilde zó van mijn basispatroon, vooral in de lengte, dat ik de kraag daar maar op getekend heb. Vervolgens roteerde ik de figuurnaad aan de zijkant van het voorpand naar de schouder en veranderde hem in rimpels. De vorm van het armsgat behield ik voor het grootste deel. Het proefmodel paste vervolgens wel vrij oké, ik heb alleen het armsgat een centimeter verhoogd en 1,5 centimeter wijdte toegevoegd aan de mouw. Ook haalde ik nog ietsje lengte uit de rimpels bij de schouders. De rok heb ik opgemeten en die leek wel goed te passen, dus daar veranderde ik behalve flink inkorten niks aan.

Of course I had to make some changes to the pattern. It was so different from my basic bodice, expecially in length, that I decided to just put the collar on my bodice and transfer the bust dart to the shoulder seam and turn it into gathers. I kept the shape of the armscye for the biggest part. The muslin fitted quite okay, all I did was raise the armhole by a centimeter and do a 1,5 centimeter full bicep adjustment. I also took a bit of lenght out of the shoulder gathers. When I measured the skirt it seemed to be fine so I didn’t make any changes there, beside shortening it.


butterick 6869 01.jpg


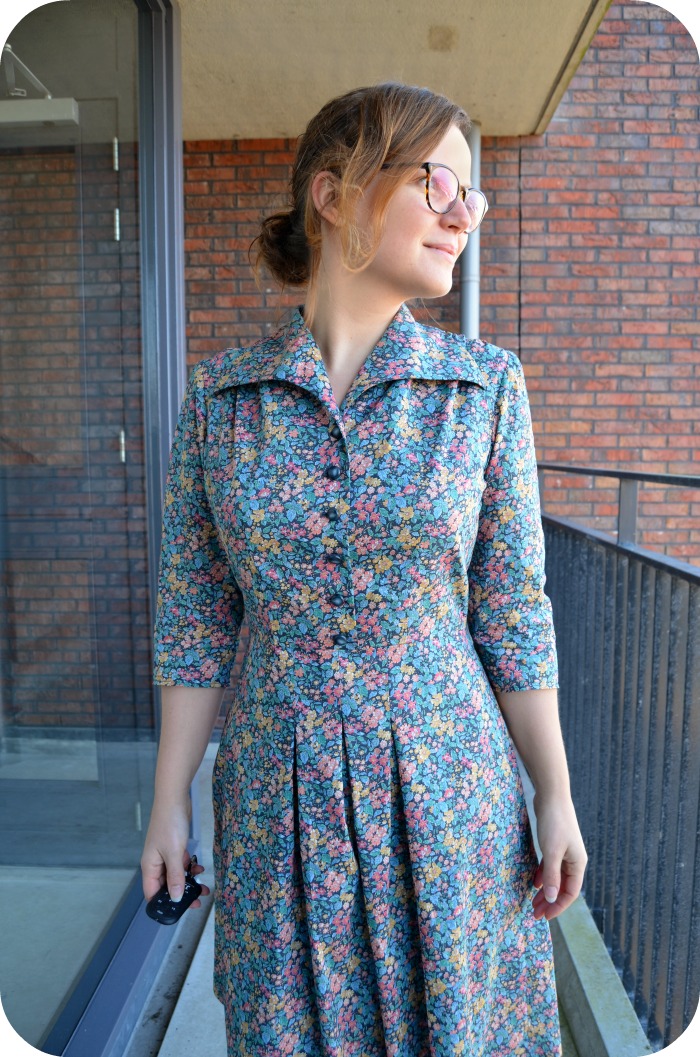
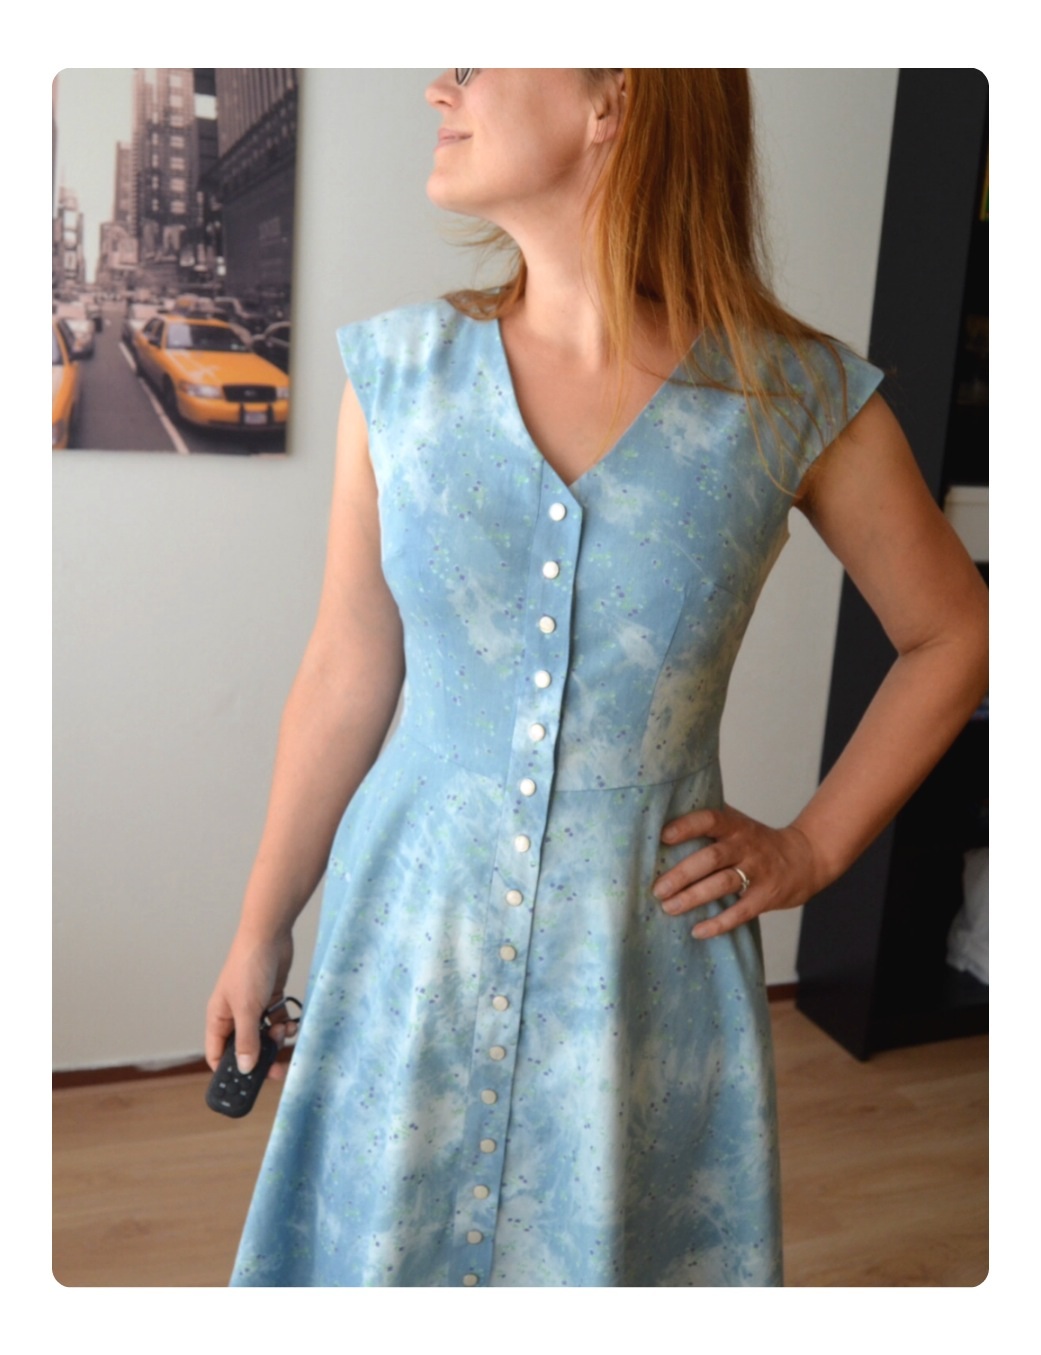
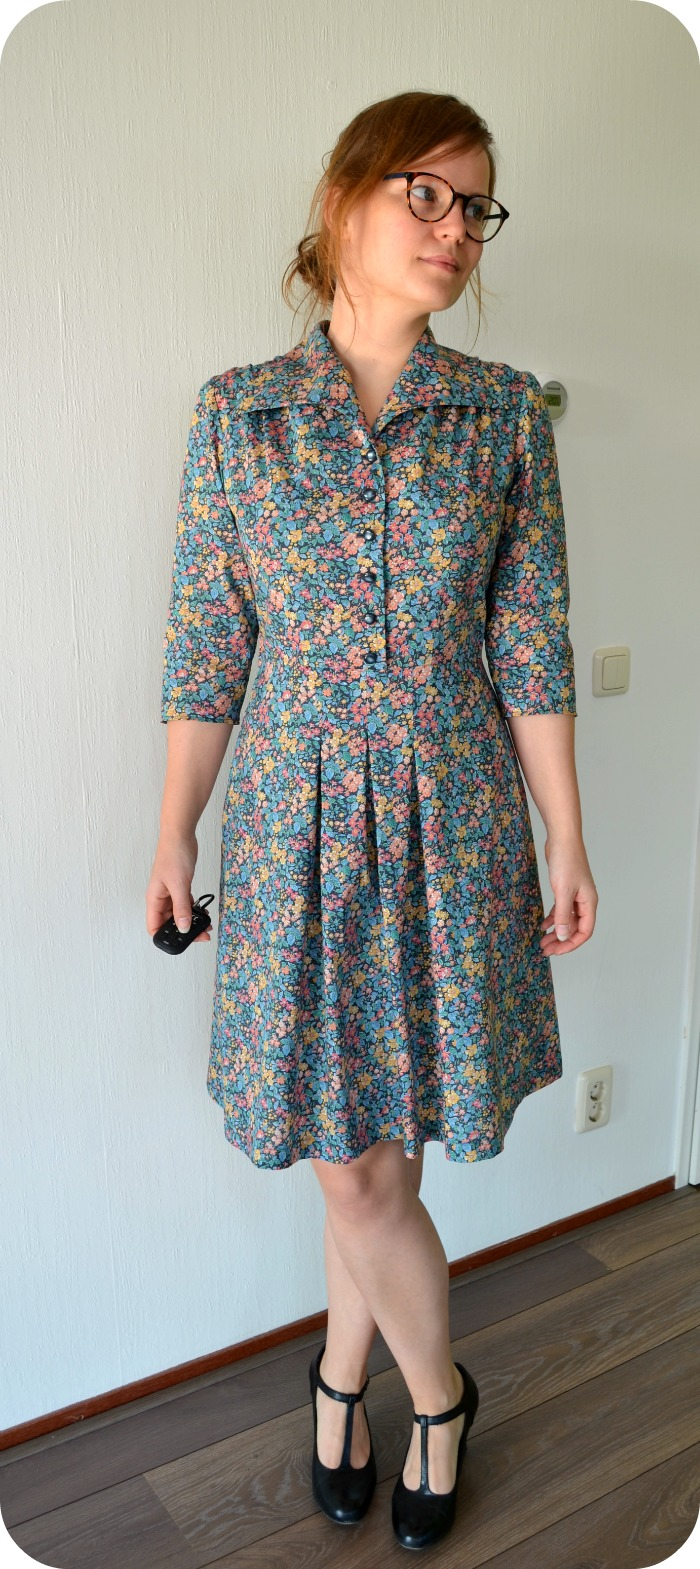
Dit is ‘m uiteindelijk geworden! De knoopjes had ik nog in mijn voorraad, ooit een keer gekocht op een rommelmarkt.

This is how it turned out! The buttons are from stash, once bought at a flea market.

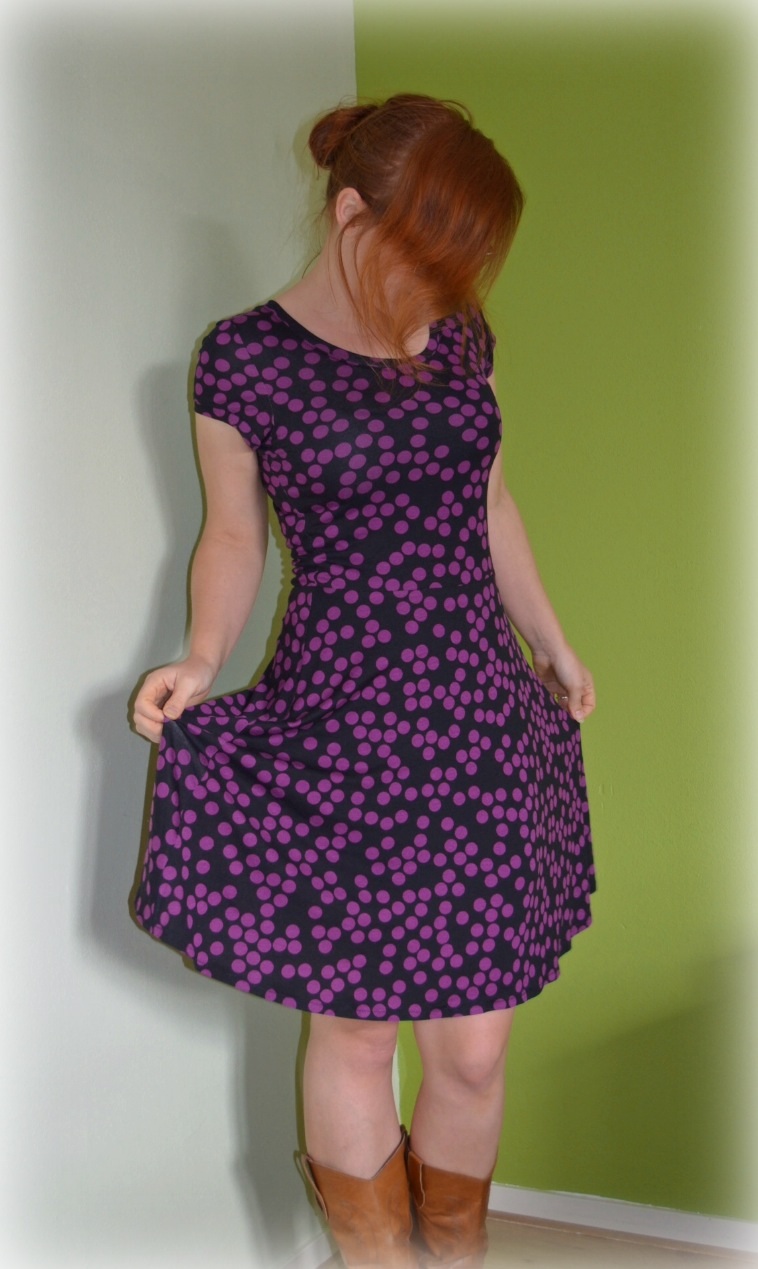
De mouw en armsgat aanpassingen waren precies goed, wat kijk eens wat ik kan:

The sleeve and armscye adjustments were just right because look at what I can do:


butterick 6869 02

butterick 6869 003


En dat op comfortabele wijze zonder dat het ook maar ergens krap voelt. Hoera! Hoera voor de hele jurk ook, hij zit heerlijk, en wat leuk is het om van een vintage patroon te naaien. Zulke leuke details, die de pasvorm beter maken: een figuurnaadje in de schoudernaad aan de achterkant (die ik wel overnam trouwens), drie figuurnaadjes in de mouw ter hoogte van de elleboog. De vorm van de rok vind ik ook mooi, die ga ik denk ik vaker gebruiken.

And very comfortably too, no tightness whatsoever. Yay! Double yay for the entire dress too, it’s so comfortable and so much fun to sew a vintage pattern. Such fun little details, for a lovely fit: a dart in the back shoulder seam (which I did transfer to my bodice), and three darts at the elbow. I also really like the shape of the skirt, which I’ll probably use again.


don't be fooled by the cranky look on my face :)

don’t be fooled by the cranky look on my face 🙂


Een paar kleine dingetjes die ik een volgende keer anders zou doen: de rok wat langer laten, een inimini beetje meer ruimte bij de buste en een forward shoulder adjustment. Dat doet niks af aan hoe blij ik ben met deze jurk, maar hey, er moet altijd wat te verbeteren overblijven toch?

A few small changes I would make to this pattern for the next time: leave the skirt a bit longer, a slight FBA and a forward shoulder adjustment. This doesn’t affect my overall hapiness at all but hey, there’s Always room for improvement right?


butterick 6869 04


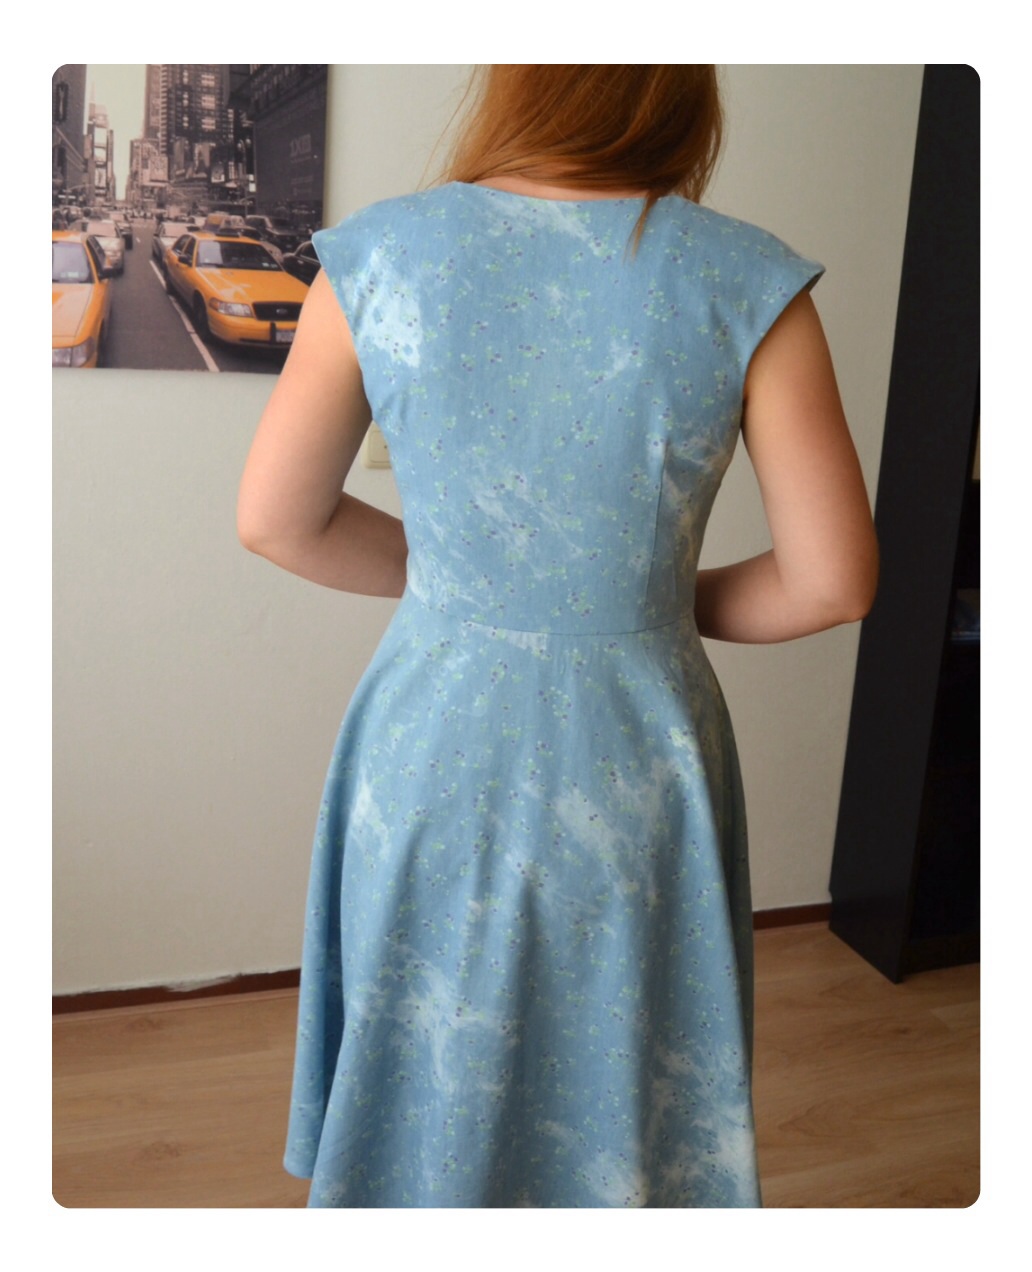
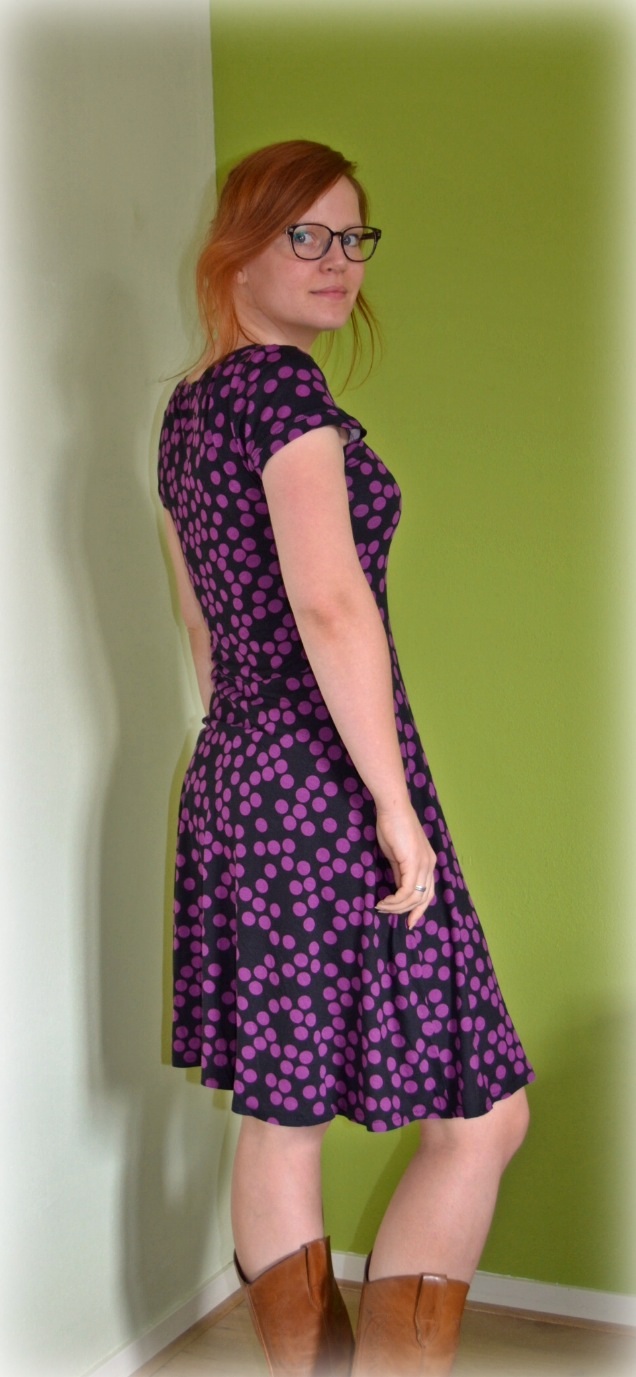
De achterkant. Het grappige van het kraagje vind ik dat ‘ie middenachter rechtopstaand is, en pas omvouwt bij de schouder.

Back view. I like how the collar stands up at CB and doesn’t fold over untill the shoulder seam.


Naast de duurste jurk die ik ooit voor mezelf gemaakt heb, is dit ook de eerste helft van mijn Vintage Pledge. Ik besloot om daar aan mee te doen als een stok achter de deur, zodat ik niet twee mooie (en dure!) patronen zou kopen en vervolgens in de la zou laten liggen. Dat heeft al voor de helft gewerkt dus 🙂

So, besides the most expensive dress I’ve ever made for myself, this is also half of my Vintage Pledge. I decided to join Marie and Kerry to motivate myself to actually sew those two wonderfull (and expensive!) patterns that I bought. So far it worked 🙂


butterick 6869 06


Uiteraard moest ik ook even het plaatje op het patroon nadoen. Wat is het duurste dat jij ooit hebt gemaakt voor jezelf? En wat voor bedrag per meter geef jij nog met een gerust gevoel uit aan stoffen?

Obviously I had to imitate the pattern picture. What’s the most expensive thing you have ever made for yourself? And how much money are you willing to spend comfortably on a fabric?

Sunshine on a cloudy day

Dit hoef ik jullie vast niet meer te vertellen: ik ben een ontzettende fan van de shirtdress, oftewel de hemdjurk/doorknoopjurk. Waarom klinken de namen van kledingstukken in het nederlands vaak zo veel lomper dan in het engels? In dezelfde categorie: de broekrok 😦

Oke, terug naar het onderwerp. Tijdens het Stoffenspektakel afgelopen voorjaar kocht ik een heel licht en dun spijkerstofje met kleine bloemetjes en een soort tie-dye vlekken erop. Ik wilde er eigenlijk een mouwloze Camí van maken. Maar toen ik dit patroon had gemaakt besloot ik dat dit stofje perfect was voor dit model, maar dan wel met een knoopsluiting die ook doorloopt op de rok en een ‘echte’ knoopsgatenbies.


This is something I probably don’t have to tell you: I am a big fan of shirtdresses. During the bi-annual big fabric market last spring I bought this very light denim, with a tiny floral print and some tie-dye like stains. I intended to make a sleeveless Camí dress with it, but after making this pattern I decided this fabric was perfect for another version of it. This time one with a ‘real’ button placket that extends all the way down.


clouds08


Een knoopsgatenbies maken is heel makkelijk, vooral als je een beetje slim de breedte bepaalt. Mijn bies is twee keer de naadtoeslag breed, 3 cm in dit geval. Wat je doet is het volgende:

– maak een bies door de laatste 1,5 cm van middenvoor te kopiëren en nog 1,5 cm door te trekken.

– teken een lijn precies in het midden van de bies (op, jawel, 1,5 cm dus 🙂 ). Dit is je nieuwe middenvoor, hier komen de knopen.

– teken nog een keer precies dezelfde bies maar dan in spiegelvorm eraan vast, zodat je bies ook een achterkant heeft. Teken de naadtoeslag.

– herhaal bovenstaande bij de voorkant van je rokdeel.

– knip je bovenlijfje niet op de stofvouw maar twee keer, zonder extra naadtoeslag toe te voegen aan de middenvoor. De laatste 1,5 cm van je bovenlijfje zit nu immers in de knoopsgatenbies verwerkt en is daardoor de naadtoeslag geworden :). Hetzelfde geldt voor de voorkant van je rokdeel.

Zo ziet het eruit (woohoo, Paint skills haha):


knoopsgatenbies


Making a button placket is quite easy, especially if you use a clever width. I made mine twice the seam allowance, so in total 3 cm. What you need to do is this:

– create a placket by copying the last 1,5 cm from your center front bodice piece, and extend it another 1,5 cm.

– draw a line exactly in the middle of the placket (at, yes, 1,5 cm 🙂 ). That’s the new CF and that’s where your buttons go.

– draw a mirrored placket attatched to the one you just made, this will be the facing. Add seam allowances.

– repeat this process with you skirt front.

– when cutting out your pattern,  cut your front bodice out twice instead of on the fold. Don’t add extra seam allowance. The last 1,5 cm of the CF are now in the button placket and so they have become seam allowance :). This also goes for the CF skirt.

Your bodice front should look like the above drawing (woohoo Paint skills, haha)


clouds05

I really, really need a haircut…


Het is een heel fijn jurkje geworden, door de lichte stof draagt het erg prettig en het kreukt bijna niet. Ideaal ook om mee te nemen op vakantie straks! Toen ik de stof kocht dacht ik dat de lichte vlekken ge-tie-dye-d waren, maar tijdens het strijken na het voorwassen kwam ik erachter dat het van bleek was. Stinken!


This turned out to be a very comfortable dress, because of the lightweight fabric. And it almost doesn’t wrinkle, which makes it perfect for the upcoming holidays. When I bought the fabric I thought the stains were tie-dyed but when I ironed the fabric after prewashing it, it turned out it was bleached. It smelled horrible!


clouds03

Als ik dit jurkje opnieuw zou kunnen maken zou ik een aantal dingen anders doen:

– de figuurnaden aan de zijkant hebben een bobbeltje aan het eind. Dat was ook al zo bij het rode exemplaar van deze jurk. Ik heb gegoogeld waar dit door kan komen en ik denk dat ze te ‘breed’ zijn. Door in mijn patroon een cm van de figuurnaad aan de zijkant naar de figuurnaad bij de taille te roteren zou dit beter moeten worden

– ik ben vergeten om het beleg te ‘understitchen’ waardoor die soms wat zichtbaar is. Oeps. Ik ben dit keer overigens niet vergeten om de halslijn te ‘staystitchen’, en daardoor zit die een stuk beter. Hoera!

– de armsgaten toch een klein beetje uitdiepen. Ze zitten niet te strak maar bij het rode exemplaar van deze jurk komen er steeds deodorantvlekken in. Dat zal bij deze jurk wel iets minder opvallen door de kleur, maar jakkes!

– de drukknoopjes écht recht onder elkaar zetten in plaats van een beetje wiebelig scheef 🙂


clouds06


If I made this dress again I would change a couple of things:

– the side darts are a bit ‘nipply’. This is also the case in the red dress I made from this pattern. I googled this and I think this is due to the dart being too wide. I transfered about a cm from the side dart to the waist dart, which should fix this issue.

– I forgot to understitch the facing, they peek out a bit. Oops. However, this time I didn’t forget to staystitch the neckline and it turned out pretty good. Yay!

– lower the armscyes just a tad. It’s not too tight or anything but I noticed in my red dress that my deodorant stains on them. I don’t think it will be that bad in this dress because of the lighter colour but still, yuck!

– place the snaps in a straight line under each other instead of a wobbly one 🙂


clouds04


Dat is best veel kritiek, maar het is niet zo dat ik niet blij ben met deze jurk. Ik merk dat ik, doordat ik het patroon zelf heb gemaakt, veel kritischer ben dan wanneer ik iets maak van gekochte patronen. Dat hoort denk ik bij het leerproces, en maakt de resultaten uiteindelijk alleen maar beter.

Wat ook bij het leerproces hoort volgens mij is steeds beter letten op en de tijd nemen voor details. Zoals bijvoorbeeld de onzichtbare handgenaaide zoom en dichtgenaaide knoopsgatenbies, en de handgenaaide ritsen in mijn voorgaande jurken. Zou het zo zijn dat, als we de ‘basics’ onder de knie hebben, we ons steeds meer richten op het perfectioneren van de details? Hoe gaat dat bij jou, hoe loopt jouw leerproces?


That’s a lot of critical remarks. Does that mean I’m not happy with this dress? Not at all! However, because I made this pattern myself I am way more critical then when I’m using a bought pattern. I think that’s part of the learning process, and it only makes for better results in the end.

Something that’s probably also part of the learning process is having more of an eye for, and taking more time to pay attention to detail. Like the invisible, handsewn hem, the slipstitched button placket and the handpicked zippers in my previous dresses. Could it be that, when we’ve got the ‘basic’ skills covered, we tend to pay more and more attention to perfecting the little details? how does this work for you, how does your learning process go?


Details


clouds02

clouds01


Ook deze jurk is afgewerkt met een all-in-one beleg. Zonder vlieseline, omdat het zo’n lekker soepel stofje is en ik dat niet stijver wilde maken. En zonder ‘understitching’ dus, maar dat was niet helemaal zoals bedoeld.

Another all-in-one facing. Without fusible interfacing, because this fabric has such a nice drape and airyness and I didn’t want that to get lost. And without understitching, but that was not as intended.


Me Made May week 3

Jaja, lieve kijkbuiskindertjes, het is weer tijd voor de round-up! En… de give-away winnaar.

Yes, ladies and gentlemen, it is time for the weekly round-up again! And… the give-away winner.

Day 15

20140523-213759-77879674.jpg

De kokerrok uit Gerties new book for better sewing. Ik draag deze niet vaak, omdat ik niet zo goed wist hoe ik ‘m moest combineren. En omdat de tailleband na de lunch wat te strak was als ik zat 😁 Maar mijn nieuwe paarse vest past er perfect bij en of de lunch was niet zo groot of mijn taille is iets kleiner geworden want ook na de lunch kon ik nog comfortabel zitten. Hoera!

My pencil skirt from Gerties new book for better sewing. I have worn this skirt only twice since making it, because I didn’t know what to pair it with and because the waistband got a bit uncomfortable when I sat down after lunch 😁 I discovered that my new purple cardigan is a perfect match and either my lunch was not that big or my waist has shrunk a bit because I could still sit comfortably after lunch. Hurray!

Day 16

20140523-214528-78328393.jpg

Hetzelfde paarse vest maar dit keer met mijn ‘different directions‘ jurk.

The same purple cardigan but this time with my ‘different directions‘ dress

Day 17

Geen fotografisch bewijs maar ik droeg mijn paars gestippelde Lady Skater jurk.

There is no photographic evidence but I wore my purple dotted Lady Skater dress.

Day 18

20140523-214835-78515253.jpg

Breien op de nieuwe veranda in de tuin van mijn ouders, in een zwarte korte broek.

Knitting on my parent’s new veranda, in black shorts.

Day 19

20140523-215030-78630908.jpg

Een nieuwe jurk! Een blogpost komt eraan.

A new dress! Blogpost is on it’s way.

Day 20

20140523-215246-78766590.jpg

Zelfde jurk, andere kleur riempje. In het kader van ‘elke combinatie maar een keer’.

Same dress, different belt. No outfit repeats = no outfit repeats, hehe.

Day 21

20140523-215423-78863804.jpg

Naar de tandarts in mijn Edith jurk, een van mijn favoriete jurken.

To the dentist in my Edith dress, one of my favorite dresses.

Give-away winnaar / winner

20140523-221322-80002116.jpg

Hanne!

Haar favoriete jurk is haar Hazel, ik kan wel zien waarom! Gefeliciteerd Hanne, wil je me je adres mailen? Dan stuur ik het pakketje jouw kant op.

Her favorite dress is her Hazel, and I can see why! Congratulations Hanne, would you e-mail me your adress so I can send the package your way?

Amazing Discovery Dress

Volgens mij zijn ze al een poosje ‘in’, de skater jurken. Ik vond het eerst maar raar, ik had nog nooit een skater in een jurkje gezien. Totdat ik laatst op nu.nl keek en daar een foto van een figuurschaatsster zag, in een jurkje met een vergelijkbare vorm. Duh, de skater dress heeft niks met skateboarden te maken 😀

I believe they have been fashionable for a while now, the skater dresses. I always thought it to be a bit weird, because I had never seen a skater in a dress. But when I saw a picture of a  figure skater in a dress with a similar shape, it hit me: skater dresses have nothing to do with skateboarding. Duh! 😀

image

Ik ben geen skateboarder, ook geen figuurschaatser, maar ik heb inmiddels wél een skater jurk. Een Lady Skater zelfs, patroon van KitschyCoo.

I am not a skateboard rider, nor a figure skater, but I do have a skater dress now. A Lady Skater dress even, a pattern from KitschyCoo.

image

Het is een tricot jurkje. Lang geleden dat ik daar één van heb gemaakt! In tegenstelling tot wat veel gedacht wordt is tricot helemaal niet ‘eng’ of ingewikkeld om mee te werken. En helemaal niet als je zo’n lekker zachte viscosemix als ik gebruikt. Ik had alleen altijd problemen met de pasvorm. Ja, dat klinkt raar, ik weet het, het zou zo makkelijk kunnen zijn aangezien tricot rekt! Op een of andere manier zat het nooit zoals ik het wou, en dan met name bij de schouders. Maar een poosje geleden deed ik een ‘amazing discovery’ (Mike! It’s amazing!), namelijk dat je de schouders ook gewoon een (of meer) maten kleiner kunt maken. En dat, samen met dit leuke stofje dat ik al 2 jaar had liggen, inspireerde me om maar weer eens een poging te wagen.

Gelukkig.

image

This is a knit dress. It’s been quite a while since I made one of those. A lot of people seem to think that sewing with knit fabric is scary, or fiddly. It really is not, especially if you use a nice and soft knit like this viscose (or rayon) lycra one. The thing I struggle with using knit fabrics is the fit. I know how weird that sounds, it could be so easy since they stretch and have a forgiving nature! But somehow I couldn’t get it right, especially in the shoulder/armscye area. But a while ago I did this amazing discovery (Mike! it’s amazing!) that I could just use one (or more) size smaller for that area. So that, along with this pretty fabric that I had in my stash for over 2 years, made me decide to give it another try.

Fortunately!

image

Want kijk hoe mooi deze zit 🙂 En: zelfs bovenaan het achterpand. Hoera! Dit is een maat 3, met maat 2 schouders en armsgaten. Het enige dat niet helemaal is zoals het moet is dat het bovenlijf wat te lang is. Maar dat was snel gefixt bij het volgende exemplaar. Want zei ik dat ik één skater jurkje had? Dat klopt niet, het zijn er inmiddels al twee 🙂

Because look how well this one fits! Even at the back of the neck. Hurray! I made a size 3, graded to a size 2 from the armpit up. The only thing that needs to be adjusted is the length of the bodice. But that was easy to fix on the next one. Wait, did I say I now have one skater dress? That’s not true, I already made a second one 🙂

image

Want toen ik dit mooie stofje zag liggen op de markt, ja toen moest ik die natuurlijk meenemen. Thuisgekomen zag ik waarom mijn oog er meteen op viel, het is dezelfde stof als die Lelie gebruikte voor haar prachtige Renfrew jurk!

Because when I saw this fabulous fabric at the market stall I knew it had to come home with me. And when I got there, I realised why it had caught my eye immediately: it’s the same fabric Lelie used for her gorgeous Renfrew dress!

image

Dus, stay tuned voor meer! In de tussentijd heb ik nog wel een vraagje. Aangezien ik me heel lang niet zo op de tricot stofjes gericht heb, heb ik geen idee waar ik leuke kan kopen. Dus: waar koop jij je toffe tricots?

So, stay tuned for more! Meanwhile, a quick question. Since my focus hasn’t been on knit fabrics, I don’t really know good sources. So: where do you buy your knits?

Het ‘perfecte’ vakantiejurkje

Waarom is dit het ‘perfecte’ vakantiejurkje?

Why is this the ‘perfect’ holiday dress?

1. Het is supersnel klaar

1. it doesn’t take long to make

… en dat allemaal in één middag!

… all in one afternoon!

2. Het past perfect en zit lekker

2. It fits perfectly and is really comfortable

3. Het is een heel basic model en dus geschikt voor vrolijke, wat uitbundigere stofjes (het patroon is een combinatie van Sewaholic’s Renfrew en dit jurkje)

 3. The pattern is pretty basic so it’s suitable for bold prints (I made the pattern myself by combining Sewaholic’s Renfew and this dress)

4.  Tijdens het naaien ontdekte ik dat mijn nieuwe naaimachine ook tricot stoffen veel netter afwerkt dan de oude

4. During the construction I found out that my new machine is also better in finishing knit fabric than the old one.

Maar waarom is het dan niet een echt perfect vakantiejurkje?

But why isn’t it THE perfect holiday dress?

Omdat de nekband aan de achterkant fluttert (zou ik dat kunnen verhelpen door ‘m de volgende keer wat korter te maken?)

The neckband is too loose in the back (would making it shorter fix that next time?)

Maar al met al ligt het niet aan mijn jurkje, maar aan de vakantie: we gaan op vakantie naar IJsland! Dus geen zon, zee en strand, maar gletsjerwandelingen, walvistochten en geisers. Dat vraagt niet om zomerjurkjes, maar om wandelschoenen, fleecevesten en thermo-onderbroeken 🙂

But in the end it is not the dress, it’s the holiday: we are going to Iceland! So no sun, sea and beach, but hiking on glaciers, watching whales and geysers. It doesn’t call for summer dresses but hiking shoes, fleece vests and thermal underwear 🙂

Niet geschikt voor zomerjurkjes, maar ik heb er wel heel, heel veel zin in!

Not suited for summerdresses, but I’m really, really looking forward to it!