Goedemiddag! Het lijkt erop dat het voorjaar eindelijk begonnen is hier in ons kikkerlandje. Stralende zon en ik zit heerlijk op ons balkon deze post te typen. De hele zomer ligt nog voor ons. Wat wil je nog meer?
Good afternoon! It looks like spring has finally arrived in all its glory. The sun is shining and I’m writing this post sitting on our balcony. We have the whole summer ahead of us. What more could you wish for?
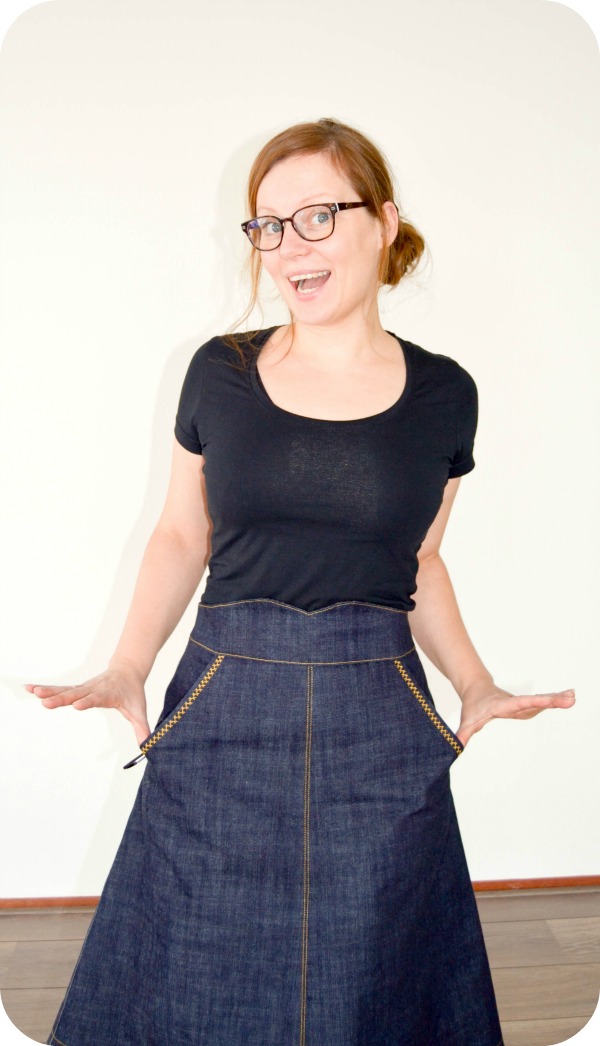
Toen ik laatst door mijn blogroll aan het lezen was zag ik de aankondigingspost van de Morgan Jeans van Closet Case files. Ik heb nooit echt het voornemen gehad om spijkerbroeken te gaan maken. Wel eens een mooi stukje spijkerstof gekocht als ik het tegenkwam maar altijd voor ‘ooit’. Ik had wel in mijn achterhoofd het idee om een oude spijkerbroek die ik ooit had na te maken, maar dat plan was veilig weggestopt in de vakjes ‘te veel werk’, ‘ik weet niet hoe dat moet’ en ‘ooit als ik er tijd voor heb’ in mijn hoofd. Tot ik dit patroon zag dus, toen realiseerde ik me dat een losser model spijkerbroek mist in mijn kast én dat ik dit patroon misschien wel kon gebruiken om die ene spijkerbroek na te maken.
When I was reading through my blogroll the other day I saw the announcement post for the Morgan Jeans from Closet Case files. I have never really had the intention to make jeans. I did buy the odd length of denim fabric when I ran into it but it was always for ‘someday’. There was also an idea in the back of my mind to recreate a pair of jeans I once had but that plan was safely tucked away in the ‘too much work’, ‘I don’t know how to do that’ and the ‘someday when I have the time’ folders of my mind. Until I saw this pattern, and suddenly I realised I wanted a pair of loose fit jeans and that I could perhaps use this pattern to recreate those jeans I once had.
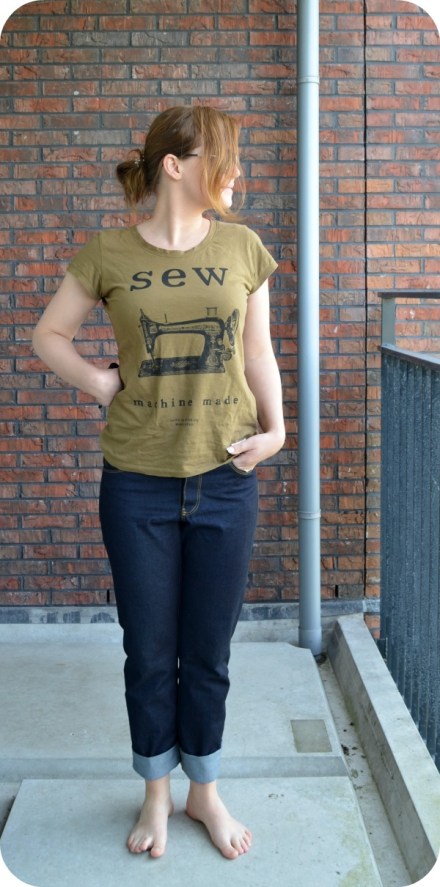
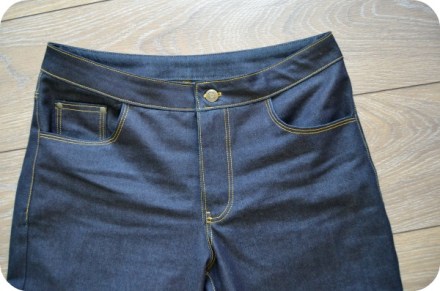
Tadaa! Ik maakte van een restje spijkerstof een proefmodelletje en naar aanleiding daarvan voegde ik wat lengte toe aan de kruisnaad aan de voor- en achterkant, en verwijderde wat wijdte aan de bovenkant van de achterkant. Ook deed ik een ‘knock knee adjustment’ omdat mijn knieën wat naar binnen staan. Het kruis is aan de voorkant wat te lang maar dat liet ik zo, omdat ik graag een wat relaxte look wilde.
Ta daa! I made a quick muslin from a denim remnant and then lengthened the crotch curve on both front and back a bit, and took out some widht at the back yoke. I also did a knock knee adjustment. The front crotch is not fitting right but since I wanted a relaxed fit I decided to leave it as is.
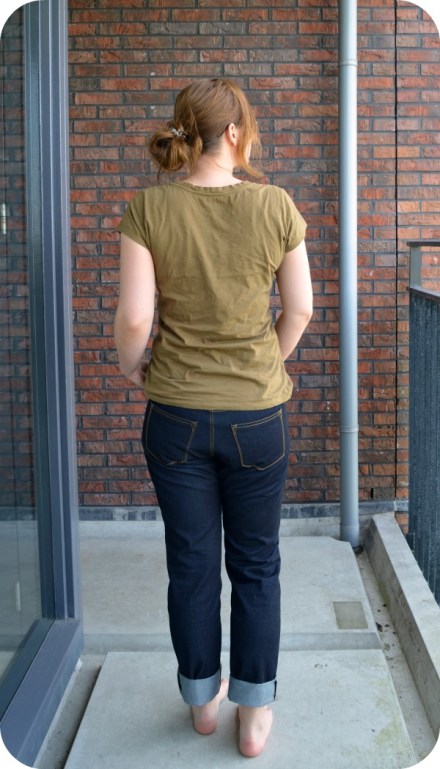
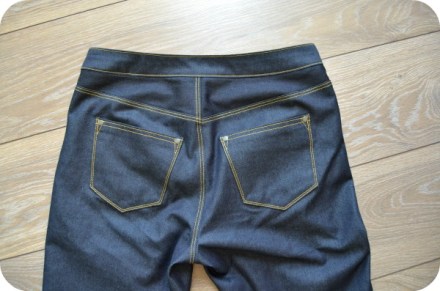
Hier de achterkant. Ook vrij losjes, maar de kruisnaad is nog wel een beetje te kort hier.
The back side. Loose fit but the crotch seam is a little too short here.
Qua pasvorm is het ongetwijfeld geen perfecte spijkerbroek te noemen maar afgezien van die te korte achterkruisnaad (3x woordwaarde :D) is het wel precies zoals ik in gedachten had. Kortom: hoera, de perfecte casual spijkerbroek om onder andere even snel mijn pyjamabroek te vervangen voor een tripje naar de supermarkt! Hij zit heerlijk, en ik denk dat de spijkerstof met de tijd ook nog wat soepeler gaat worden, dus het kan alleen maar nog beter worden.
Fit-wise this is not a perfect pair of jeans, but the short back crotch aside, it is just as I intended. So: yay! The perfect pair of jeans to for example change into for a quick trip to the supermarket! It’s really comfortable and I think the fabric will only get softer with wear so it can only get better right?
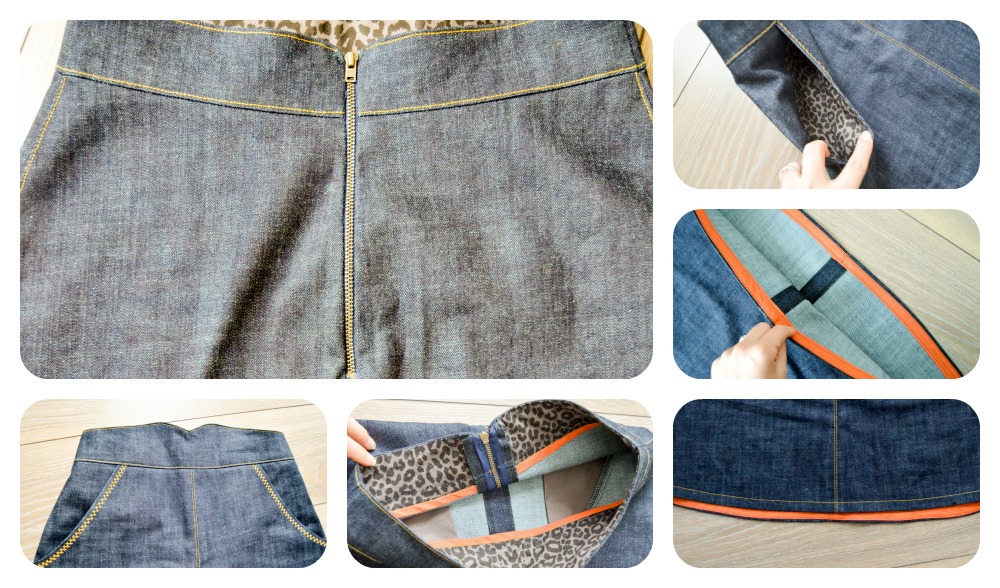
Even een paar details, omdat ik erg trots ben hoe het er allemaal uitziet 🙂
Here are a few detail shots, because I’m quite proud of how they runed out 🙂

Zoals je ziet gebruikte ik in de lockmachine hetzelfde kleur garen als voor het doorstikken. Dat had ik toevallig liggen, en ik hou van dat soort details. De zakken zijn uiteraard gemaakt van een stofje met bloemenprint. En last but not least liet ik de riemlusjes erbij zitten. Ik draag nooit een riem, dus de riemlusjes op mijn spijkerbroeken zijn een beetje als mannentepels: compleet overbodig.
As you can see the overlocking threads have the same colour as the topstitching thread. I’m a sucker for little details like that. The pockets are abviously made of a floral fabric. Is there any other way really? Last but not least, I omitted the belt loops. I never wear a belt with jeans, so the belt loops are to me a bit like a man’s nipples: completely unneccesary.

Deze foto’s heb ik een stuk lichter gemaakt zodat je de ‘foutjes’ in de pasvorm goed kan zien. Ik heb nog een aantal aanpassingen gedaan aan het patroon en die getest, maar ik krijg die extra stof bij het kruis maar niet weg. Tijd om wat nieuws te proberen dus, en ik heb nog de Sandra jeans van Style Arc liggen. Ik denk dat ik die nu maar eens uitprobeer, om te kijken of ik daar die ene spijkerbroek van lang geleden mee kan namaken. Het was een bootcut model dus er zijn wel wat aanpassingen nodig, maar we zullen zien!
I brightened these pictures so the fit issues are more obvious. I did some more adjustments and muslined them but I just can’t get the front crotch right. So, time to try something else, and I remembered I also had the Sandra jeans pattern from Style Arc. I think I’ll give that one a go to see if it’s the right pattern to use to recreate the other pair of jeans. It was a bootcut one so it’s gonna need some modifications but first I want to get that crotch seam right!