
Na de ruimvallende Morgan jeans wilde ik graag een wat nauwsluitender model maken. Het liefst met bootcut pijpen. Niet van die hele wijde ‘flare’ pijpen, maar wat bescheidener. Eigenlijk wilde ik gewoon de broek die ik in deze blogpost aanheb namaken. De stof had ik al een poos liggen en toen ik na de Morgan jeans de smaak te pakken had maakte ik deze er direct achteraan.
After the loose-fitting Morgan jeans I wanted to make a more fitted one. With bootcut legs. Not flared but bootcut. Really I just wanted to recreate the jeans I wore in this post. I had the fabric and after the Morgan I got bitten by the jeans making bug and decided to just make this one too.
Als patroon gebruikte ik de Sandra narrow leg jean van Style Arc, een patroon voor stoffen zonder stretch. De pijpen veranderde ik zelf naar bootcut door bij de zoom aan beide kanten 4 cm extra aan te tekenen en vanaf iets boven de knie een nieuwe zijnaad te tekenen:
The Sandra narrow leg jean from Style Arc was my starting point. It’s a pattern for non-stretch fabrics. I changed the narrow legs to bootcut legs by adding 4 cm to both sides of the hem and then draw a new side seam from a little above the knee:

Vervolgens maakte ik een proefmodel van maat 10.
Next I made a muslin in size 10.
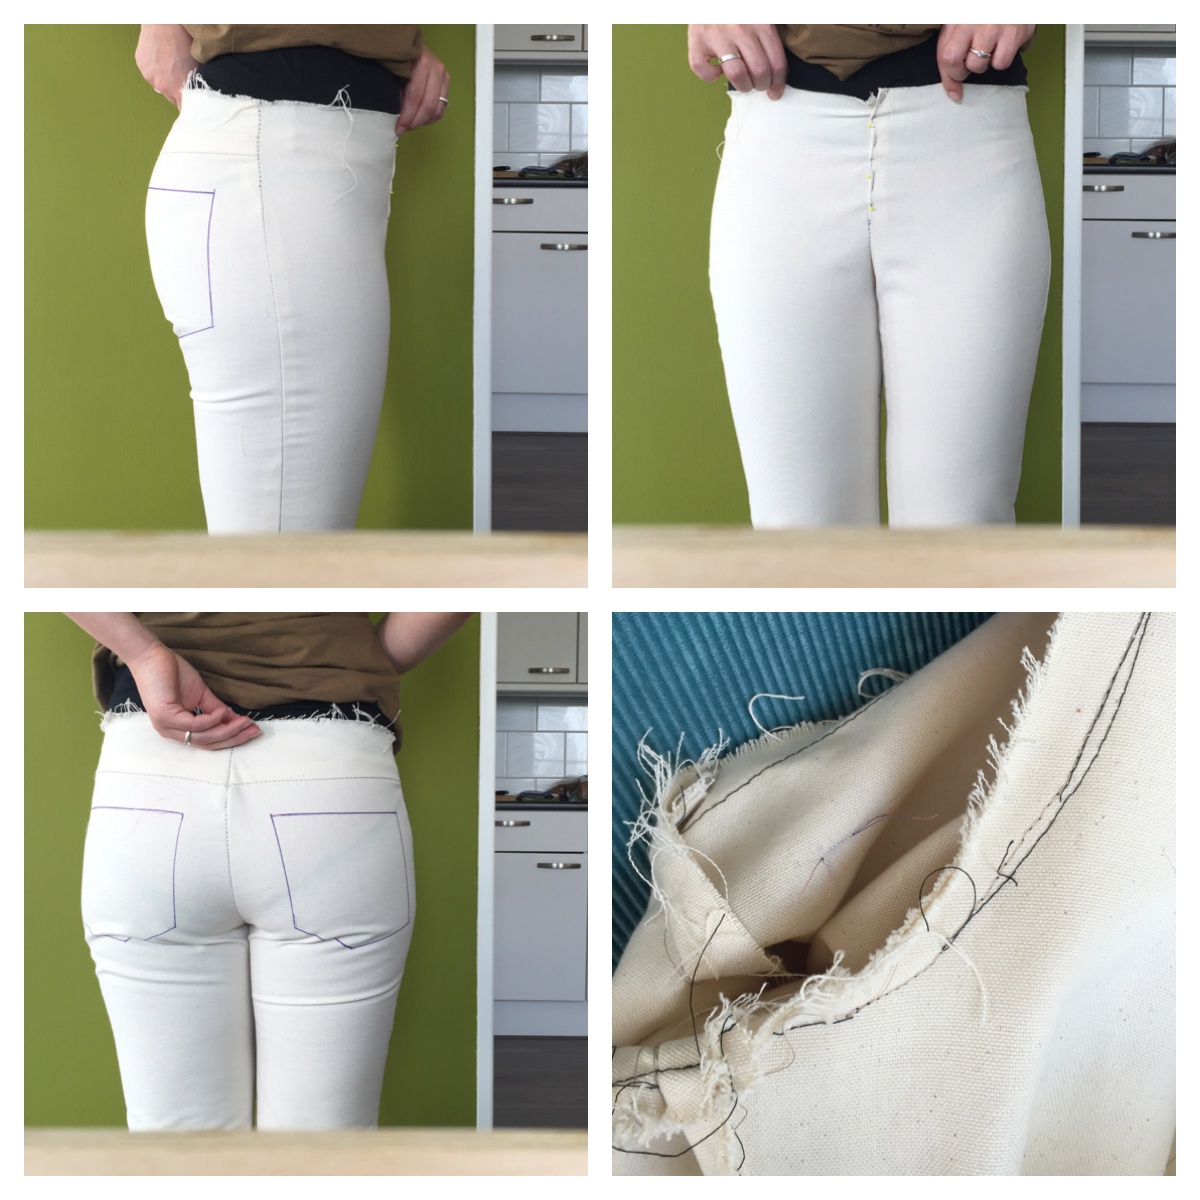
De zakken tekende ik erop zodat ik kon zien waar ze zouden zitten. Hierboven zie je de uiteindelijke versie inclusief aanpassingen. Ik deed er uiteindelijk een aantal kleine:
- 1,5 centimeter lengte toegevoegd aan de binnenbeennaad;
- aan beide kanten van de pas 1,5 centimeter wijdte weggehaald en ook uit de tailleband;
- middenvoor bovenaan een centimeter lengte verwijderd uitlopend naar niks aan de zijnaad;
- de ‘curve’ in de achterkruisnaad (bilnaad? :D) een klein stukje uitgediept;
- de kontzakken een centimeter ingekort en een beetje van vorm veranderd;
- de pijpen een centimeter verlengd.
I drew on the pockets so I could check the placement. The pictures are of the muslin after I adjusted it a bit. I did the following adjustments:
- added 1,5 centimeter to the inseam length;
- removed 1,5 centimeter of width from both sides of the yoke and the waistband;
- removed a centimeter of the top of the CF seam, graded to nothing at the sides;
- changed the back crotch curve a little;
- shortened the back pockets by a centimeter and changed the shape a bit;
- added a centimeter to the length of the legs.
Dit is wat ik met de zakken deed (nadat ik ze had ingekort):
This is what I did to the pockets (after shortening them):

Oke, dat was een hele lange inleiding, maar het resultaat mag er zijn (vind ik dan)!
Well that was a very long introduction, but the result was worth it I think!
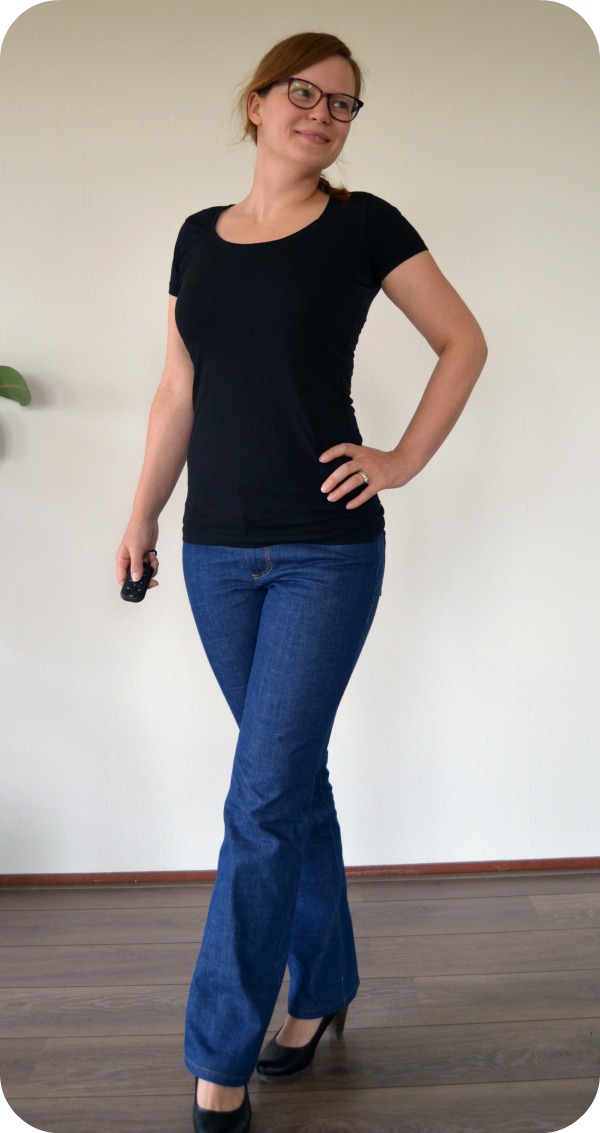
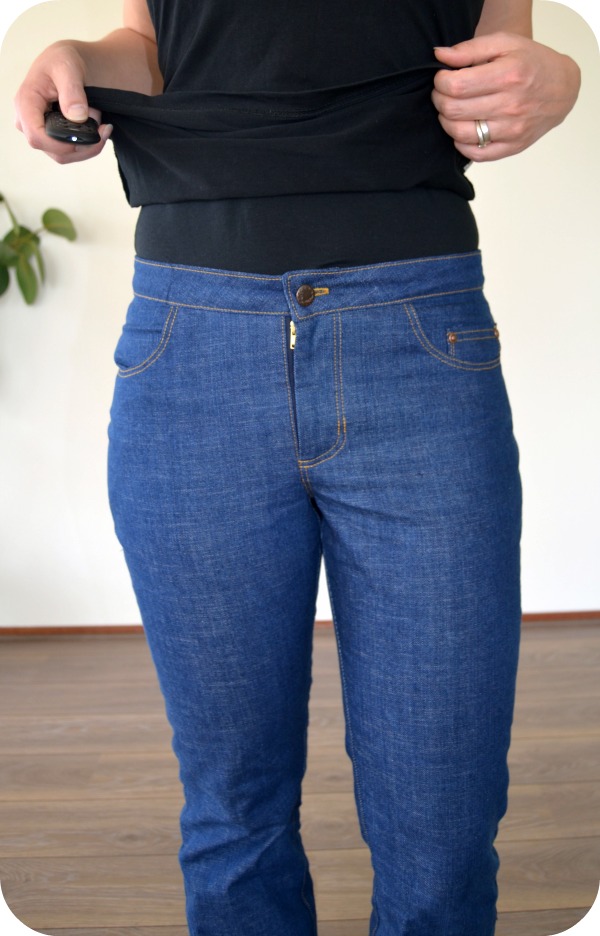

Je ziet de rits bij de gulp een beetje maar dat is dan ook het enige wat ik op te merken heb aan deze broek, en bovendien wordt dat toch wel bedekt door mijn shirt. Hij zit heerlijk!! Deze foto’s zijn genomen nadat ik hem een middag en avond gedragen had dus hij is een klein beetje uitgelopen, maar dat heb je bij spijkerbroeken zonder stretch. Het stoort me ook totaal niet, ik ben juist superblij met deze pasvorm!
You can see the zip a bit at the fly but that’s NBD because it will always be covered by my shirt. This thing is so comfortable! These pictures were taken after I wore them the afternoon and evening before so the fabric stretched a bit. It happens with non-stretch denim but it doesn’t bother me at all, I think the fit is still great!


Even de details showen hoor 🙂 Een spijkerbroek maken is VEEL werk, en ook wel precisiewerk, maar als het dan goed lukt is het ook heel bevredigend.
Showing off the details here 🙂 Making a pair of jeans is a LOT of work, and it involves a lot of precise stitching, but if it works out it’s very satisfying.

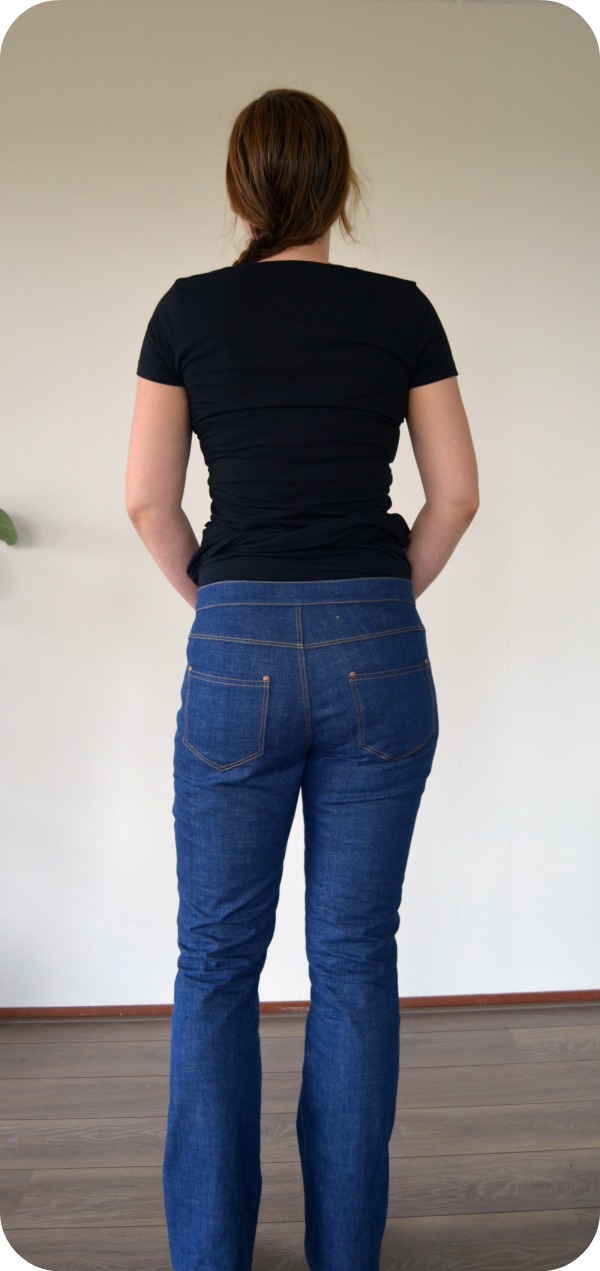
Alleen zullen die details niet altijd voor iedereen zichtbaar zijn 😀
It’s just that not all details will be visible for the general public 😀

Mocht ik in de toekomst nog een exemplaar maken (vast wel) dan ga ik toch één dingetje veranderen: de zoom aan de achterkant wat lager maken en aan de voorkant wat hoger. Dat hangt wat makkelijker bij schoenen. Niet dat het me stoort, maar is dat juist niet datgene wat zelf maken zo leuk maakt: dat je dingen tot in de puntjes kunt perfectioneren?
If I make another pair in the future (which I’m sure I will), I’ll change just one little thing: I’d make the legs a bit longer on the back and shorter on the front, to make them hang better when wearing shoes. I’m not bothered by how the hem hangs on this pair, but isn’t that the beauty of making things yourself: you can change even the smallest of details to make something just perfect for you?

Oh my giddy aunt! These are so beautifully made and the topstitching is perfect. Well done. Thanks for sharing. Hila.x
Thank you Hila! I really enjoy topstitching and when it turns out the right way it is so satisfying!
Superknap Inge!
Dank je Truus 🙂
They look great! I think they are more flattering on you than the Morgan jeans too. Not that those are not flattering, these one just suit you better I think. Great idea to draw on the pockets!
I checked out your Morgans again and I take it back, they’re just a very different style 🙂 Kudos for making two in a row!
Thank you! I like making things in pairs 🙂 They’re definately a different shape than the Morgans, and I also think the camera was at a better angle with these pictures. The Morgans stretch quite a bit when wearing them and then fit better in the back. I’m tempted to try and see what the effect of lengthening the inseam would be on that pattern because I think that’s what I should have done on that pattern too instead of lengthening the crotch seam.
Amai, je ziet er geweldig uit! Die jeans is prachtig gemaakt! Ik ben jaloers!
Dank je wel! Ben er ook heel blij mee 🙂
Perfect fit and wonderful detail!
Thank you! I really enjoyed sewing this one
These look fabulous. I adore bootleg jeans so flattering on so many people. The fit & finish looks fab!
Thank you! Yes, bootcut is a great shape. Also better than skinny jeans if you have full calves like me 🙂
Ziet er goed uit zeg! Het model staat je goed!
Dank je! Ben super blij met het resultaat!
These look so great! I love the alterations you did.
Thank you!
Wow!! These are brilliant!!
Thank you!!
Wow Inge, goed gedaan! Als ik het goed zie heb je een labeltje ingenaaid midachter, mag ik vragen waar je dat hebt gekocht? Ik ben al een poosje op zoek. Leuk om bij je mee te lezen en fijn, de foto’s van het hele proces. Ben nu alweer benieuwd naar je volgende project.
Dank je! Ja klopt, komt van nominette. Staat meestal een kortingscode voor in de la Maison Victor. Scheelt weer wat 😉
Pingback: 2016: top ehm, more than 5 | IngeMaakt
Pingback: Style Arc Sandra – again :) | IngeMaakt