Sandra jeans the third and a t-shirt

Ken je dat gevoel dat je krijgt als je een heel gaaf boek uit hebt, of als je een toffe serie uitgekeken hebt? Dat gevoel heb ik ook als ik een goed gelukt naaiproject heb afgerond. Onlangs realiseerde ik me dat dat de reden is dat ik van een geslaagd patroon vaak meteen er achteraan een tweede versie maak.

You know the feeling you get when you finish a really good book or a great tv-series? I get the same feeling when finishing a very succesful sewing project. Recently I realised that’s the reason I often sew the same pattern twice in a row.


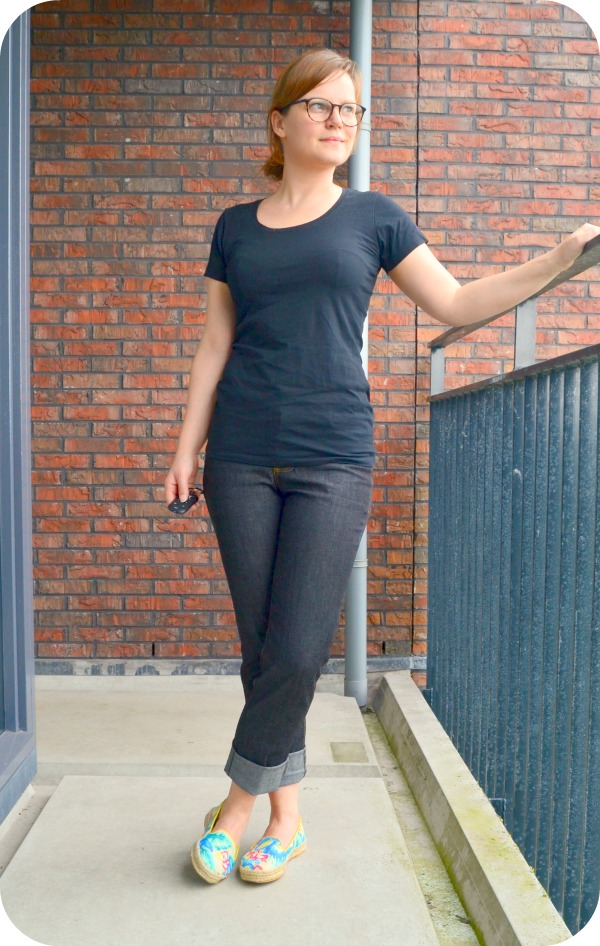
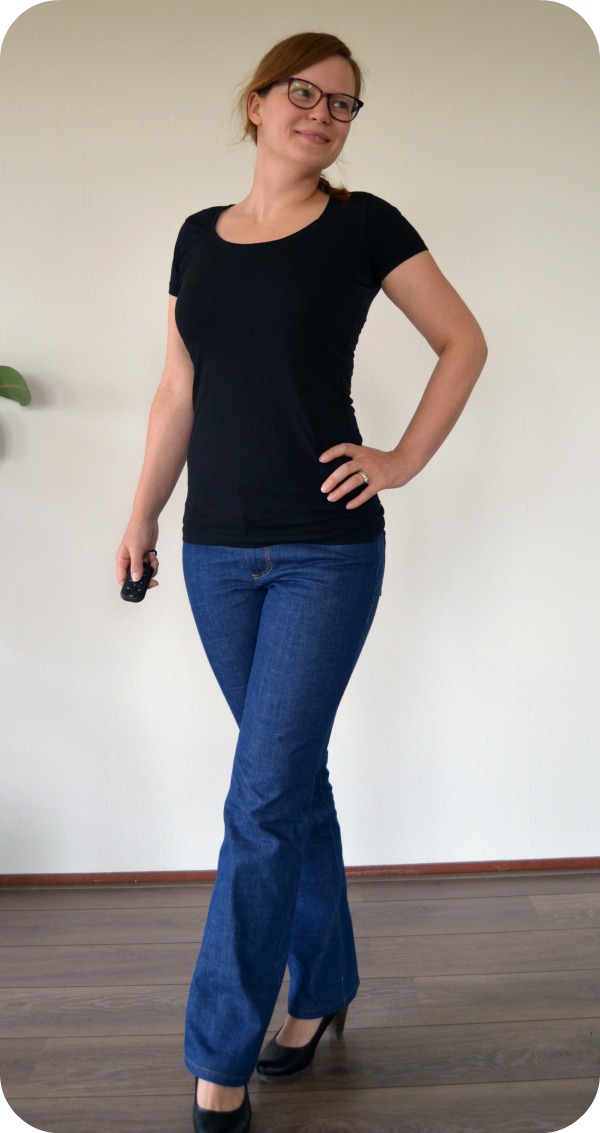
Hier dus maar weer een Sandra jeans van Style Arc, haha. Dit keer met iets wijdere pijpen, en in een lichtblauwe non-stretch denim uit mijn voorraad.

So, here is yet another Style Arc Sandra jeans, haha. This time in a pale blue non-stretch denim from the stash and with slightly wider legs.


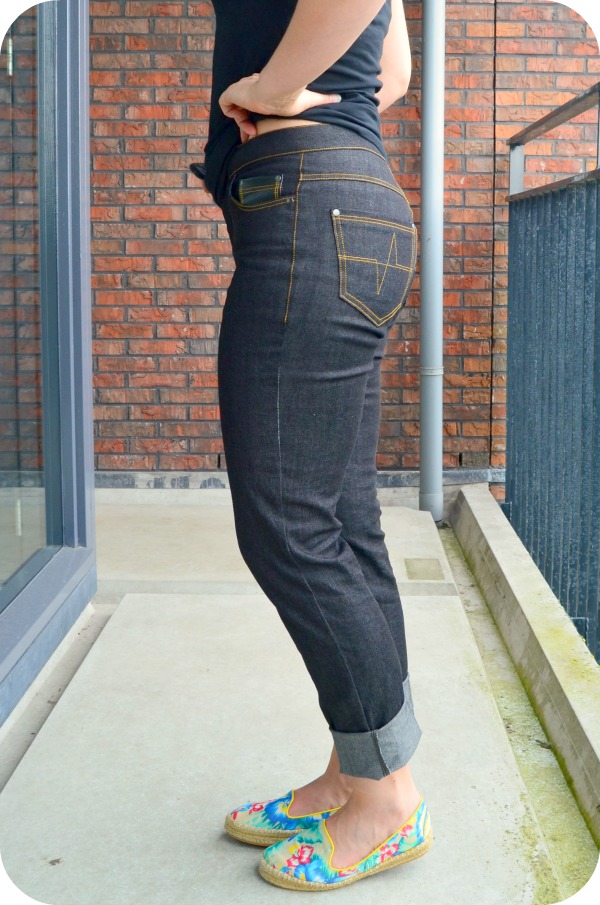
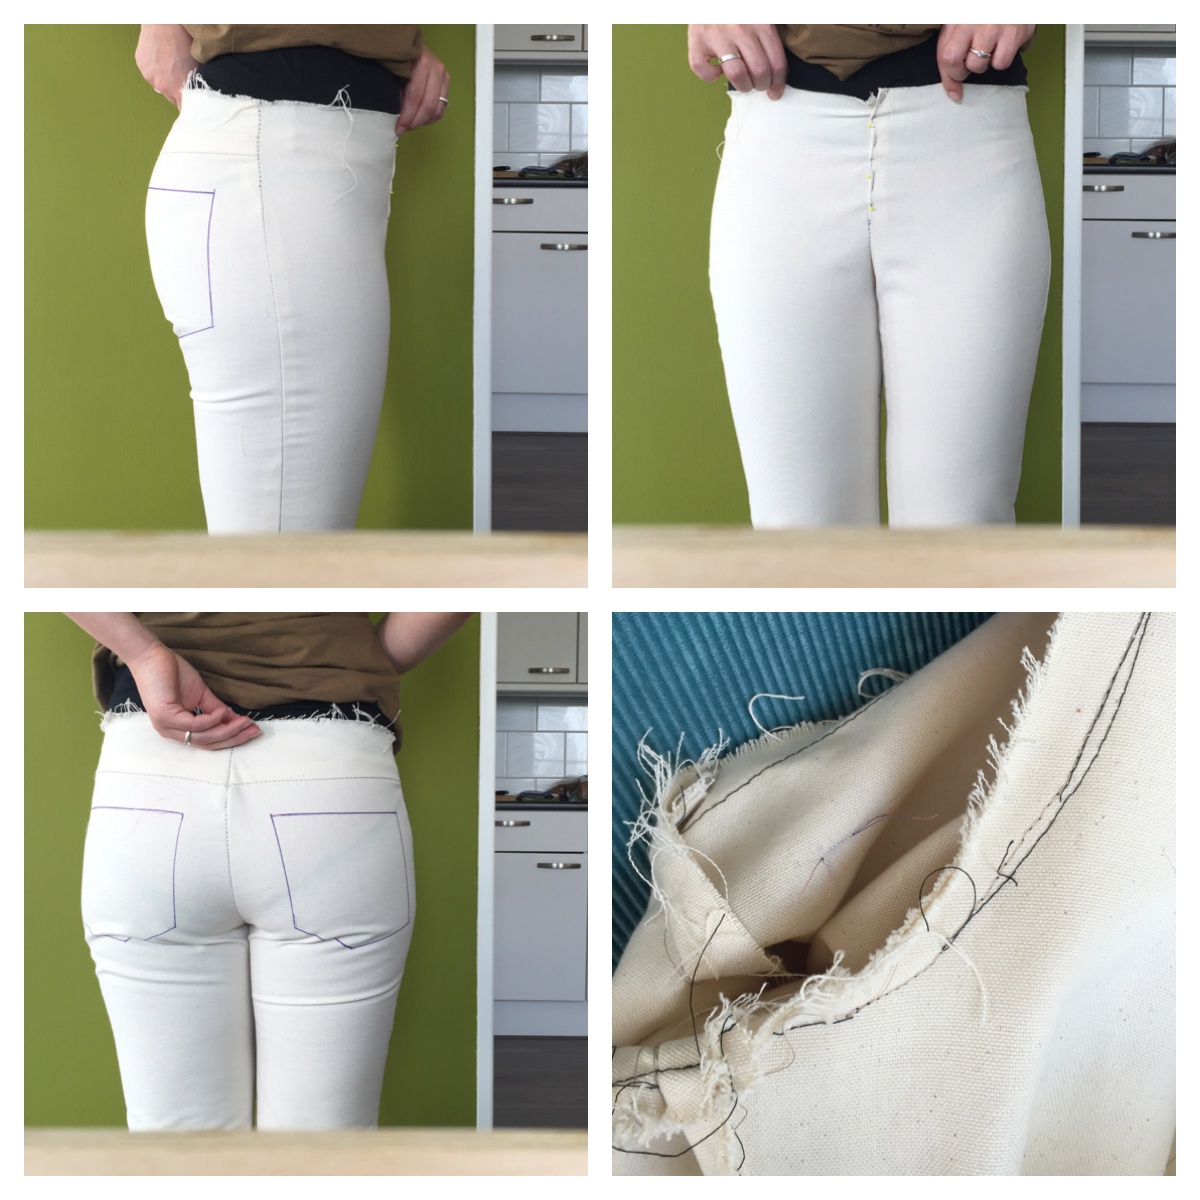
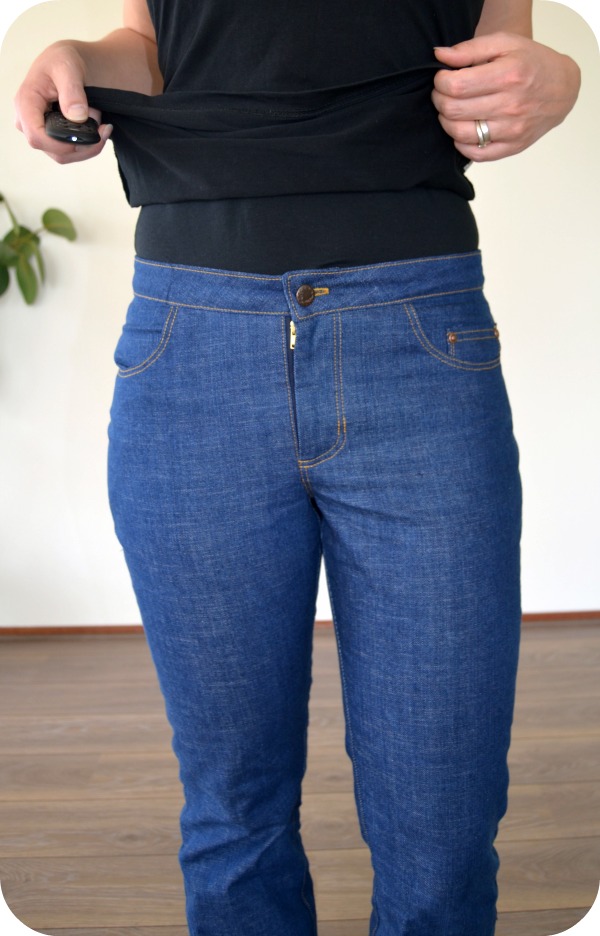
Het is wel lastig om zo’n lichte stof goed op de foto te krijgen. Deze foto’s zijn gemaakt toen ik de broek net af had, hij zit nog goed strak. Dat was ook de bedoeling, want bij zowel de Morgan jeans als mijn eerdere non-stretch Sandra loopt de stof tijdens het dragen aardig uit. Ik hoop dat dat zo wat beter opgevangen wordt door de stof. In de taille tekent hij een beetje, maar daardoor zakt ‘ie in ieder geval niet af 😉 Voor het verstevigen van de tailleband volgde ik de eerste methode uit deze tutorial en die werkt heel goed!

Getting good pictures of such a light fabric is a bit hard. These pics were taken as soon as I finished the jeans, it’s still quite tight. I intended them to be, because both my Morgan jeans and the other pair of non-stretch Sandra bag out quite a lot when worn. I hope this way it won’t show as much. The top of the waistband digs in a bit but hey, at least they won’t slip down 😉 I used the first method from this tutorial to reinforce the waistband and that worked beautifully.


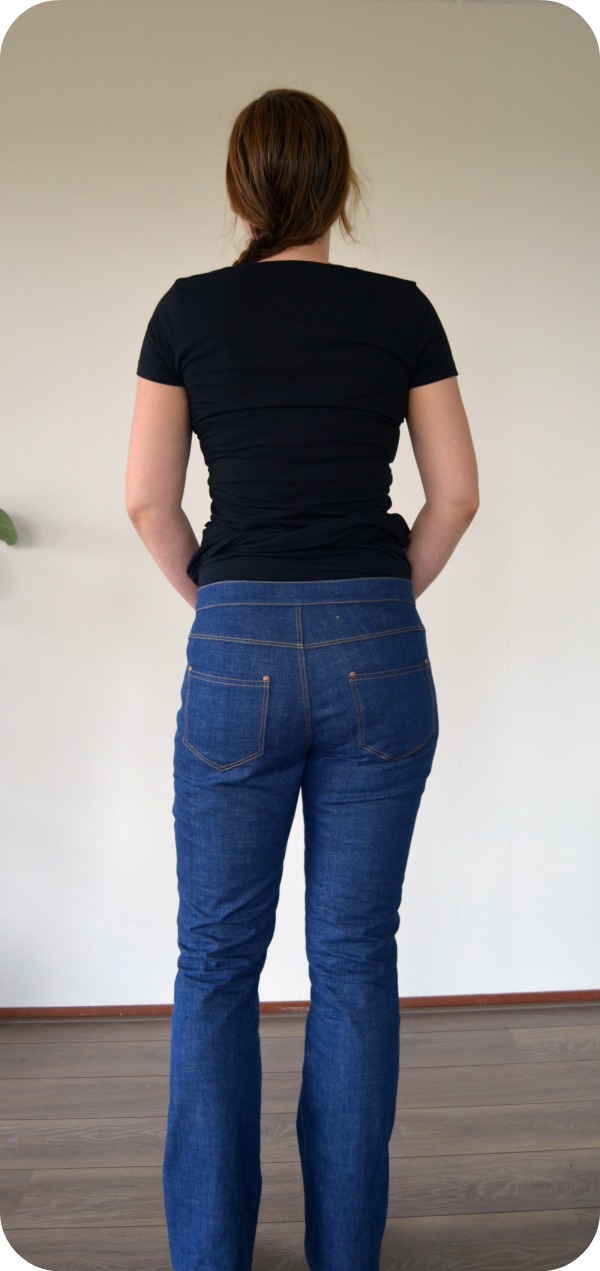
Ik ben superblij met de pasvorm achter in de rug. Broeken die ik in de winkel koop sluiten hier nooit mooi aan, deze is perfect!

I’m so pleased with the fit at the back waist. Pants or jeans I from the shops never sit right here, and these are perfect!


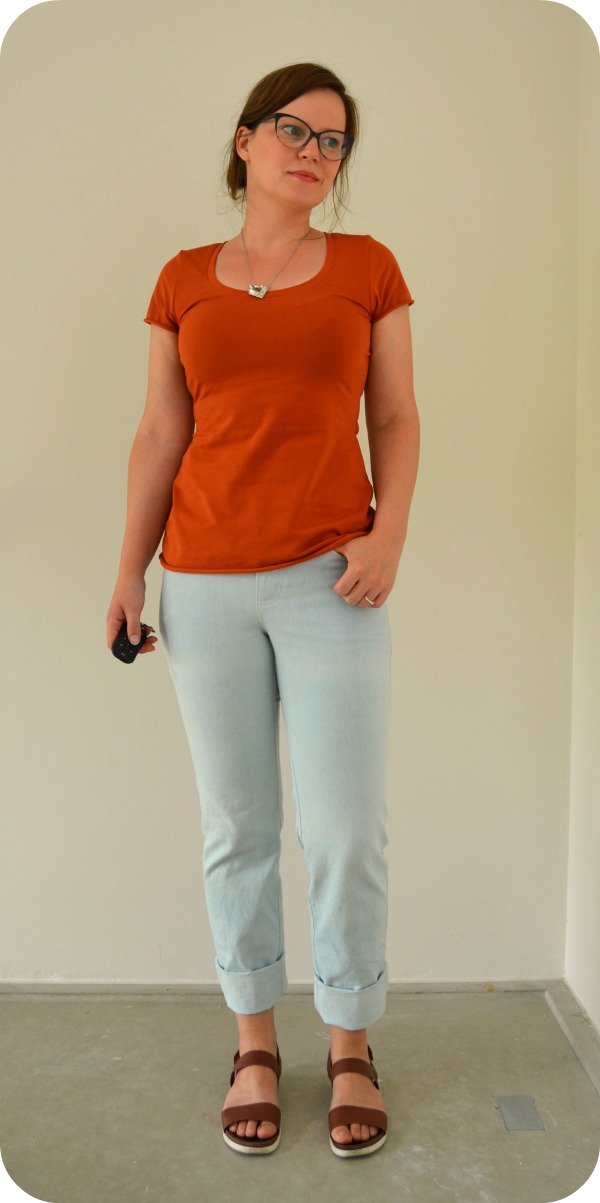
Het shirt maakte ik ook zelf. Ik was al een poosje op zoek naar een shirt of vest in deze kleur, maar ik kon het nergens vinden. Gelukkig kon ik wel stof in de goede kleur vinden, en het patroon maakte ik vorig jaar zelf in mijn zoektocht naar het perfecte t-shirtpatroon. Het trekt een klein beetje bij de oksels maar ik weet inmiddels hoe ik dat moet aanpassen. Verder is het niet gezoomd, ik vond het er wel leuk uitzien met die opgekrulde mouwen en onderkant, lekker casual.

The shirt is also me-made. I have been looking for a shirt or cardigan in this colour but couldn’t find it. I did however find fabric in the right colour, and the pattern is the one I made last year in the search for the perfect fitted tee pattern. It pulls a bit under the arms but I now know how to fix this. It isn’t hemmed, I like how casual the curled up sleeves and bottom looks.


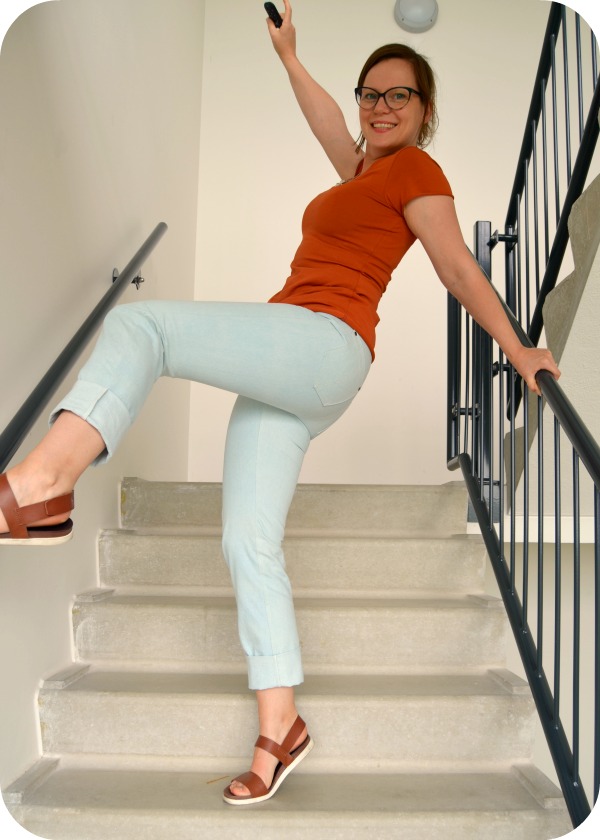
Wat zo tof is van dingen precies op maat maken, is dat deze broek ondanks de strak-heid totaal niet oncomfortabel is of me in mijn bewegingsvrijheid beperkt zoals je ziet.

The great thing of making things to fit is that these jeans, despite their tightness, are in no way uncomfortable or restrictive, as you can see in the photo above.


Verder had ik er niet zoveel zin in, qua foto’s 😉

This was kind of how I felt about taking pictures 😉


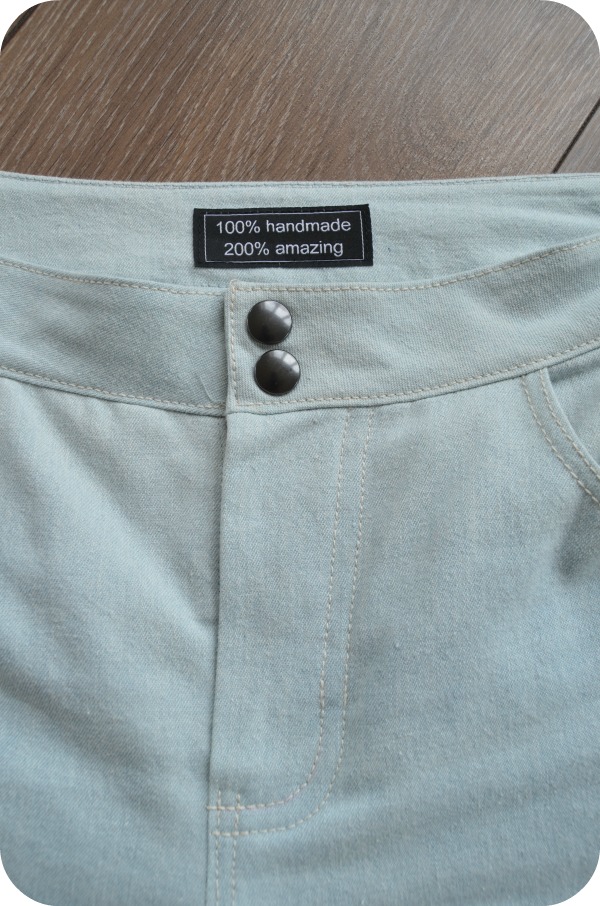
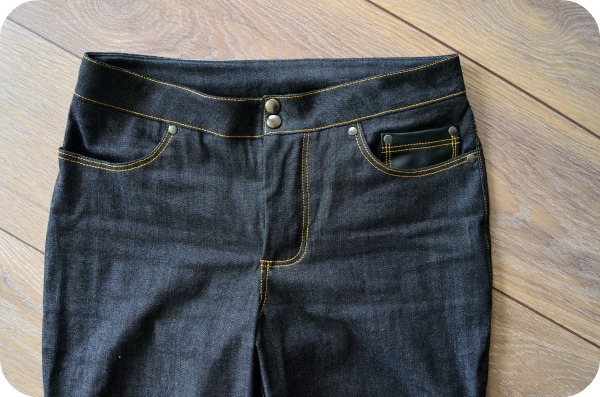
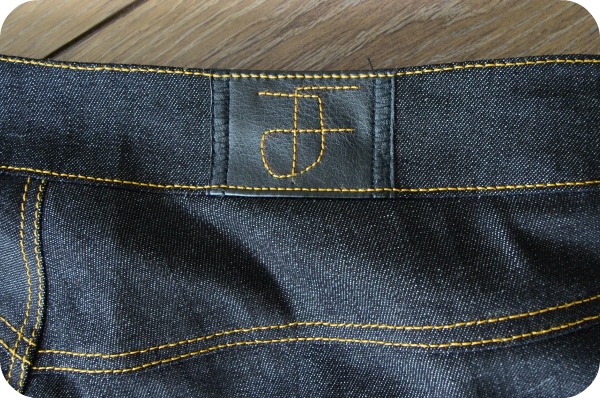
In plaats van een jeansknoop gebruikte ik weer twee drukknopen. Dat zit wat steviger en het is minder zichtbaar door shirts heen. Het label komt van Dutch Label shop. Ik kreeg onlangs een mailtje of ik hun labels wilde uitproberen, gratis. Daar hoefde ik niet lang over na te denken natuurlijk 🙂 De inspiratie voor dit label kwam van een foto die Brooke onlangs Instagramde (de één-na-laatste). De kwaliteit is dikke prima, ze zijn mooier dan de andere labels die ik heb laten maken.

I used snaps instead of a jeans button again. I like how it feels more secure and they don’t show through shirts like jeans buttons can do. The label is from Dutch Label shop. They recently e-mailed me and asked wheter I wanted to try their labels, for free. It didn’t take long to decide 🙂 Inspiration for this label was this Instagram pic of Brooke (the one but last). The quality looks pretty good, they look better than any other label I had made.


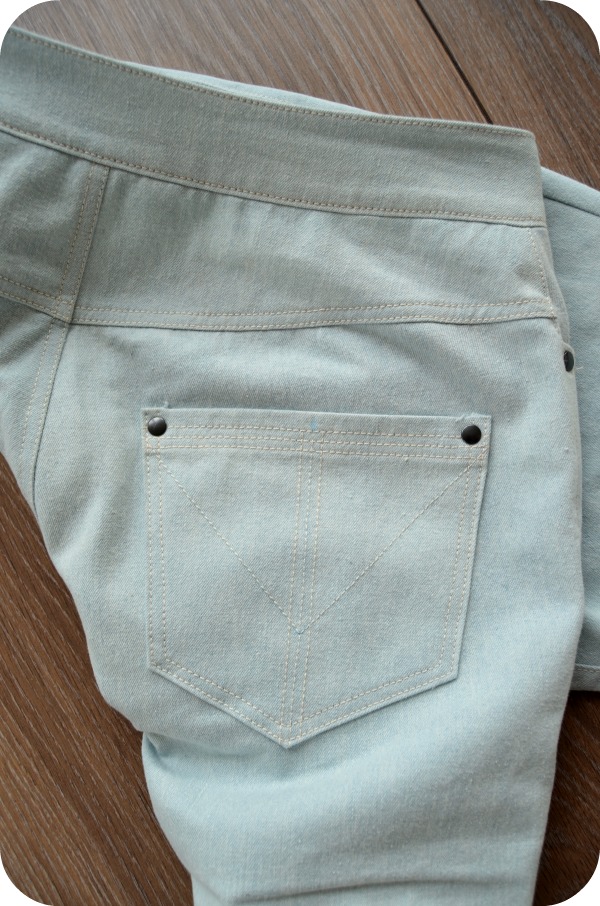
Het patroontje op de kontzak. Bijna niet zichtbaar door het ecru doorstikgaren.

The back pocket topstitching. Almost invisible in this off-white topstitching thread.


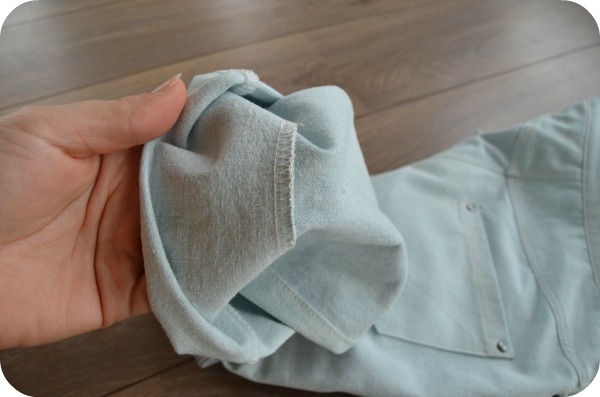
En omdat ik deze broek toch waarschijnlijk alleen maar met opgerolde pijpen ga dragen heb ik hem niet gezoomd. Een beetje efficiency is immers nooit weg!

And because I’ll probably only wear these with the legs rolled up, I dind’t hem them. A bit of efficiency never hurts, right?!

p.s. ook je eigen labeltjes bestellen met korting? Dutch Label shop geeft je met de code “ingemaakt15” 15% korting op je bestelling (30 dagen geldig, vanaf vandaag)

p.s. want to order your own labels too with a discount? Dutch Label shop gives you a 15% discount if you use the code ‘ingemaakt15’ (valid for 30 days, starting today)

Style Arc Sandra – again :)

Nieuwe naaipatronen proberen vind ik erg leuk maar bij sommige dingen zit ik toch echt stevig in kamp ‘never change a winning team’. Bij spijkerbroeken bijvoorbeeld. De bootcut Sandra broek die ik maakte zit nog steeds heerlijk. Dus toen ik zin kreeg om weer eens een spijkerbroek te maken haalde ik dat patroon weer van stal. Dit keer wilde ik ‘m gewoon met rechte pijpen maken, zoals het originele patroon, daarom printte ik ‘m opnieuw uit en deed ik dezelfde aanpassingen weer, aangevuld met nog een paar andere.

When it comes to sewing patterns I like trying out new things, but for some things I’m firmly in camp ‘never change a winning team’. Jeans, for instance. The bootcut pair of Sandra jeans I made still fits wonderfully well, and so when I felt like making another pair of jeans, I just got it out again. This time I wanted to make the original narrow legged version so I printed out the pattern again, re-did my adjustments and made a few new ones.


Ik moest de foto’s flink oplichten. Zwarte spijkerstof is kennelijk ook moeilijk voor camera’s!

I had to lighten the pictures quite a lot, apparently black denim is hard to photograph too!


De stof is deze zwarte stretch demin. Een beetje aan de lichte kant, maar voor de zomer leek me dat wel fijn. Omdat het patroon voor een denim zonder stretch is moest ik hem vanaf de bovenbenen tot de taille wat innemen. Aan beide kanten een centimeter ongeveer, dus 4 in totaal. Zoals je hierboven ziet zitten de zakken daardoor een klein beetje te ver naar de zijkant. Mocht ik dit patroon nogmaals van een stretch stof maken, dan zou ik ze een hele of halve centimeter richting middenachter verplaatsen.

Maar los van dat ben ik superblij met het resultaat 🙂

The fabric I used is this black stretch denim. It’s a bit lightweight, but I thought that woul be nice for summer. Because this pattern is for non stretch denim, I took out some width at the side seams from halfway my tights up to the waist, 4 cm in total. This caused the back pockets to look a little wide set. Next time I’ll make this in a stretch denim I’ll center them one or a half centimetre.

Apart from that, I’m super pleased with the result 🙂


Naast het innemen deed ik nog een ‘knock knee adjustment‘ van een centimeter, en een aanpassing voor stevige kuiten van één of anderhalve centimeter, dat weet ik niet meer precies. Voor deze stretch stof was dat precies goed, maar als ik een non-stretch stof ga gebruiken dan doe ik voor de zekerheid bij de onderbenen aan beide kanten een halve centimeter extra denk ik. De knieën zijn een klein beetje uitgerekt, omdat ik voor het maken van deze foto’s nog snel even op de fiets een nieuwe batterij voor mijn camera-afstandsbediening moest kopen, haha.

Besides taking in the sides I did a one cm knock knee adjustment and a full calve adjustment of one or one and a half cm, I don’t really recall. That was just perfect for this stretch denim, but if I make this again in a non-stretch one, I’ll add just a little width to the lower legs so that my mighty calves have enough room. The knees have stretched a bit in these pictures because I had to get out on my bike to get a new battery for my camera remote so I could take these pictures, haha.


Super blij met de pasvorm!

I’m so happy with the fit!


Nog even een korte opsomming van alle aanpassingen die ik deed:

  • de binnenbeennaad een centimeter verlengen
  • middenvoor aan de bovenkant een centimeter verlagen
  • het achterbovenpand flink innemen, de pas in het midden aan beide kanten 1,3 centimeter en op de middenachternaad nog een keer 2 centimeter in totaal
  • de kontzakken een centimeter korter maken en de punt aan de onderkant een centimeter naar het midden verplaatsen
  • een centimeter ‘knock knee adjustment’
  • ruimte toevoegen voor de kuit op het achterpand
  • de zakken aan de voorkant wat dieper maken, want bij mijn andere versies vind ik die wat te ondiep
  • vanaf het midden van mijn bovenbenen tot aan de taille op de zijnaden elke kant 2 centimeter ingenomen ivm de stretch in de stof.

Omdat ik al verwachtte dat ik ‘m wat in zou moeten nemen heb ik de tailleband pas aangepast en geknipt toen de rest van de broek klaar was, zodat alle aanpassingen erin verwerkt konden worden. Best slim vond ik zelf!

En volgens mij was dat het wel. Voor een volgende keer verhoog ik de pas aan de achterkant met een centimeter in het midden, want dat trekt een beetje naar beneden. En ik wil de voorkruisnaad een klein beetje uitdiepen want het lijkt vanuit deze camerahoek alsof ik een beetje een camel toe heb. Maar dat is als ik echt uberkritisch ben en zie je eigenlijk niet als je vanaf gewone mensenhoogte kijkt 🙂


A short summary of all the adjustments I did:

  • lengthening the inseam with a cm
  • lowering CF by a cm
  • taking in the back yoke with 1.3 cm on each side at the middle of the yoke and another 2 cm total at the CB
  • shortening the back pockets by a cm and moving the bottom point inwards a cm
  • a one cm knock knee adjustment
  • a full calve adjustment
  • deepening the front pockets. I made two bootcut versions and found the pockets to be a bit shallow
  • taking in the side seams from halfway up my upper legs to the waist by 2 cm on both sides because of the stretch in the fabric.

Because I anticipated having to take it in a bit I adjusted and cut the waistband after I had finished everything else, so I could incorporate all the adjustments. Pretty clever if I may say so myself!

And I guess that was all. For next time I’ll ad a cm of length to the CB as I find it pulls a bit. And I’ll scoop out the front crotch curve just a bit because from this camera point it looks like I have a tiny camel toe. This is me being supercritical though, and it doesn’t show when you look from a normal human perspective 🙂


Dan nog een paar details – mijn favoriet bij deze broek:

Then some details – my favourite part of these jeans:


Twee drukknopen op de tailleband en… een nepleren zakje! Die restjes nepleer is echt ‘the gift that keeps on giving’.

Two snaps at the waistband and… a pleather coin pocket! Those pleather scraps really are ‘the gift that keeps on giving’.


Restjes van mijn Camí-jurk als zakken en een biais bandje voor de tailleband.

Scraps of this Camí dress as pockets and a little bias tape for the waistband.


Doorgestikte kontzakken en….

Topstitched back pockets and…


Mijn paraaf op een nepleren labeltje 🙂 gewoon met een sharpie erop getekend en toen gestikt. Zulke kleine details vind ik één van de leukste dingen van zelf kleding maken!

A simple version of my autograph on a pleather label 🙂 I drew it on with a sharpie and then stitched it. Those little details are one of the things I love the most about making my own clothes!

2016: top ehm, more than 5

December alweer… misschien heb ik dit wel eens vaker verteld, maar ik word altijd een beetje melancholisch van december. Met name van de jaarwisseling. Het begin van het jaar vind ik altijd fijn, een soort van nieuwe-rondes-nieuwe-kansen gevoel, en aan het eind van het jaar loopt alles zo af. Misschien heeft het er wel mee te maken dat ik beter ben in het beginnen aan dingen dan in dingen afronden, of dat ik liever vooruit kijk dan terug  🙂

December already… maybe I’ve said this before but december always makes me feel a bit melancholic. Especially around the turn of the year. I like january because it’s a fresh new year, with new chances, four seasons ahead of us. In december, the year just ends, unfinished business or not. Maybe it’s because I’m better at starting new things than finishing off things. Or that I enjoy looking forward way more than looking back  🙂


Maar terugkijken is soms ook best leuk, vooral met Gillians top 5. Daarom bij deze mijn top 5 favoriete projecten van het afgelopen jaar. Het bleek dit jaar onmogelijk om me te beperken tot 5 en daarom zijn het er een paar meer.. wat maakt dat nou uit, successen zijn er tenslotte om gevierd te worden toch?

But looking back can be fun too, especially with Gillians top 5. So here is my top 5 favourite projects from this year. The only thing here is that it was impossible to narrow it down to 5, so there are a bit more… who cares, successes should be celebrated right?

Hier zijn ze dus, in willekeurige volgorde / so here they are in no particular order:


panter print Maya bra

Butterick 6501 knockoff

La maison Victor Mabel

the perfect t-shirt dress

bootcut Style Arc Sandra jeans

Butterick 6869 for Vintage pledge

In de categorie (nog) niet op de blog / in the not (yet) on the blog-category:

opal_cardigan

opalinwool

Opal cardigans! Beide in gebreide wol en super comfortabel. De laatste heb ik afgelopen vrijdag gemaakt en net snel nog even gekiekt. Dit is dus de befaamde pyjamadag-look. Op het internet. Zero fucks given  😉

Opal cardigans! Both in knitted wool and super comfortable. The bottom one was made last friday and I quickly snapped a pic before writing this post. The famous pajama-day-look. On the internet. Zero fucks given  😉

 
En in de categorie absolute winnaar / and in the category absolute winner:

Dit is vast geen hele grote verrassing want hij staat ook al op de bovenstaande foto  🙂

I can’t imagine this being a surprise because it’s pictured above too  🙂


De pyjamabroek!! / pajama pants!!

Echt, ik denk dat ik deze broek 80% van de tijd dat ik thuis ben aan heb. De rest van de tijd zit ie in de was. Perfecte pasvorm (voor zover je dat van een pyjamabroek kunt zeggen) en heerlijk zachte stof. Ik heb na deze nog twee pyjamabroeken gemaakt maar die zijn op de een of andere manier niet zo perfect als deze.

Seriously, I wear these pants about 80% of the time I’m home. The rest of the time, it’s in the wash. It has the perfect fit (if there is such a thing for pajama pants) and the fabric is nice and soft. I’ve made two more after this one but somehow they haven’t turned out as perfect as these.

Tot zover de favorieten van 2016, het jaar waarin ik mijn beha’s, pyjamabroek en pyjamalook op internet zette 🙂 Up next zijn de minst favoriete projecten. Ik beloof een pyjama-vrije post!

So here they are, my favourites of 2016, the year in which I put my bra’s, pajama pants and pajama look on the internet 🙂 Up next are the least favourite projects, and I promise that one will be pajama-free!

Style Arc Sandra jeans

Na de ruimvallende Morgan jeans wilde ik graag een wat nauwsluitender model maken. Het liefst met bootcut pijpen. Niet van die hele wijde ‘flare’ pijpen, maar wat bescheidener. Eigenlijk wilde ik gewoon de broek die ik in deze blogpost aanheb namaken. De stof had ik al een poos liggen en toen ik na de Morgan jeans de smaak te pakken had maakte ik deze er direct achteraan.

After the loose-fitting Morgan jeans I wanted to make a more fitted one. With bootcut legs. Not flared but bootcut. Really I just wanted to recreate the jeans I wore in this post. I had the fabric and after the Morgan I got bitten by the jeans making bug and decided to just make this one too.

Als patroon gebruikte ik de Sandra narrow leg jean van Style Arc, een patroon voor stoffen zonder stretch. De pijpen veranderde ik zelf naar bootcut door bij de zoom aan beide kanten 4 cm extra aan te tekenen en vanaf iets boven de knie een nieuwe zijnaad te tekenen:

The Sandra narrow leg jean from Style Arc was my starting point. It’s a pattern for non-stretch fabrics. I changed the narrow legs to bootcut legs by adding 4 cm to both sides of the hem and then draw a new side seam from a little above the knee:


Sandra jeans 09


Vervolgens maakte ik een proefmodel van maat 10.

Next I made a muslin in size 10.


De zakken tekende ik erop zodat ik kon zien waar ze zouden zitten. Hierboven zie je de uiteindelijke versie inclusief aanpassingen. Ik deed er uiteindelijk een aantal kleine:

  • 1,5 centimeter lengte toegevoegd aan de binnenbeennaad;
  • aan beide kanten van de pas 1,5 centimeter wijdte weggehaald en ook uit de tailleband;
  • middenvoor bovenaan een centimeter lengte verwijderd uitlopend naar niks aan de zijnaad;
  • de ‘curve’ in de achterkruisnaad (bilnaad? :D) een klein stukje uitgediept;
  • de kontzakken een centimeter ingekort en een beetje van vorm veranderd;
  • de pijpen een centimeter verlengd.

I drew on the pockets so I could check the placement. The pictures are of the muslin after I adjusted it a bit. I did the following adjustments:

  • added 1,5 centimeter to the inseam length;
  • removed 1,5 centimeter of width from both sides of the yoke and the waistband;
  • removed a centimeter of the top of the CF seam, graded to nothing at the sides;
  • changed the back crotch curve a little;
  • shortened the back pockets by a centimeter and changed the shape a bit;
  • added a centimeter to the length of the legs.

Dit is wat ik met de zakken deed (nadat ik ze had ingekort):

This is what I did to the pockets (after shortening them):


Sandra jeans 10


Oke, dat was een hele lange inleiding, maar het resultaat mag er zijn (vind ik dan)!

Well that was a very long introduction, but the result was worth it I think!


Sandra jeans 01

Sandra jeans 03

Sandra jeans 04


Sandra jeans 02


Je ziet de rits bij de gulp een beetje maar dat is dan ook het enige wat ik op te merken heb aan deze broek, en bovendien wordt dat toch wel bedekt door mijn shirt. Hij zit heerlijk!! Deze foto’s zijn genomen nadat ik hem een middag en avond gedragen had dus hij is een klein beetje uitgelopen, maar dat heb je bij spijkerbroeken zonder stretch. Het stoort me ook totaal niet, ik ben juist superblij met deze pasvorm!

You can see the zip a bit at the fly but that’s NBD because it will always be covered by my shirt. This thing is so comfortable! These pictures were taken after I wore them the afternoon and evening before so the fabric stretched a bit. It happens with non-stretch denim but it doesn’t bother me at all, I think the fit is still great!


Sandra jeans 05


Sandra jeans 08


Even de details showen hoor 🙂 Een spijkerbroek maken is VEEL werk, en ook wel precisiewerk, maar als het dan goed lukt is het ook heel bevredigend.

Showing off the details here 🙂 Making a pair of jeans is a LOT of work, and it involves a lot of precise stitching, but if it works out it’s very satisfying.


Sandra jeans 07


Alleen zullen die details niet altijd voor iedereen zichtbaar zijn 😀

It’s just that not all details will be visible for the general public 😀


Sandra jeans 06


Mocht ik in de toekomst nog een exemplaar maken (vast wel) dan ga ik toch één dingetje veranderen: de zoom aan de achterkant wat lager maken en aan de voorkant wat hoger. Dat hangt wat makkelijker bij schoenen. Niet dat het me stoort, maar is dat juist niet datgene wat zelf maken zo leuk maakt: dat je dingen tot in de puntjes kunt perfectioneren?

If I make another pair in the future (which I’m sure I will), I’ll change just one little thing: I’d make the legs a bit longer on the back and shorter on the front, to make them hang better when wearing shoes. I’m not bothered by how the hem hangs on this pair, but isn’t that the beauty of making things yourself: you can change even the smallest of details to make something just perfect for you?