Solid as a rock

Een effen jurk, lang geleden dat ik die maakte! Mijn eerste Cami jurk was effen zwart, maar met gekleurde stiksels. En verder alleen deze blauwe NL 6000 jurk, geloof ik… Hoog tijd om daar maar eens verandering in te brengen 🙂

A dress from a solid fabric, it has been quite a while since I made one! My first Cami dress is solid black, but has contrast topstitching. My first NL 6000 dress must have been the only true solid dress I have made… About time to change that 🙂

20140625-164023-60023235.jpg

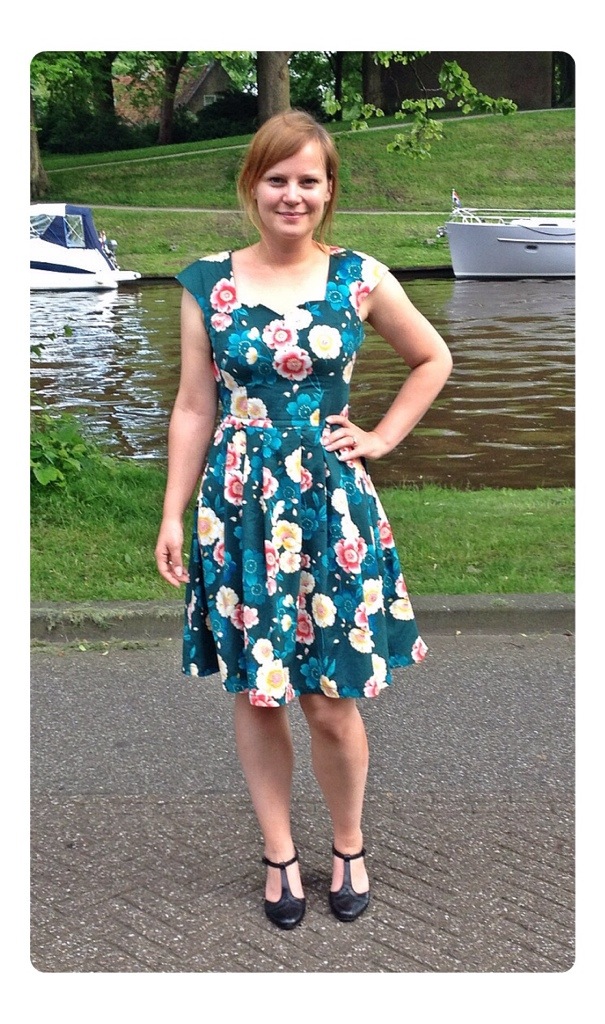
Ook dit patroon heb ik zelf gemaakt. Marijn en ik zijn gek op tv-series, en een poos geleden keken we Borgen. Birgitte Nyborg heeft op een gegeven moment een groene jurk aan met een v-hals en knoopjes. Die vond ik zo tof dat ik besloot om m een keer na te maken. Helaas kan ik geen foto vinden van die jurk, dus je zal het van me aan moeten nemen dat ie er echt op lijkt. Alleen dan niet groen.

This is a pattern I’ve made myself again. Marijn and I love watching tv series, and a while ago we were watching Borgen. Birgitte Nyborg is wearing a green v-necked dress with front button closure in one episode and I liked it so much that I decided to make a dress like that one day. Unfortunately I can’t find a pic of that dress so you’ll just have to take my word for it that this dress really looks like that one. It’s just not green.

20140625-205254-75174060.jpg

Kapmouwtjes zijn voor mij echt de ontdekking van het jaar. Ze bedekken de schouders genoeg voor op het werk en geven niet zo’n opgefrummelde look onder een vestje. En als bonus: gebruiken niet veel stof. Deze jurk is gemaakt van 1,5 meter stof! Oke, ik gebruikte een restje van mijn Christmas Cami voor het beleg maar dat telt niet echt mee toch?

Cap sleeves are the discovery of the year for me. They cover enough of the shoulders to be suitable for work and don’t bunch up under a cardigan. And bonus: they use very little fabric. This dress only took 1,5 meter of fabric! Ok, I used a remnant from my Christmas Cami for the facing but that doesn’t really count, right?

20140625-205845-75525050.jpg

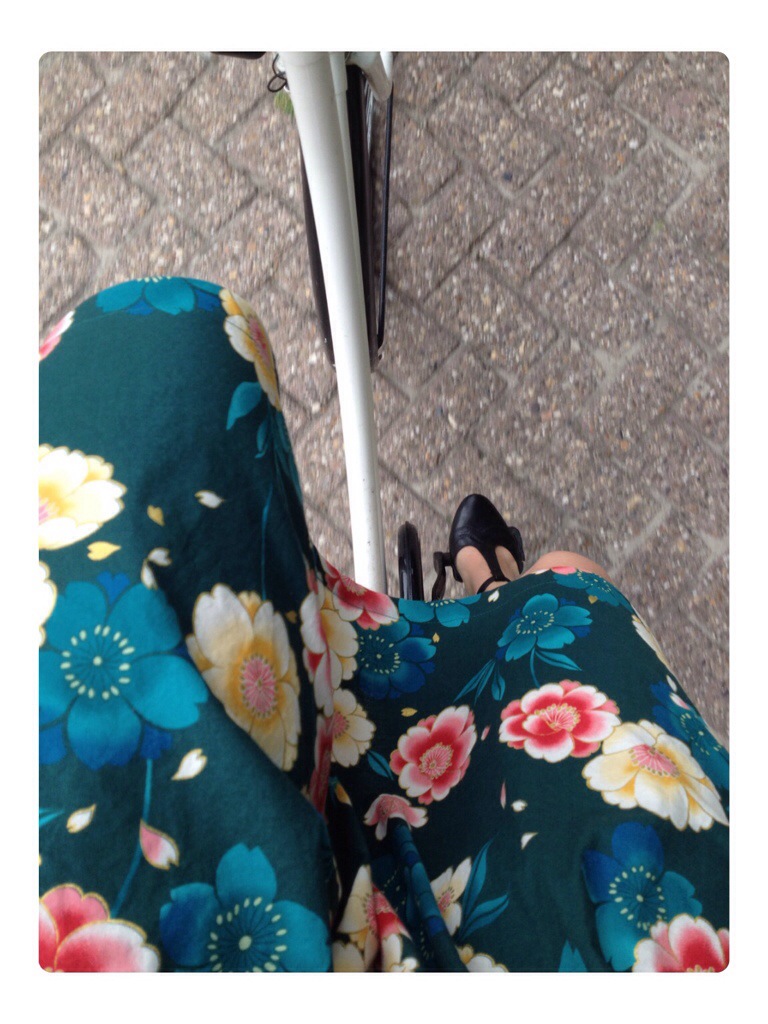
De rok is een halve cirkelrok, dat leek me leuk om eens uit te proberen. Het patroon maken was een eitje met behulp van de By Hand London app. Ik denk dat ik dit soort rok vaker ga gebruiken, een mooie afwisseling voor de gerimpelde en geplooide exemplaren.

The skirt is a half cirkle one, I thought it would be a fun shape to try out. Making the pattern was a piece of cake using By Hand London’s app. I think I’ll use this skirt pattern more often, it’s a nice deviation from the gathered and pleated ones I often use.

20140625-211546-76546446.jpg

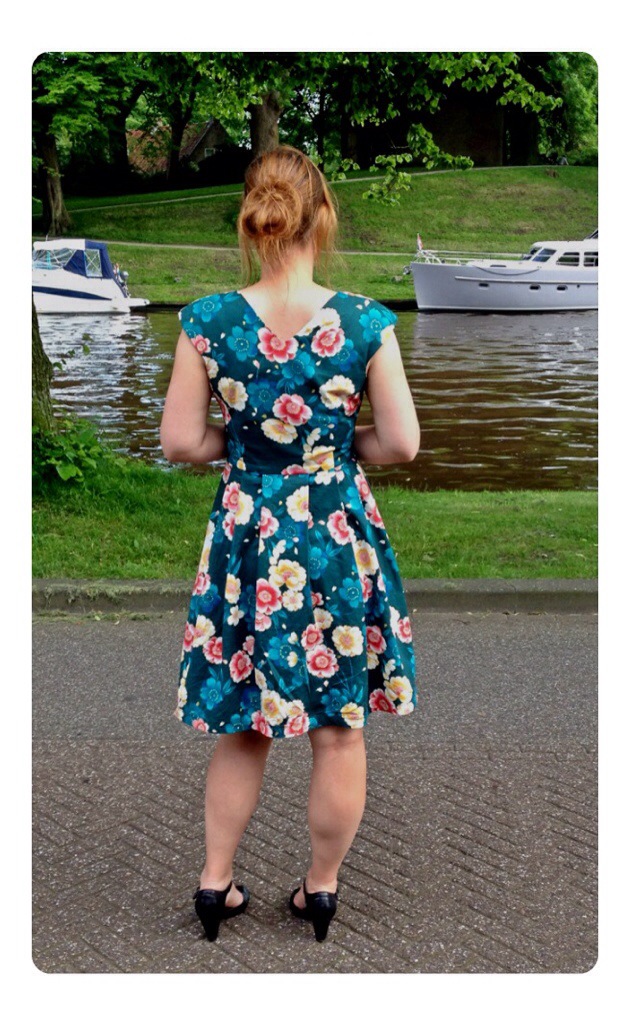
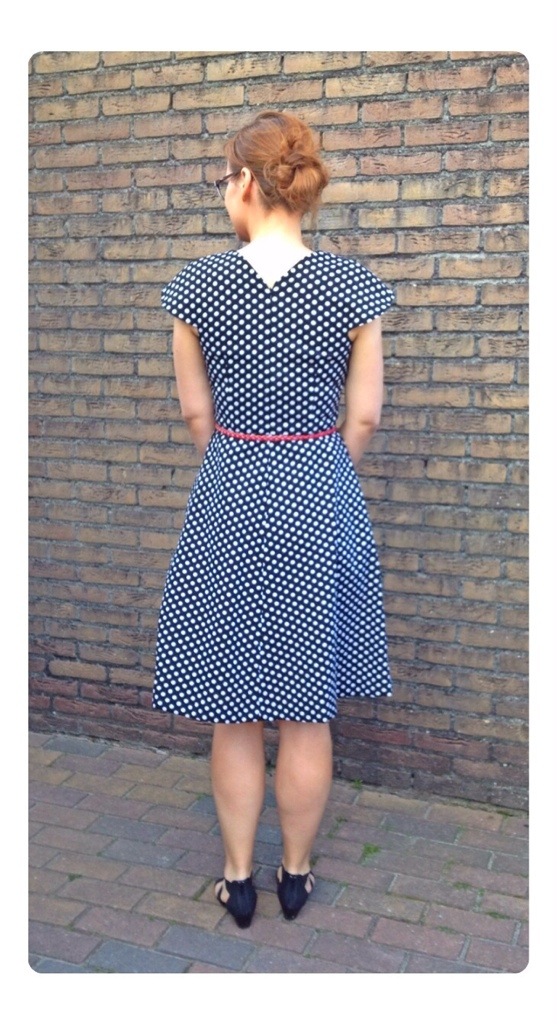
De achterkant. Volgende keer trek ik ‘m even recht voor de foto 😉 En hallo kreukels! Maar ook: hallo, precies genoeg ruimte op de rug om te bewegen, zonder op de klokkenluider van de Notre Dame te lijken.

The back view. Next time I’ll make sure it’s straight before I take the picture 😉 And: hello wrinkles! But also: hello, exactly enough ease to move, but not enough to look like the hunchback of the Notre Dame.

20140625-211949-76789907.jpg

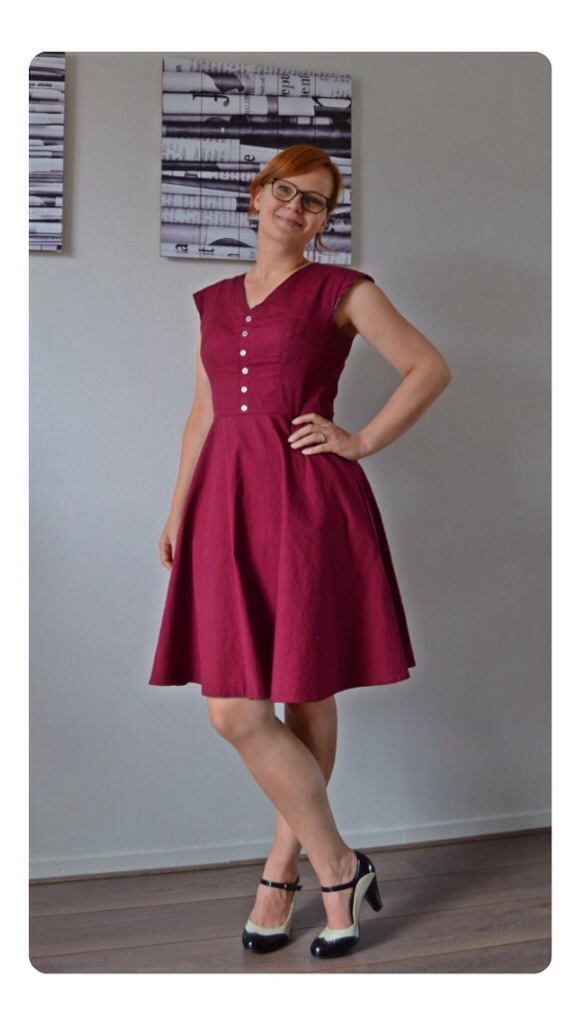
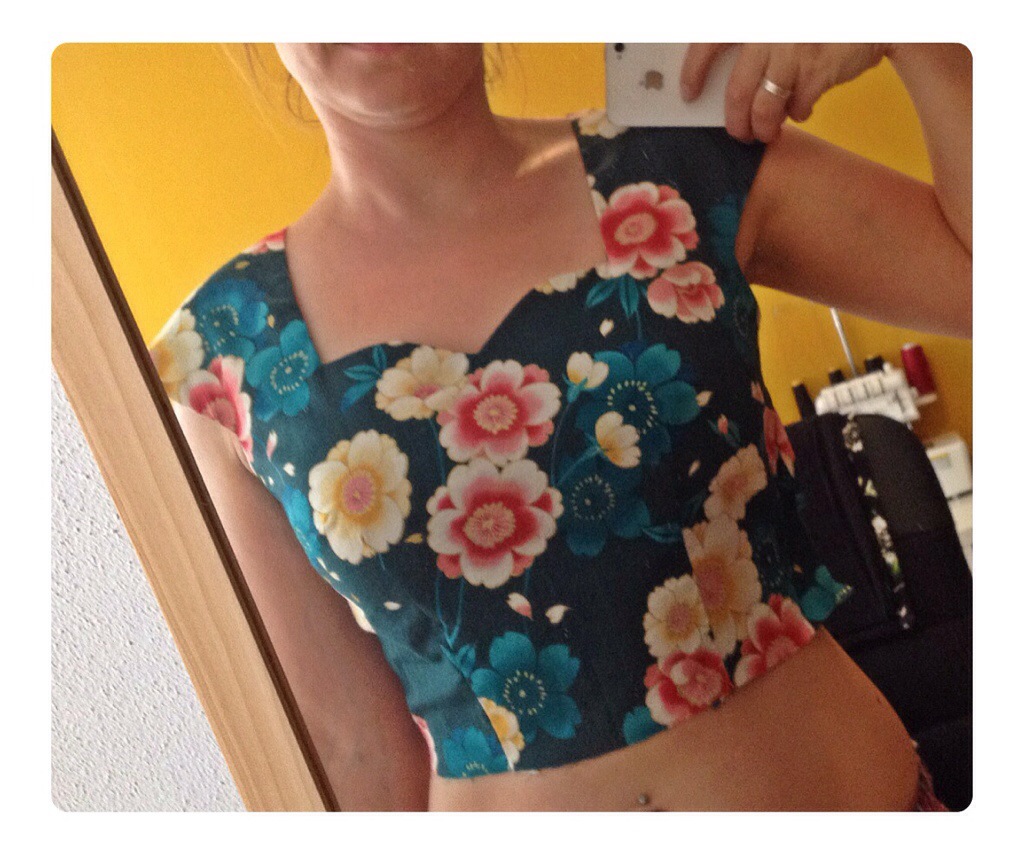
Deze foto doet het al een beetje vermoeden: ik ben erg blij met deze jurk! Een heel klein puntje van kritiek: ik ben vergeten om de halslijn te ‘staystichen’ waardoor die een heel klein beetje uitgerekt is. Hopelijk helpt het opschrijven hiervan om het niet weer te vergeten (maar ik heb een donkerbruin vermoeden van niet hehe).

Perhaps this pic gives it away a little: I am quite happy with thow this dress turned out! Just one minor complaint: I forgot to staystitch the neckline and it has stretched a teeny bit. Hopefully writing this down will help me remember it next time (although it probably won’t hehe).

20140625-212603-77163259.jpg

Een klein beetje hobbelig inderdaad. Het beleg piept een heel klein beetje onder de mouwtjes uit maar dat vind ik er juist wel leuk uitzien. De knoopsgaten zijn overigens niet functioneel, ze zitten nog dicht. Ik heb de biezen aan elkaar genaaid, er zit een rits in de zijnaad.

It’s a little wobbly indeed. The facing peeks out a bit from underneath the sleeves but I quite like that. The buttonholes aren’t functional. I sewed the plackets together, there is a zipper in the side seam.

20140625-212756-77276161.jpg

Een met de hand genaaide zoom. Mag ik zeggen dat het WK perfect is om voetbal en met de hand naaien te combineren? Ja, dat mag ik zeggen!

A hand sewn hem. Guys, watching the world championship on tv is so perfect for hand stitching!

20140625-213012-77412793.jpg

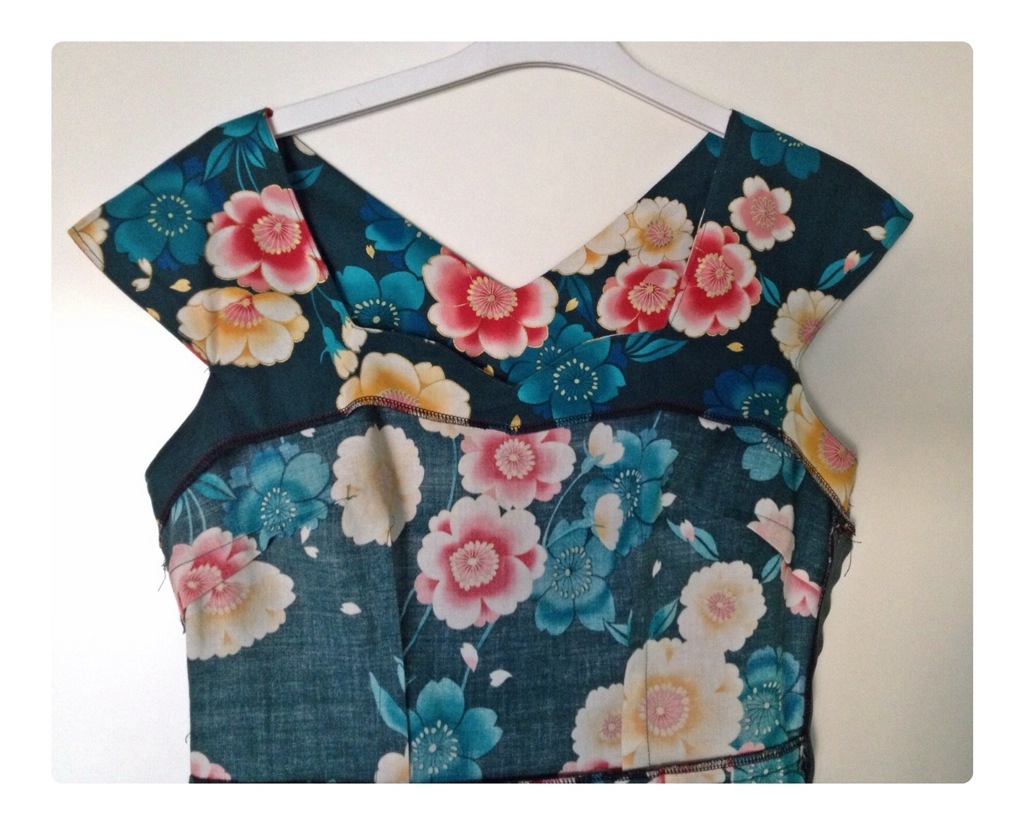
Als uitsmijter nog een paar details. Waar ik misschien nog wel het allertrotststst op ben is de manier waarop het beleg en de knoopsgatenbies in elkaar overgaan. Dat had ik zo uitgedacht en het werkte ook nog. Niet dat iemand het ziet, maar ik weet dat het er zit. Is dat niet het mooie van zelf kleren maken?

Last but not least some details. The thing I’m actually the most proud of is the way the facing and the button placket connect. I thougt it out that way and it worked out exactly like that. Not that anyone will ever see it, but I know it’s there. Isn’t that the beauty of making your own clothes?

From Crepe-ish to Cambie-ish

Het patroon van mijn vorige jurk baseerde ik op dat van de Crepe. Ik zei toen al dat ik nog een paar dingetjes wilde aanpassen: de halslijn verlagen en de mouwtjes iets minder ehm, aanwezig maken. Afgelopen week had ik eindelijk weer tijd om achter de naaimachine te kruipen en dus ging ik aan de slag.

The pattern of my last dress was based on the Crepe. In that post I said I wanted to make some adjustments: lowering the neckline and make the sleeves a bit less, well, big. Last week I finally had some sewing time and so I got to work.

20140607-222356-80636134.jpg

Efficient patroonknippen / efficient pattern cutting

Ik naaide het bovenlijf in elkaar en keek of het paste. Toen zag ik het: ik had mijn Crepe-achtige patroon omgetoverd in een Cambie-achtig patroon!

I sewed up the bodice and tried it on for fit. And then I noticed: I had changed my Crepe-ish pattern in a Cambie-ish pattern!

20140607-222653-80813759.jpg

Eerst was ik eigenlijk een beetje teleurgesteld. Ik heb twee Cambies gemaakt (hier en hier) en die passen beide prima, dus het voelde een beetje alsof al dat patroontekenwerk voor niks was geweest. Maar ja, uiteindelijk gaat het om de jurk die eruit voorkomt en de ervaring van het doen, en toen kon ik wel over die eerste teleurstelling heen stappen.

At first I was a little disappointed. I have made two Cambie dresses (here and here) and they fit pretty good, so it felt a bit like all that pattern drafting was for nothing. But then I realised in the end it is about the resulting dress and the learning experience and I was able to get past that first bit of disappointment.

20140607-223131-81091888.jpg

Ik besloot wel om de rok te plooien in plaats van te rimpelen, wat ik eerst van plan was, om de gelijkenis met de Cambie te verminderen. Na heel wat rekenwerk over hoeveel plooien en hoe breed die moesten zijn (waar ik uiteraard compleet niet uit kwam) besloot ik het maar met de vrije hand te doen. Het is niet helemaal symmetrisch maar dat valt niet op.

I did decide to pleat the skirt rather than to gather it, to decrease the resemblance to the Cambie. After doing a lot of math on the amount and width of the pleats (and not getting it) I decided to just wing it. It’s not perfectly symmetrical but that doesn’t really show.

20140607-224032-81632701.jpg

Uiteindelijk denk ik dat dit de best passende jurk is die ik tot nu toe heb gemaakt. Ik ben er zo blij mee!

In the end I think this is the best fitting dress I have made so far. I am so, so happy with it!

20140607-224242-81762192.jpg

Sorry voor de kreukels, maar ja dat krijg je met een katoenen jurk. Waarschijnlijk ziet ‘ie er vaker zo uit dan perfect gestreken. En ook voor de crappy foto’s, maar dat was alles wat ik voor elkaar kreeg bij Marijn. Voor degenen onder jullie met een gewillig fotograferende vriend/man: wees er maar zuinig op 😉

Sorry about the wrinkles, but well, this is what you get with a cottong dress. It will probably look like this way more than perfectly ironed. Also sorry for the crappy pics. For those with a boyfriend/husband willing to take loads of pics: consider yourself lucky 😉

20140607-224513-81913397.jpg

Close-up van de figuurnaden. Als ik heel kritisch ben denk ik dat die aan de zijkant nog wel een halve centimeter naar beneden kan. De hoogte van de apex is anderhalf jaar geleden opgemeten door mijn naai-juf, sindsdien ben ik wat afgevallen en wat ouder geworden, dus misschien zijn de dames ook wel wat gezakt.

Close-up of the bust darts. If I’m really nitpicky I think I could probably lower the side dart about a half a centimeter. The apex height was measured by my sewing teacher a year and a half ago, and since then I lost some weight and got a bit older, so maybe the ladies sagged a bit.

20140607-225047-82247093.jpg

20140607-225047-82247906.jpg

Een close-up van de halslijn en de belegdelen. Voor het beleg gebruikte ik Jenny haar tutorial, waarin ze heel goed uitlegt hoe je een mooie afwerking krijgt. Ik wist al wel hoe dat moest als je een middenachter rits hebt, maar dit keer deed ik de rits in de zijnaad en had ik dus geen naad op de rug.

Another close-up of the neckline and the facings. I made an all-in-one facing and sewed it in as per Jenny’s fabulous tutorial. There is no center back seam in this dress because the zipper is in de side seam. I thought and thought about how to put in the facing when I remembered her great ‘making facings your friend’ series.

20140607-232021-84021436.jpg

De stof komt overigens van hier. Voor de stashbusters onder jullie: niet klikken!

The fabric is from here. For the stashbusters among you: don’t click this link!

Al met al begin ik patroontekenen steeds leuker te vinden. Ik ben wel benieuwd: maak jij ook je eigen patronen? En zo ja, waar haal je de inspiratie vandaan?

I’m really starting to like patterndrafting. I’m curious: do you draft your own patterns too? And if so, where do you get your inspiration for them?

Crepe-ish or the ‘oops’-dress

Lang geleden maakte ik al eens een paar patronen voor rokjes zelf. Daarna hield het eigenlijk een beetje op met mijn patroontekenavonturen. Maar een paar weken terug kreeg ik het opeens op mijn heupen en tekende ik een basispatroon voor mezelf. Niet zo eentje die ‘skintight’ is, maar met wat beweegruimte erin, net zoveel als dat mij ideaal leek. Vervolgens wilde ik het gaan gebruiken om het patroon van Colette’s Crepe jurk zo aan te passen dat die precies paste.

Some time ago I drafted some patterns for skirts, and then my adventures in patterndrafting kind of stopped. But a few weeks ago I was suddenly hit with an urge to draft someting, and I made a basic bodice. Not a skintight one like a block or a sloper (or whatever it is called), but one with just as much ease as I wanted to have. Then I decided to use it to adapt Colette’s Crepe pattern to fit me.

20140525-183456-66896655.jpg

Dat ging hardstikke goed. Ik legde het Crepe patroon op mijn patroon en trok het over zodat mijn zelfgemaakte patroon de halslijn en mouwtjes van de Crepe kreeg. De taille was ongeveer even groot als die van maat 6 en dus nam ik die maar voor de rok. Ik maakte een bovenlijf-proefje van de stof die ik als voering wilde gebruiken en dat paste zowaar. Alles ging dus prima, totdat ik de patroondelen op de stof ging leggen. Te weinig stof. Oeps.

So far so good, I put the Crepe pattern on top of my self drafted pattern and traced it so that my self drafted pattern got the neckline and sleeves of the Crepe pattern. The waist seemed to match the size 6 so I took that size for the skirt. I made a muslin of the bodice from the lining and it fitted. All went well untill I put the pattern pieces on my fabric. I didn’t have enough. Oops.

Maar ja, ik wilde per se die jurk uit die stof, en op dat moment! Dus ik paste mijn plannen wat aan, en besloot in plaats van de wikkelsluiting een rits middenachter te doen. En dus knipte ik 4x het voorpand van de rok en haalde ik het extra stuk van het achterpand van het bovenlijf af. Crisis afgewend. Ware het niet dat ik in mijn vastberadenheid vergat om naadtoeslag aan mijn nieuwe middenachternaad te knippen. Oops 2.

But, I wanted that pattern, made from that fabric, at that time. So I adapted my plan and decided to add a centre back zipper and eliminate the wrap part. To do that, I just cut 4 front pieces of the skirt and removed the wrap part from the bodice back. Crisis averted, I thought. Only to discover later on that I totally forgot to add seam alowance to the centre back. Oops 2.

20140525-184326-67406251.jpg

Uiteindelijk is het allemaal goed gekomen. Ik naaide de zijnaden op 1cm ipv 1,5 zodat ik ook een centimeter over had om de middenachternaad (3x woordwaarde!) te naaien. Ik denk dat dit de pasvorm wel een klein beetje beinvloed heeft maar ja, beter een beinvloede pasvorm dan een te kleine jurk!

It all worked out in the end though. I sewed the side seams on 1cm instead of 1,5cm seam allowance which gave me a centimeter to put in the centre back seam. I think this influenced the fit a bit but hey, an influenced fit is still better than a too small dress right?

20140525-184637-67597680.jpg

Ik ben erg blij met de vorm van de halslijn, alleen zou ik hem bij de volgende versie iets lager maken. En de mouwtjes iets smaller, want ik vind ze wel een beetje breed.

I’m very happy with the shape of the neckline, even though I will lower it a bit on a next version. I will also make the sleeves a little bit narrower, as I think they are a bit wide.

20140525-185017-67817250.jpg

Ondanks dat ben ik supertrots op deze jurk. Ik deed iets wat ik nooit eerder heb gedaan en het werkte!

Despite those things I am super proud of this dress. I did something I had never done before and it worked!

20140525-185323-68003707.jpg

Als kers op de taart besloot ik de zoom met een mooi kantje af te werken en met de hand te naaien.

To top it off I decided to use some lace in, and handstitch the hem

20140525-185440-68080657.jpg

De foto’s hierboven zijn niet de meest charmante die ik hier gepost heb – veel zon en weinig make-up, en een jolige bui, vooral door flauwe grapjes van mijn broertje op de achtergrond terwijl mijn vader foto’s probeerde te maken. De foto’s hierboven zijn nog prima vergeleken bij de foto’s waar de flauwe grapjes in resulteerden:

The pictures above are not the most flattering ones I posted here – bright sun, no make-up and making lots of stupid jokes with my brother in the background while my dad tried to take some pics. The ones above are just fine compared to these ones:

20140525-185828-68308773.jpg

20140525-190628-68788726.jpg

😁

Zelfgemaakt rokje

Jaja, dat maakte ik natuurlijk al eerder. Maar dit rokje heb ik hélemaal zelf gemaakt. In de naailes leer ik nu patroontekenen. En aangezien ik het beste leer door dingen te doen, heb ik meteen maar een rokje gemaakt!

A self-made skirt. Yes I’ve done that before but I completely made this one myself. Including the pattern. I started learning how to draft patterns in my sewing class. And for me the best way of learning is by doing things, so I made this skirt.

Dit is het patroon, het is er eentje zonder tailleband (want simpel beginnen) maar met een stolpplooi (want ook weer niet té simpel). De naadtoeslag heb ik er meteen maar bij aan getekend want dat vind ik prettig werken.

This is the pattern, without a waistband (to start with someting simple), but with an inverted pleat (not too simple either). I drafted the pattern including the seamallowance, I like patterns that have the seam allowance included.

Het was best een beetje spannend maar….

It was pretty exciting but….

Het past! Niet perfect, kennelijk hebben mijn heupen niet zo een perfecte ronding als de lineaal 🙂 Maar hé, het begin is er!

It fits! It’s by no means perfect, I guess my hips aren’t as perfectly rounded as the ruler 🙂 But it’s a good start!

Best goed voor een eerste poging al zeg ik het zelf. En na deze onderbreking weer vrolijk verder met…

Pretty good for a first try if I say so myself. And after this interruption back to…