Different directions

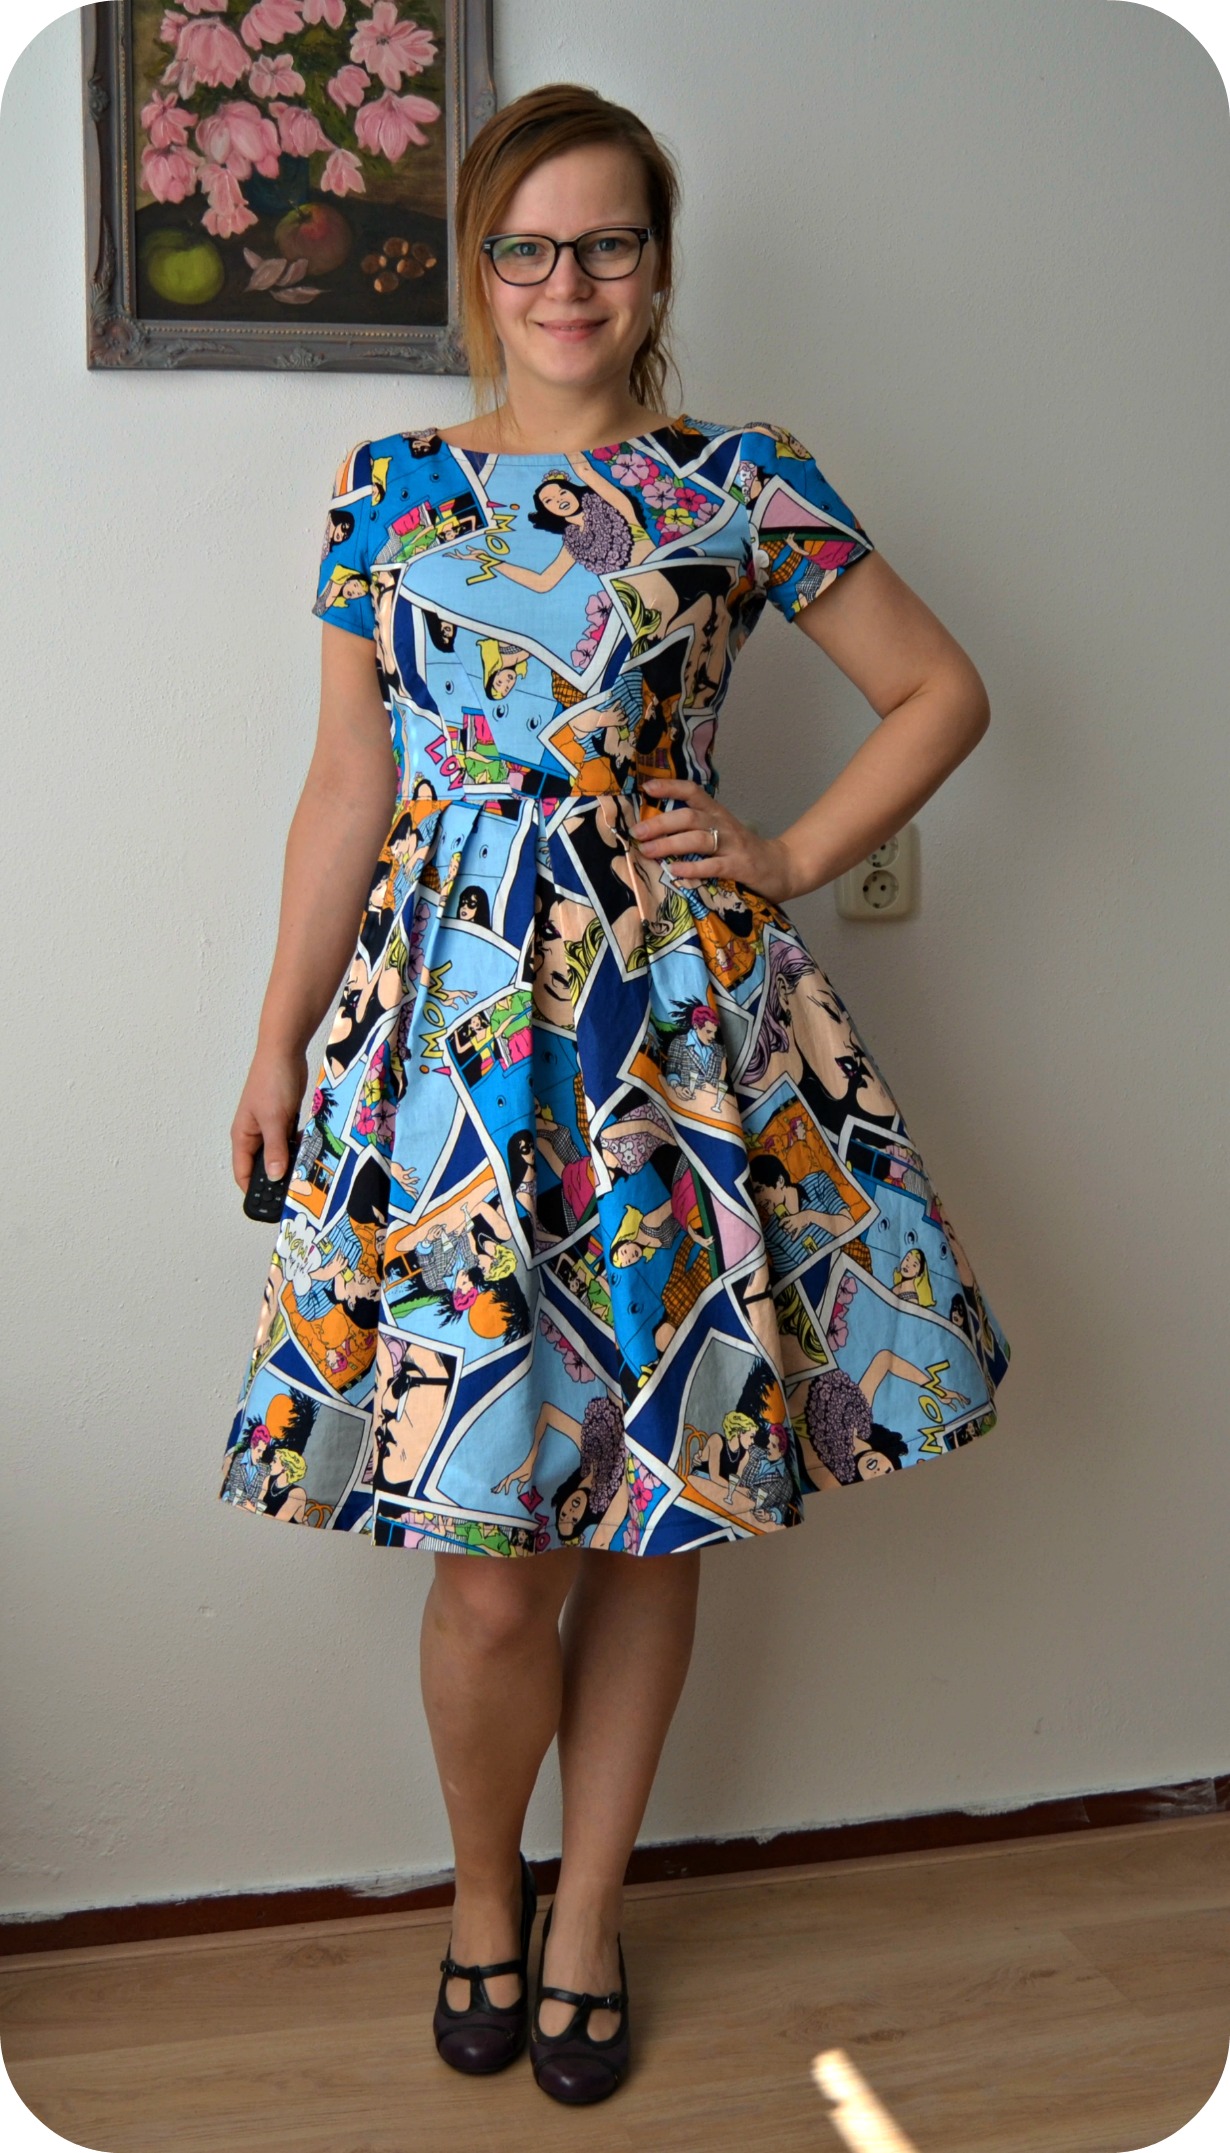
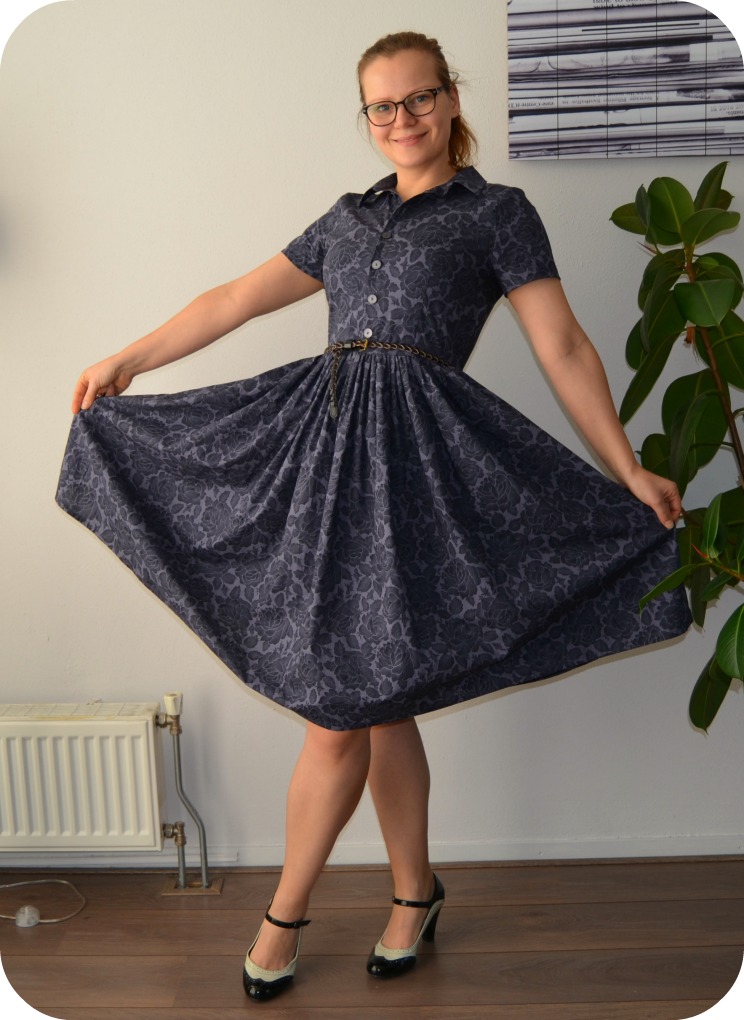
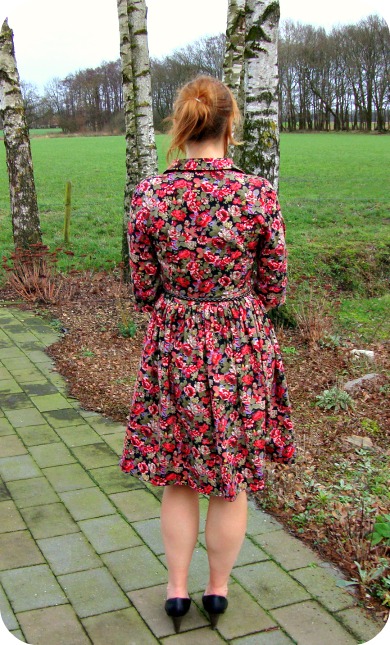
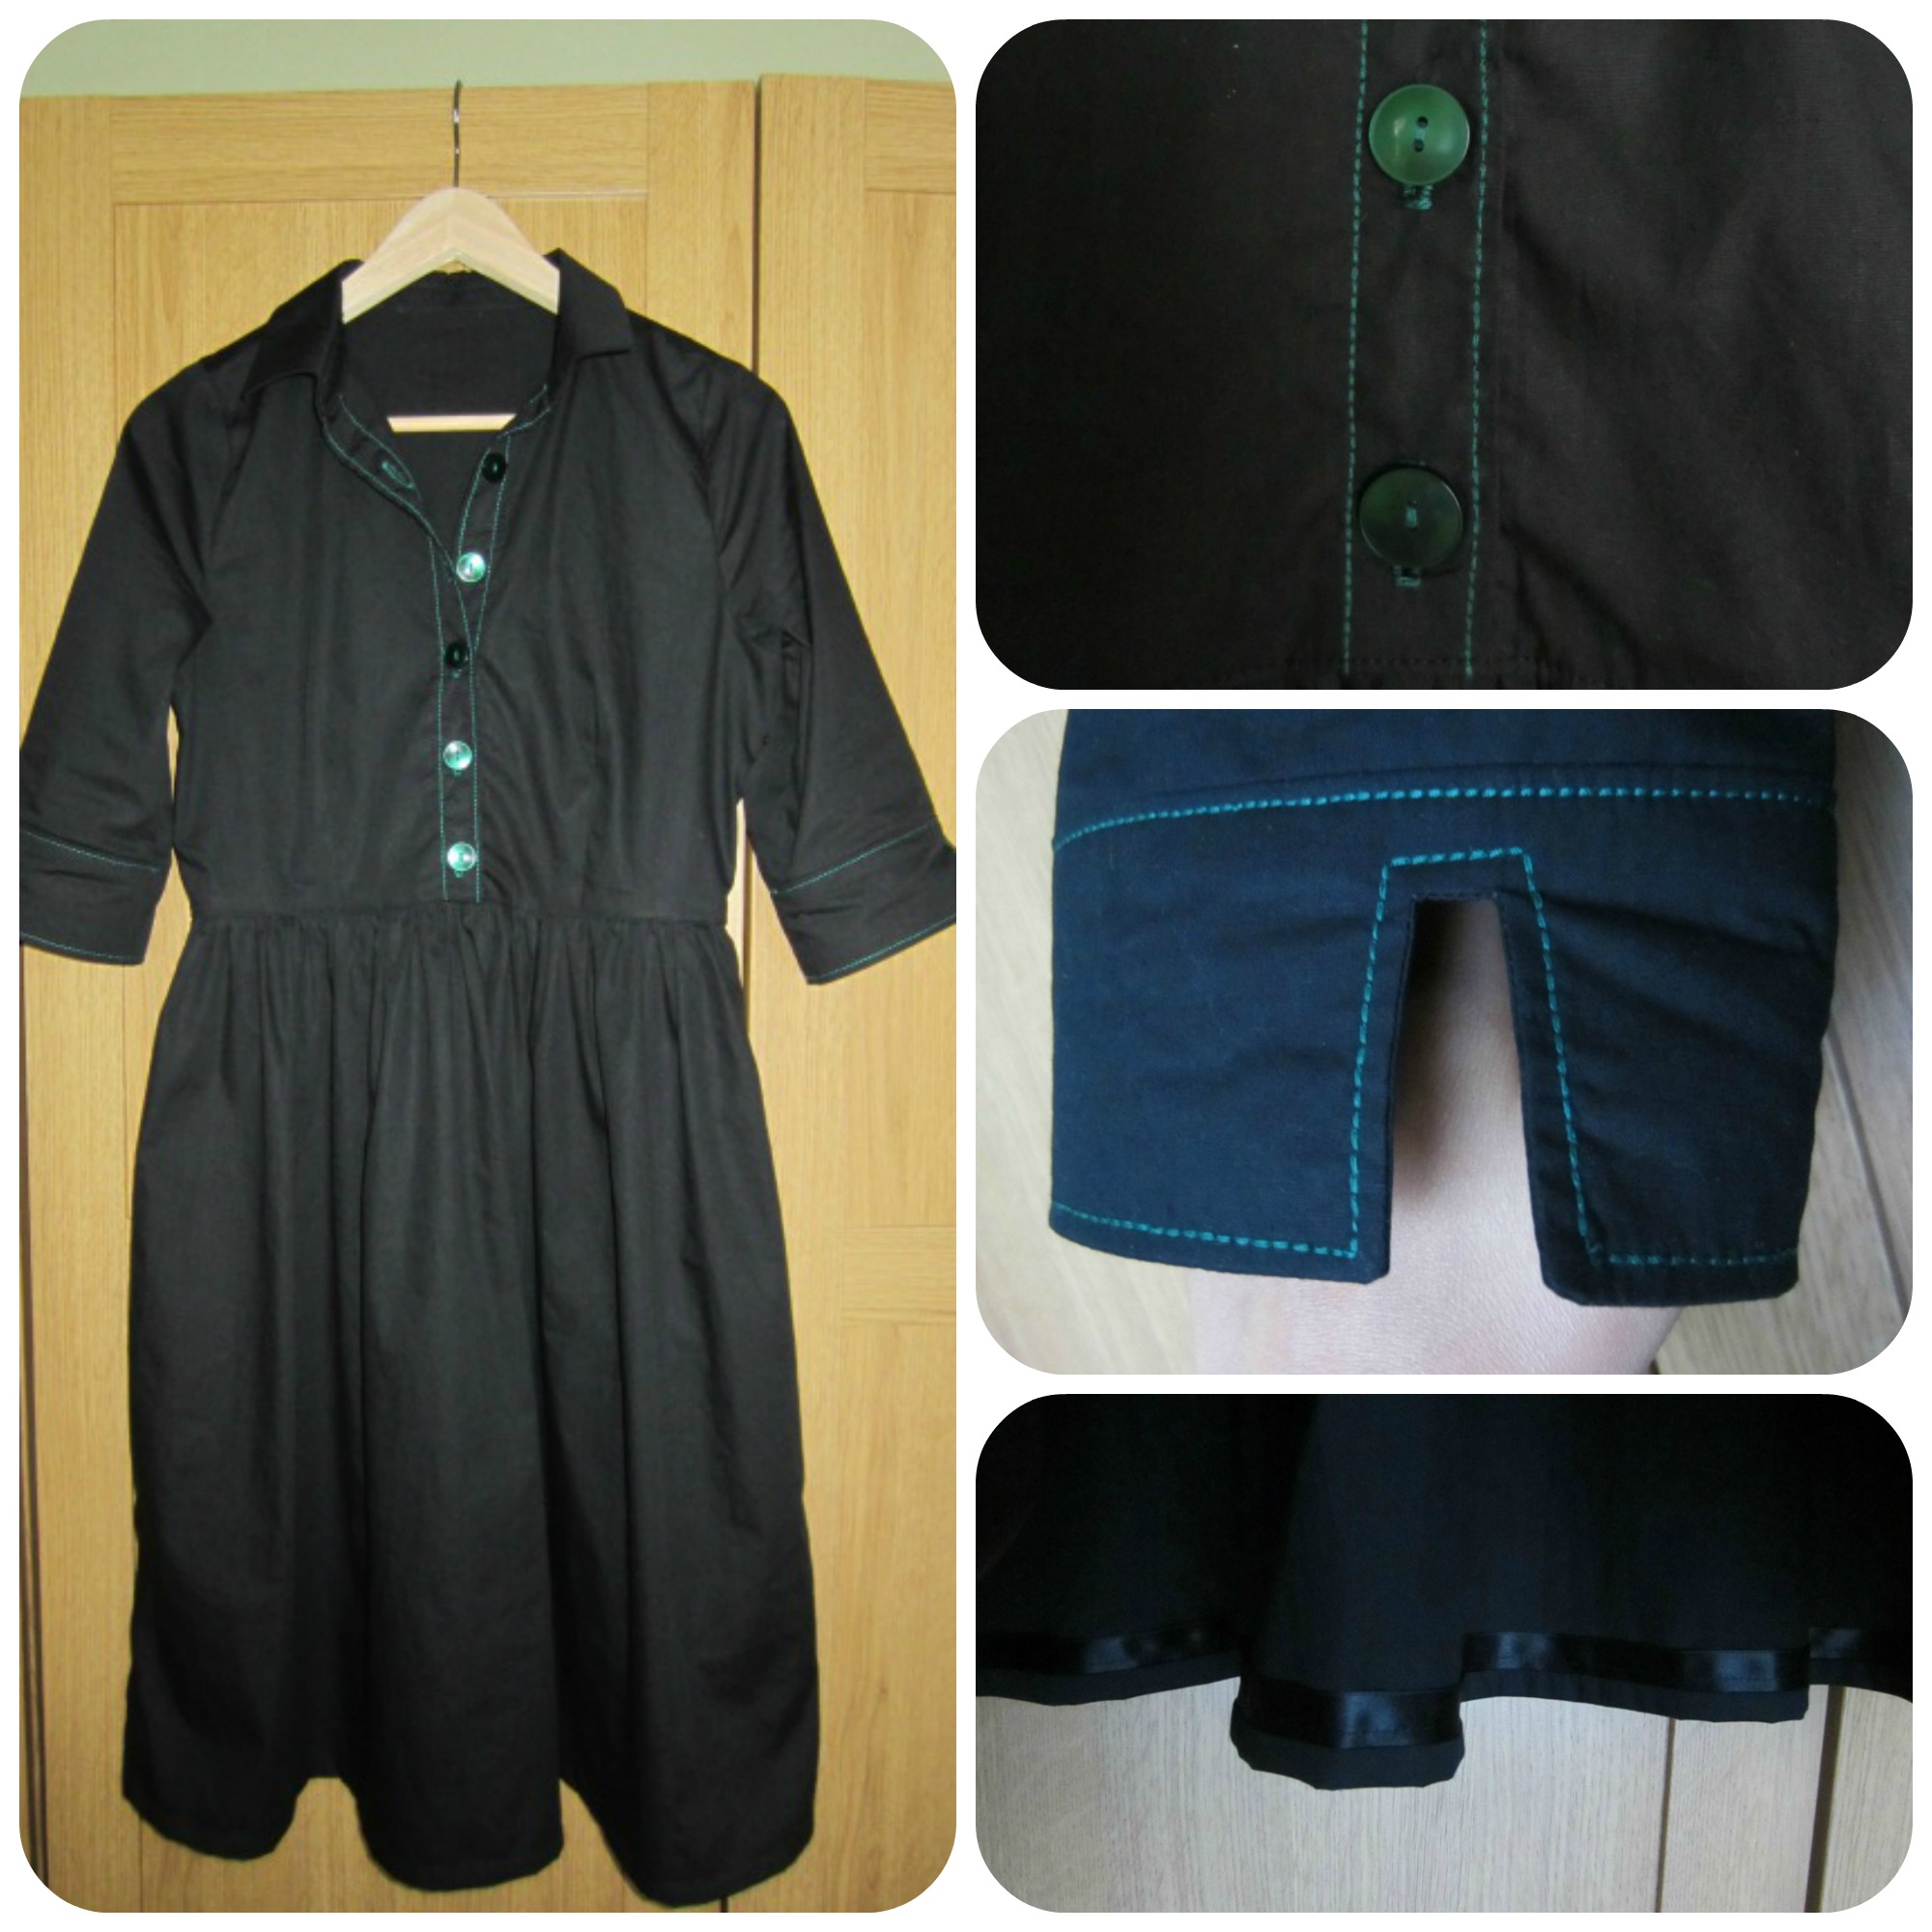
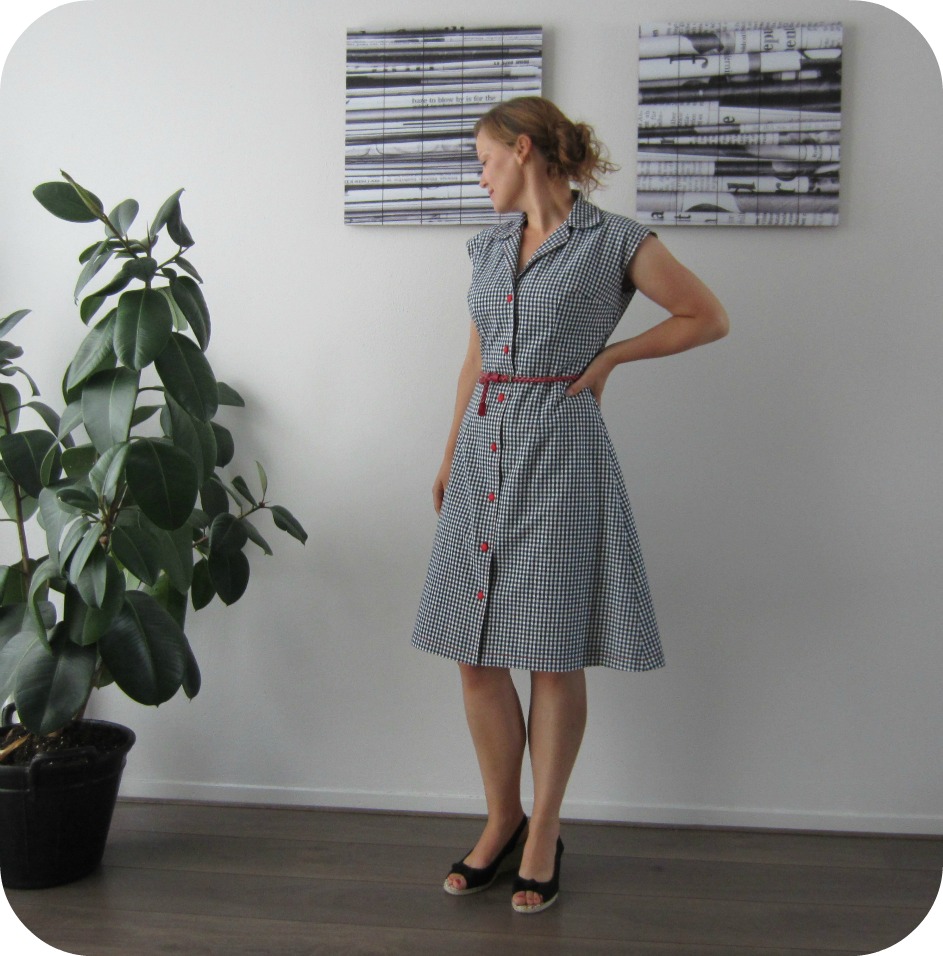
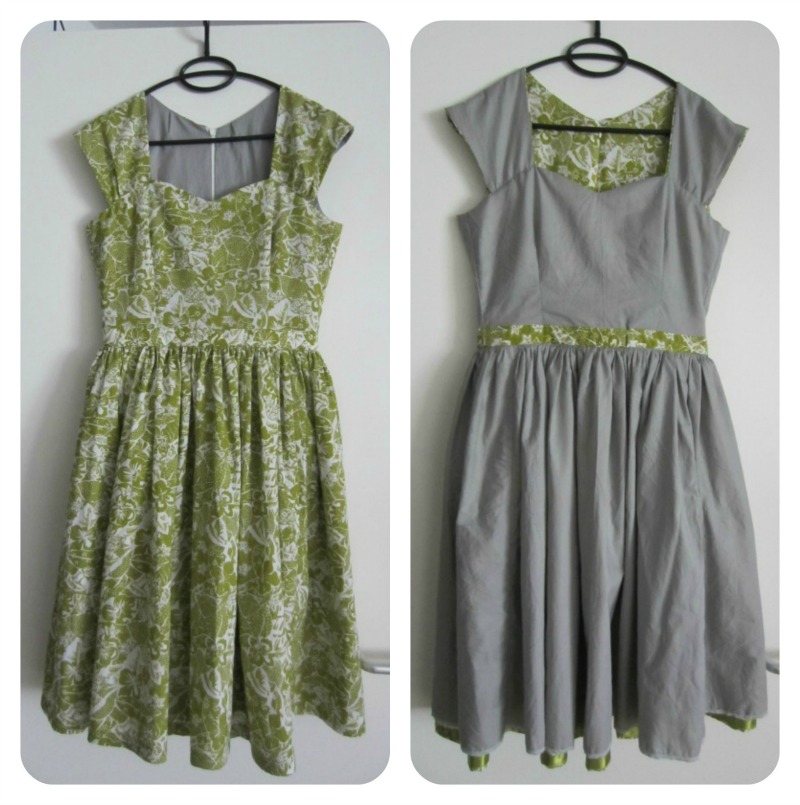
En dat is nummer 3, van Simplicity 2444! Dit keer met een gerimpelde rok, in plaats van de geplooide. Voor een beetje variatie, maar ook omdat het patroondeel voor de rok niet op mijn stof paste. Die was maar 1.10m breed.

And here’s number 3 of Simplicity 2444! This time with a gathered skirt instead of the pleated one. For a bit of variance but also because the pattern piece didn’t fit on the fabric, which was only 1.10m wide.

2444-3

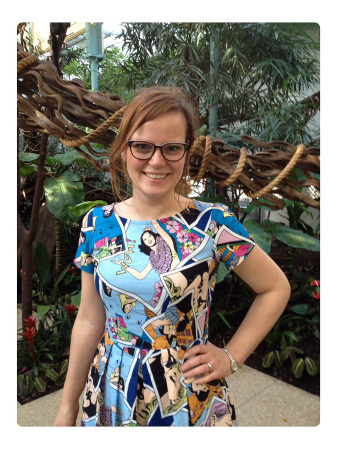
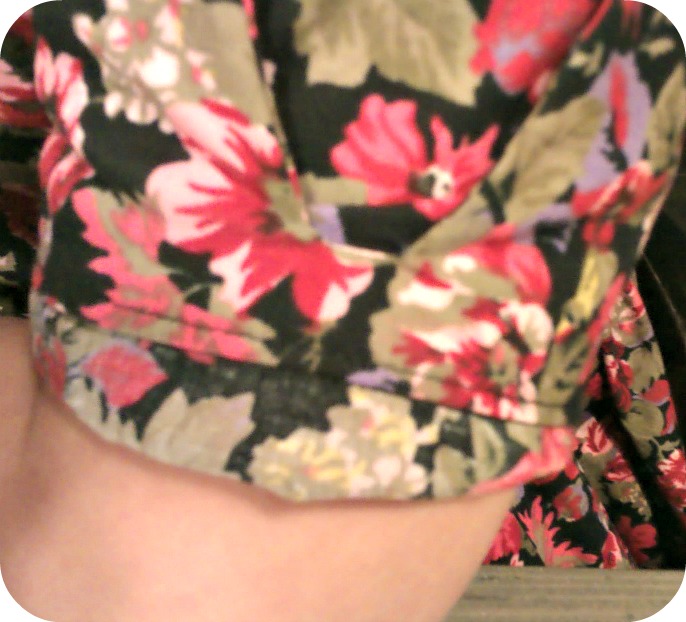
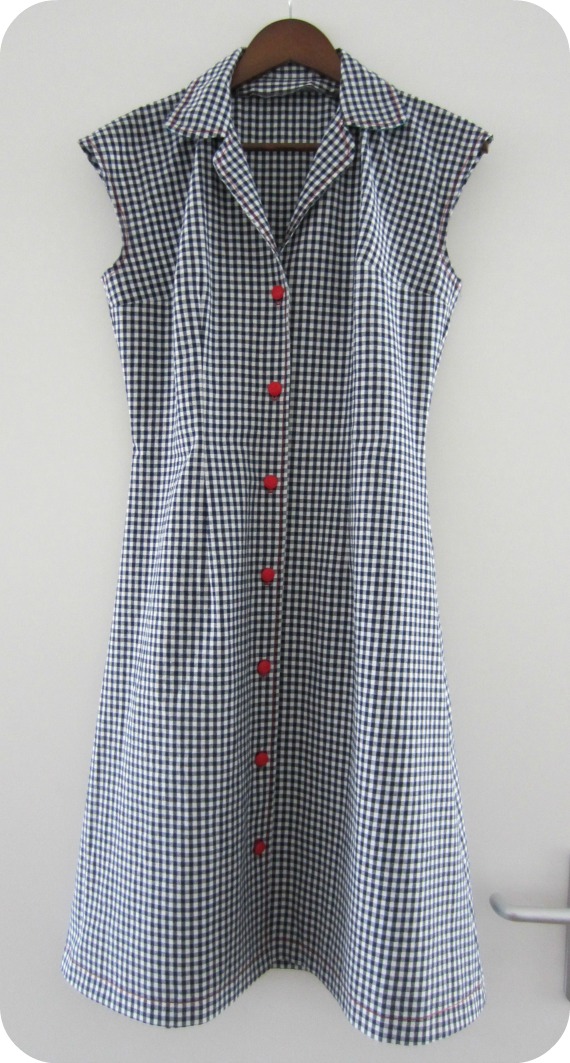
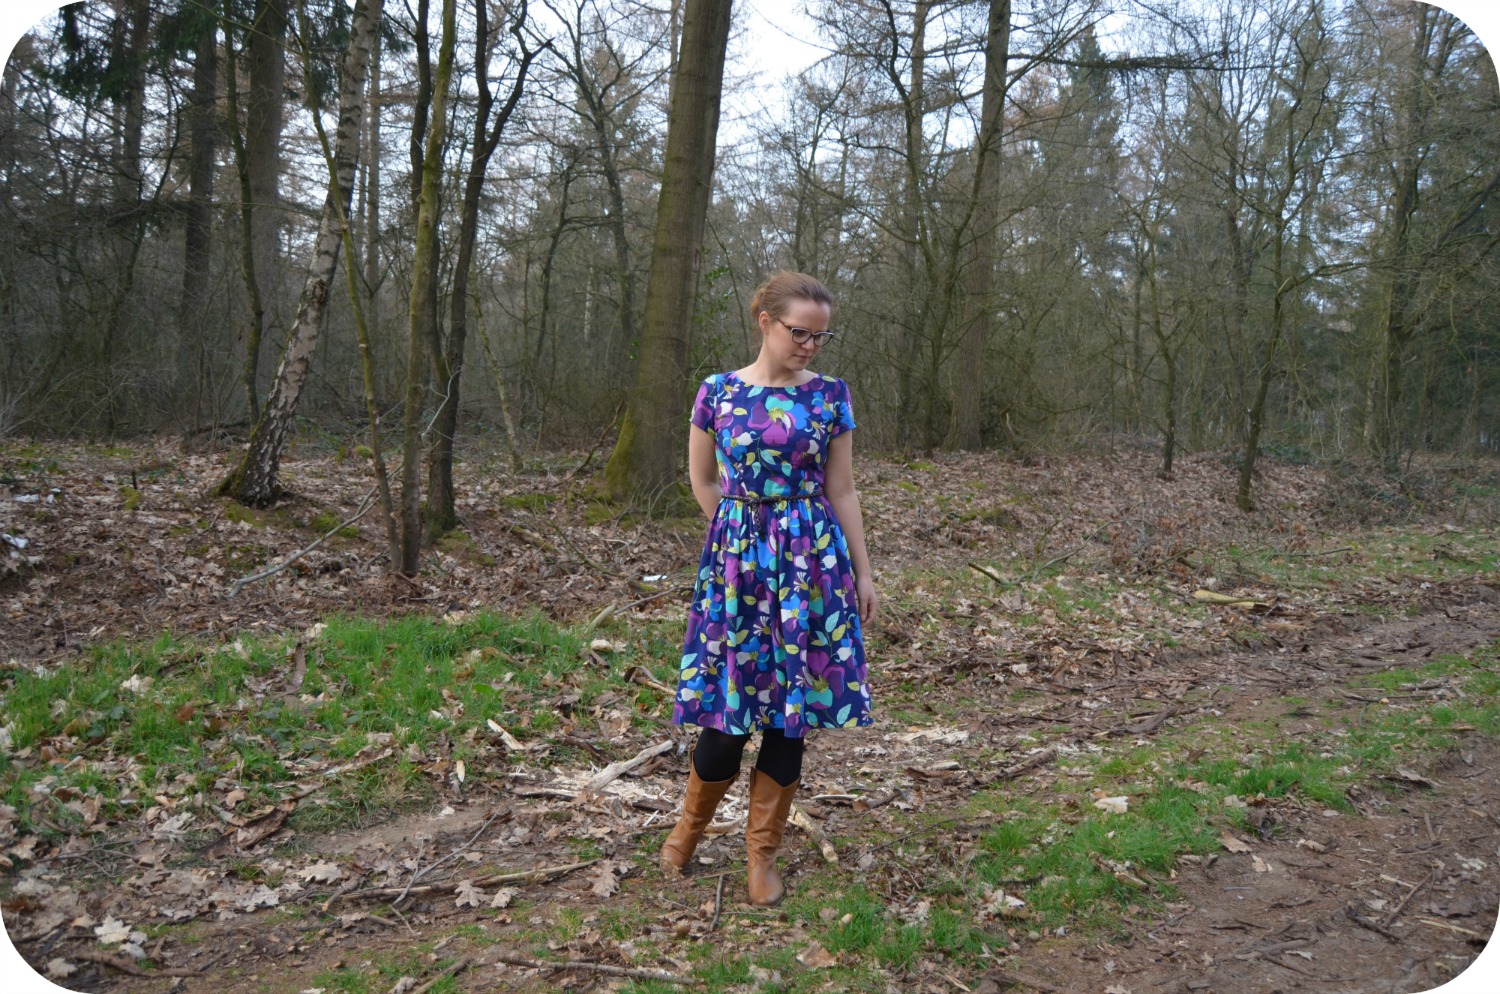
Laten we het even over de stof hebben (want over het patroon heb ik niet zoveel meer te vertellen). Is ‘ie niet prachtig?! Ik bestelde hem via modes4u.com. Als je een beetje tijd en geld over hebt, ga daar dan vooral een kijkje nemen. Als een kind in de snoepwinkel voelde ik me tijdens het uitzoeken!

Let’s talk about the fabric for a moment (because what’s left to say about the pattern?). Isn’t it fabulous?! I got it at modes4u.com. If you have some spare time and money, by all means take a look there. I felt like a kid in a candy store while browsing all those pretty fabrics!

2444-7

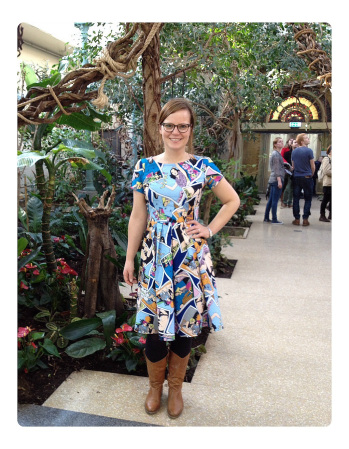
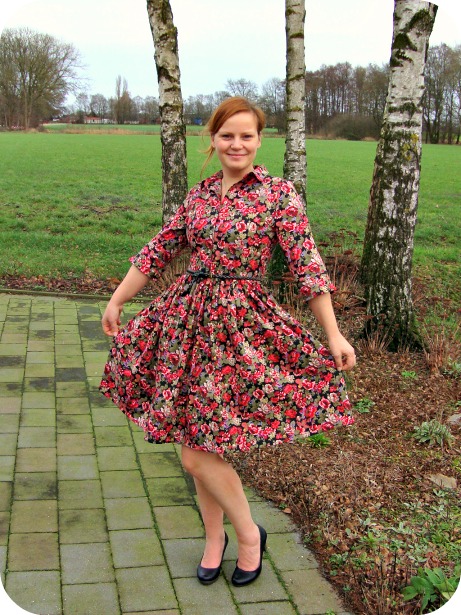
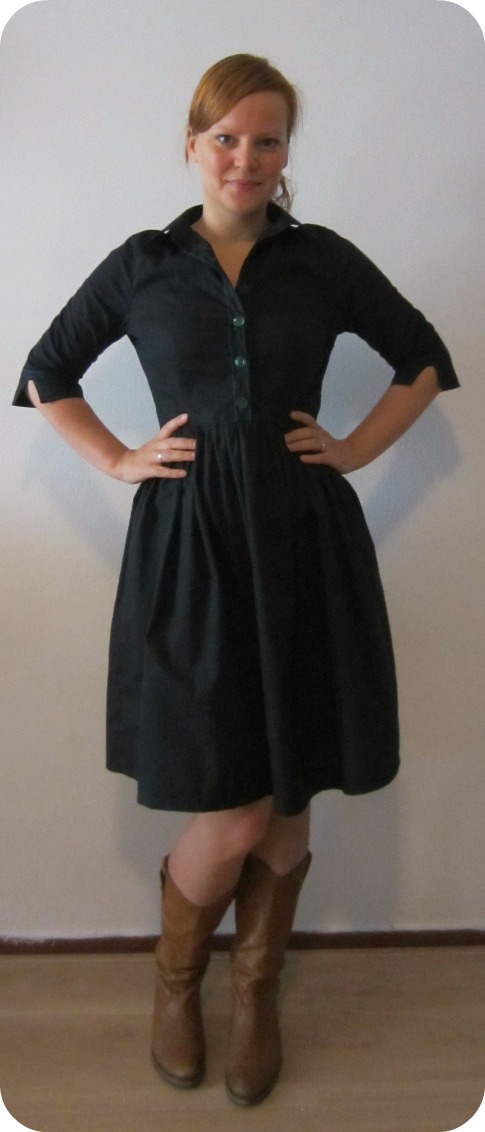
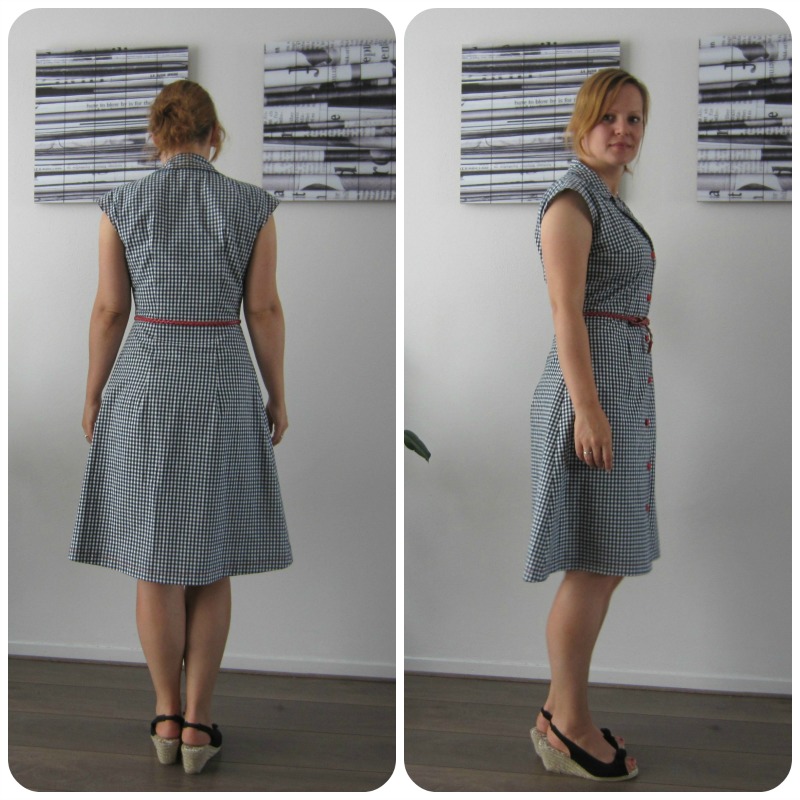
Deze foto’s maakte ik onderweg van mijn werk naar huis. Dat is het voordeel van een mooie (alhoewel een beetje lange) route naar het werk. Parkeren op een parkeerplek, stukje door het bos banjeren et voila, alle gelegenheid om in de rust foto’s te maken met het statief, zonder dat de rest van de wereld meekijkt.

I took this pics on the way home from work. That’s the plus side of a scenic (albeit quite long too) route to work. I parked on a parking along the road, walked into the woods et voila, a nice place to take some pics without the world watching.

2444

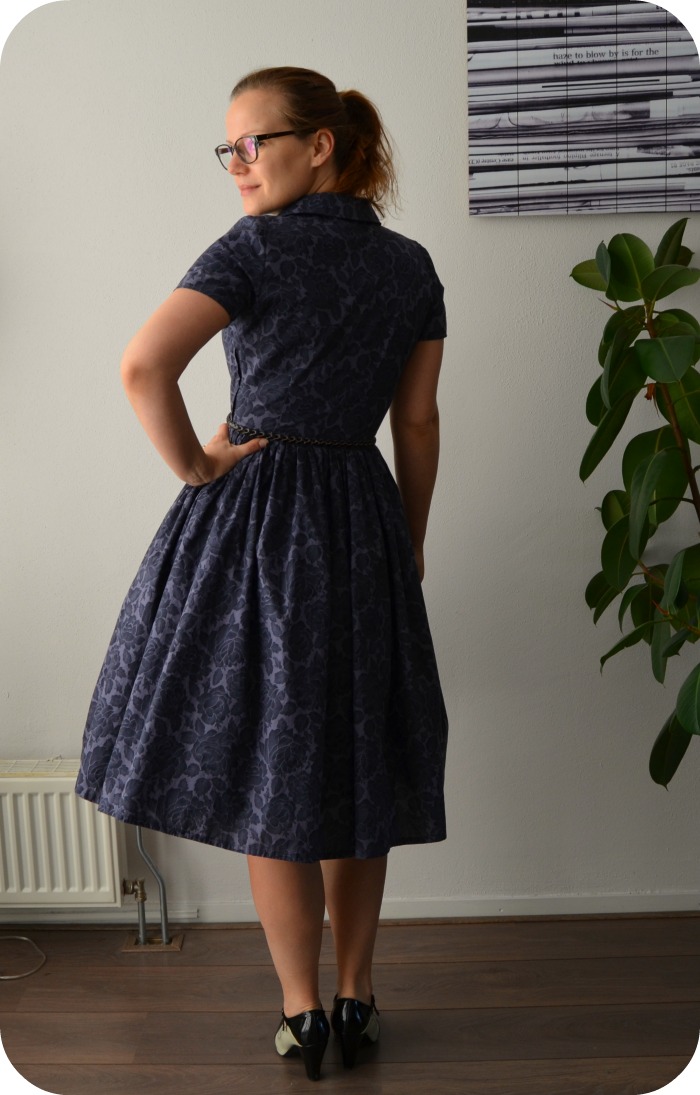
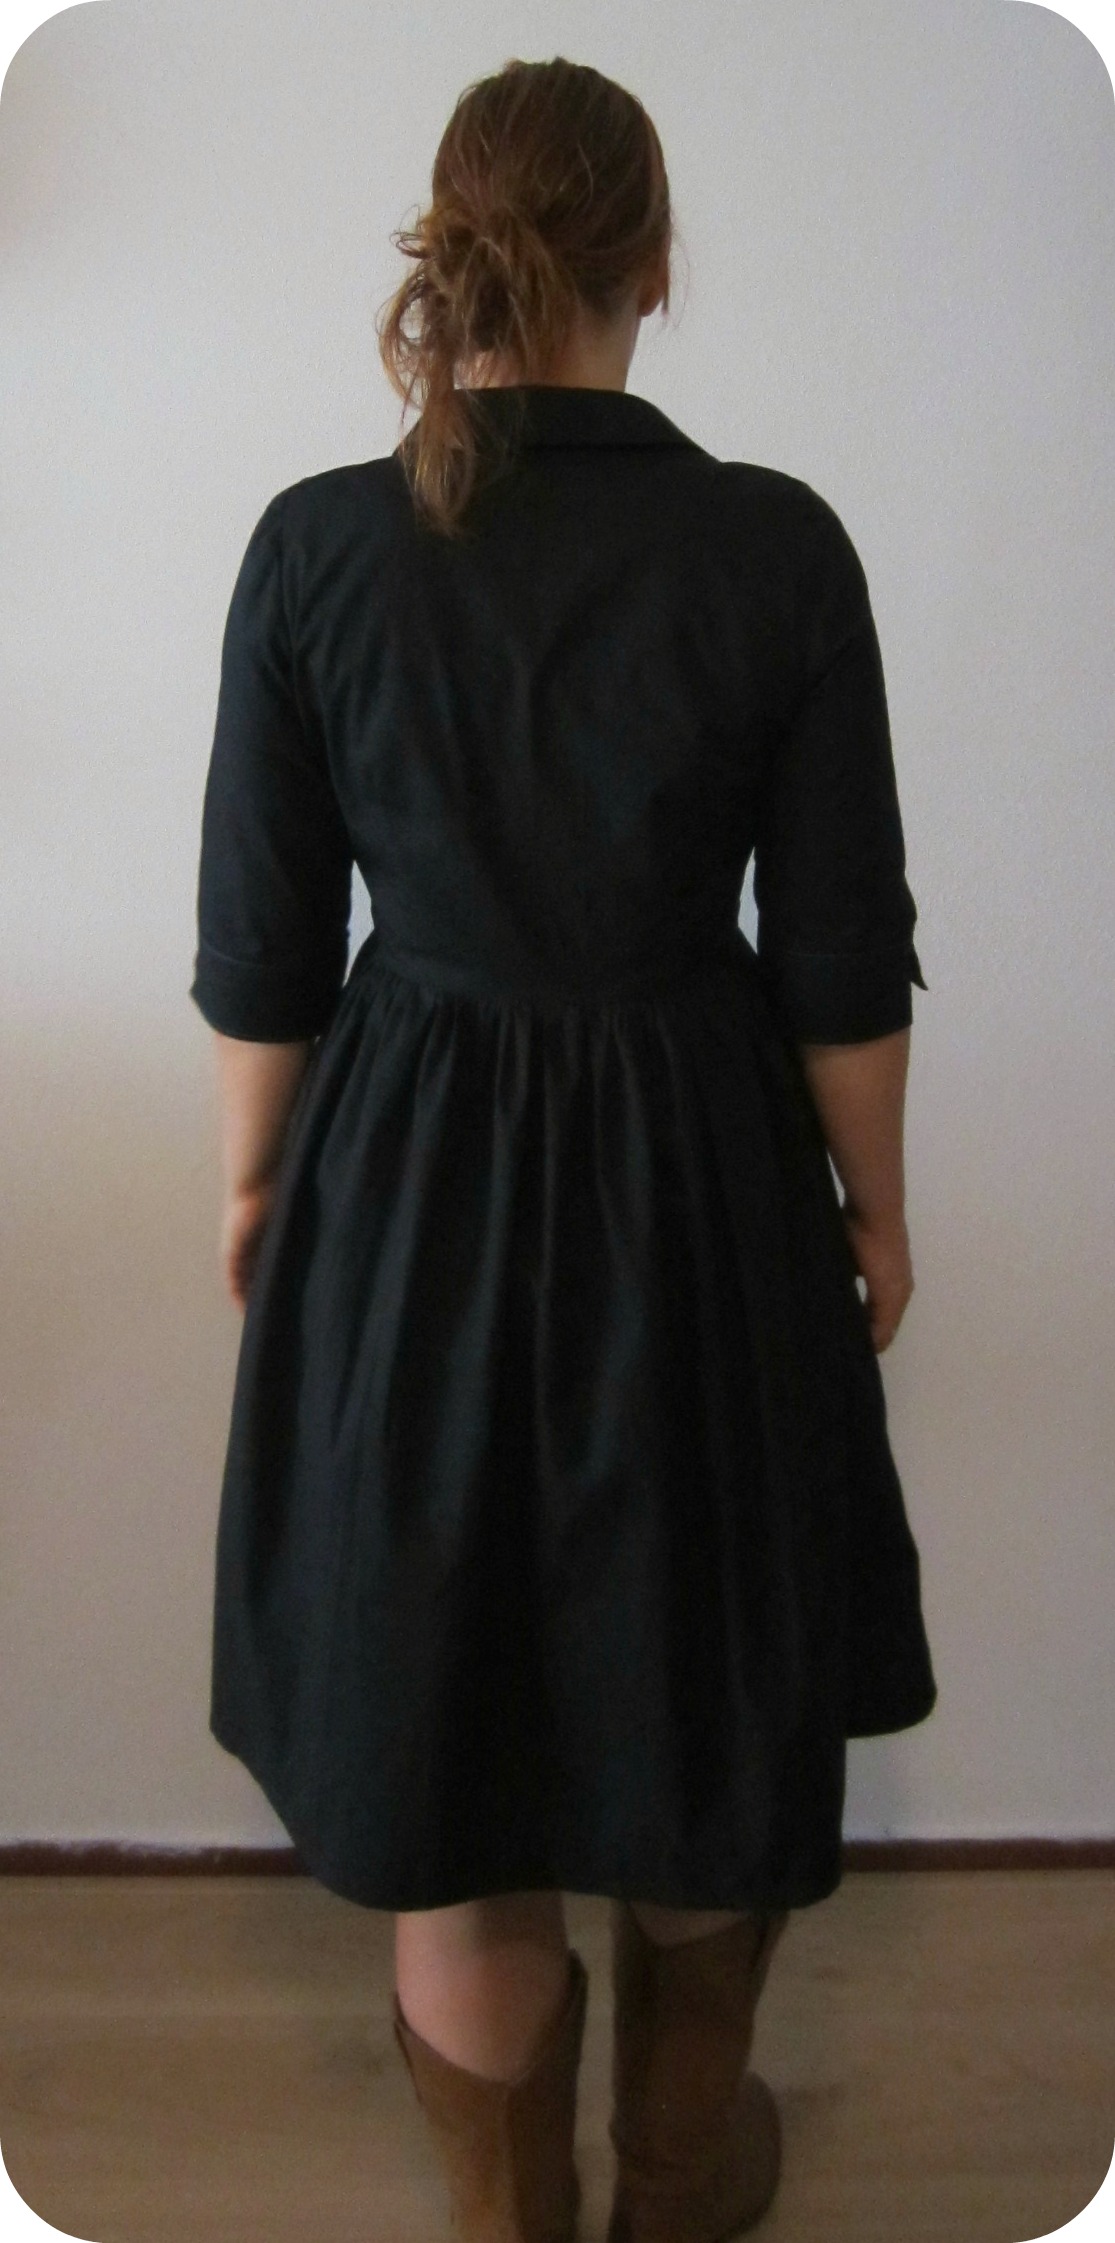
Het nadeel is dan wel weer dat je jurk er een beetje verfrommeld uitziet van het zitten de hele dag.

Downside is that you have a wrinkled dress from sitting in it all day.

2444-6

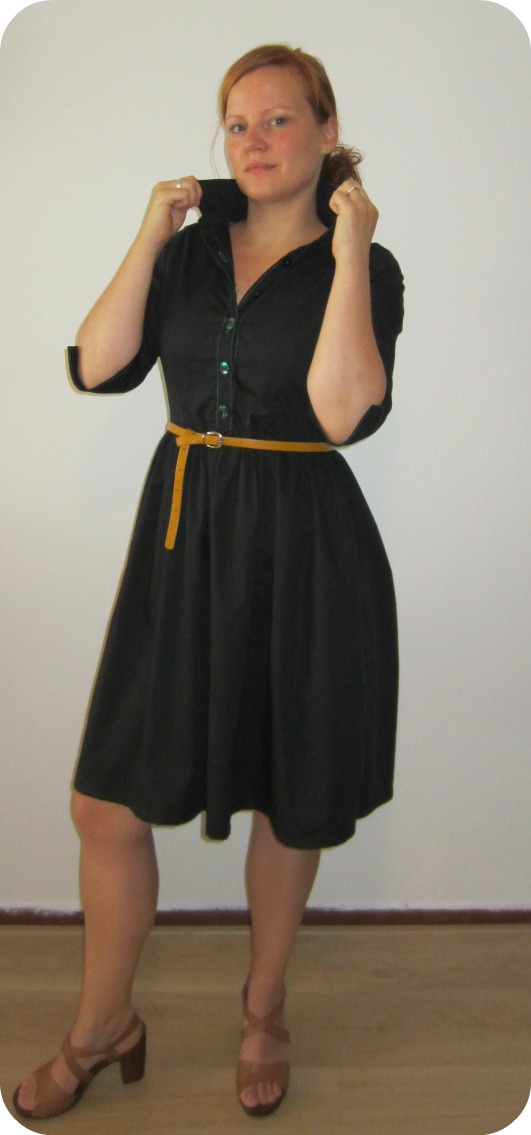
En van het verstopt zitten onder een vestje 🙂

And from being hidden underneath a cardigan 🙂

2444-8

Ik zie dat het ook weer tijd wordt voor een haarverfje haha.

I’ve noticed it’s about time that I dye my hair again haha.

2444-2

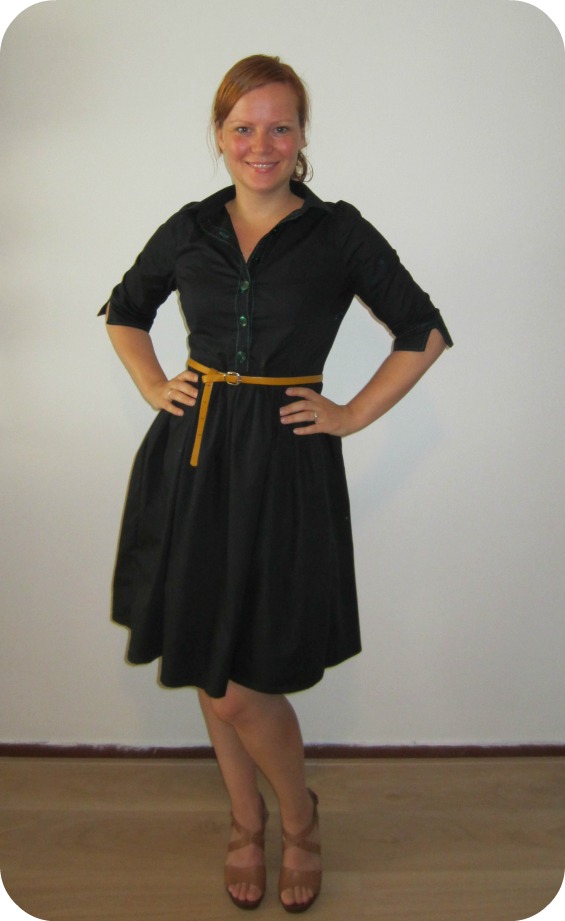
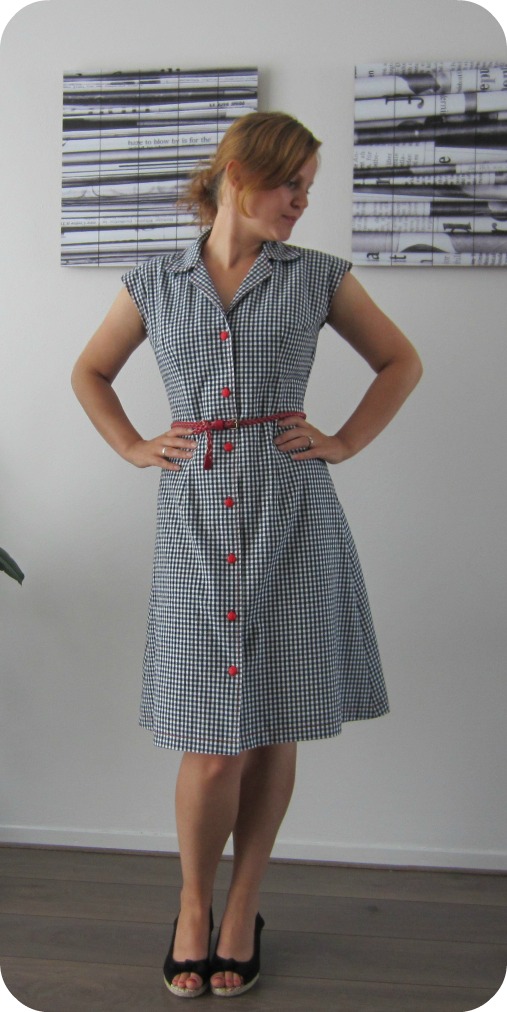
Ik ben wel blij dat ik dit plekje heb ontdekt om foto’s te maken, want ik vind buiten-foto’s eigenlijk leuker dan die die binnen gemaakt zijn. Maar binnen foto’s maken voelt wel fijner, het is lekker warm en je hebt geen pottekijkers.  Ik ben wel benieuwd hoe jullie dat doen? Heb je een fotograaf of een statief? En hoe bepaal je of iets een goede achtergrond is voor foto’s?

I’m quite happy that I found this quit spot for making pics, because I prefer photos taken outdoor over those taken indoors. But taking pics in the comfort, warmth and solitude that the house provides is way more comfortable. I’m curious how you guys do this. Do you have a photographer or a tripod? And how do you decide what’s a good background?

2444-5

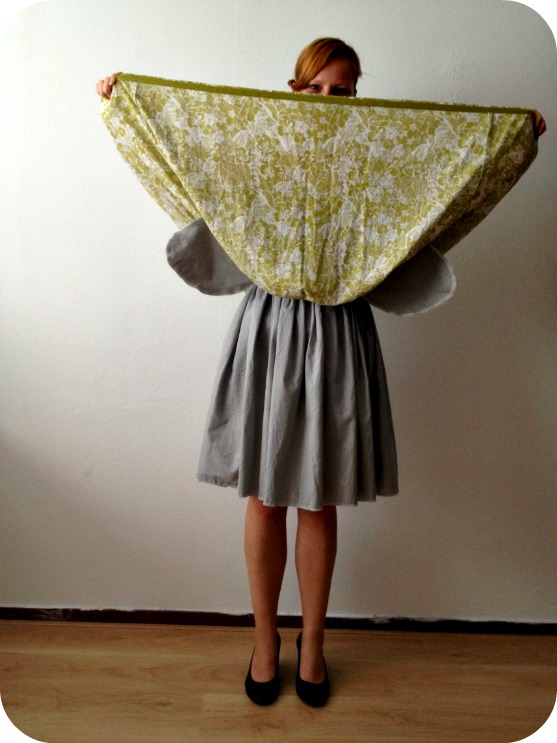
Als uitsmijter nog een dansje, het is tenslotte weekend!!!

And finally a little dance for you, after all it is the weekend!!!

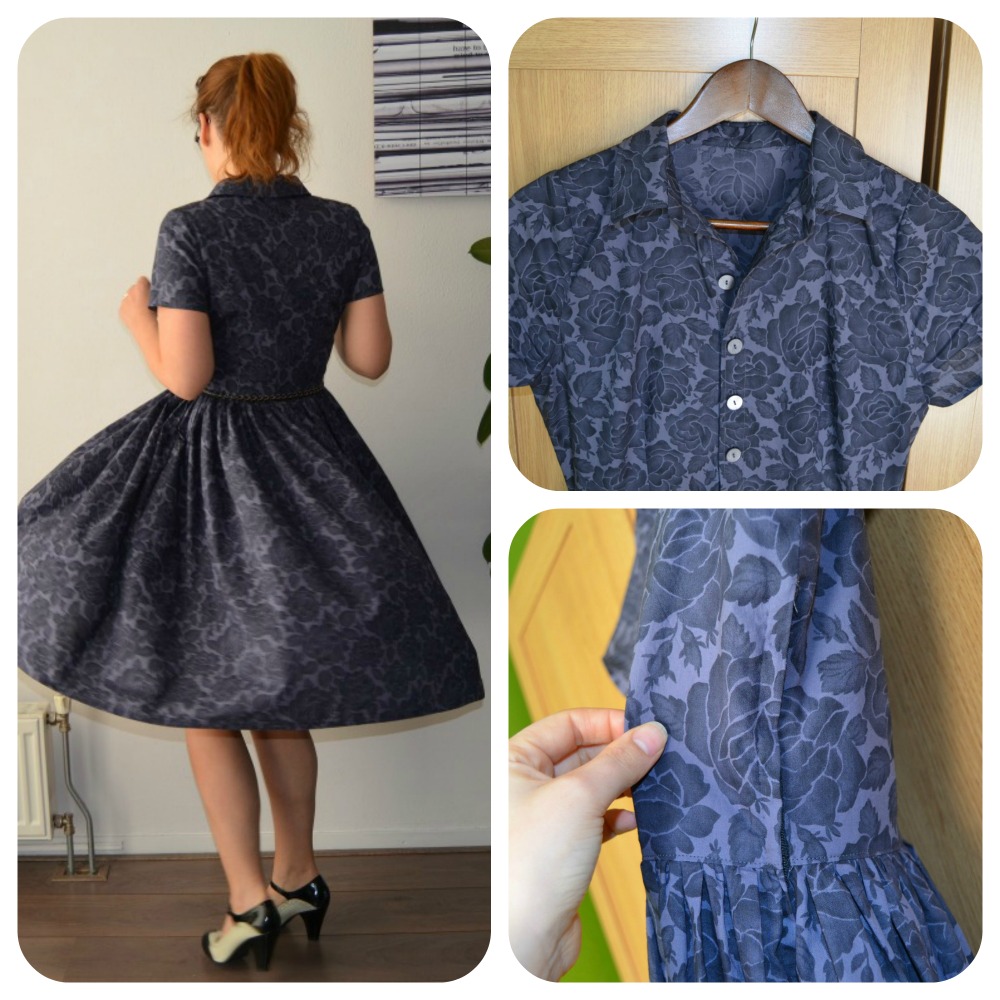
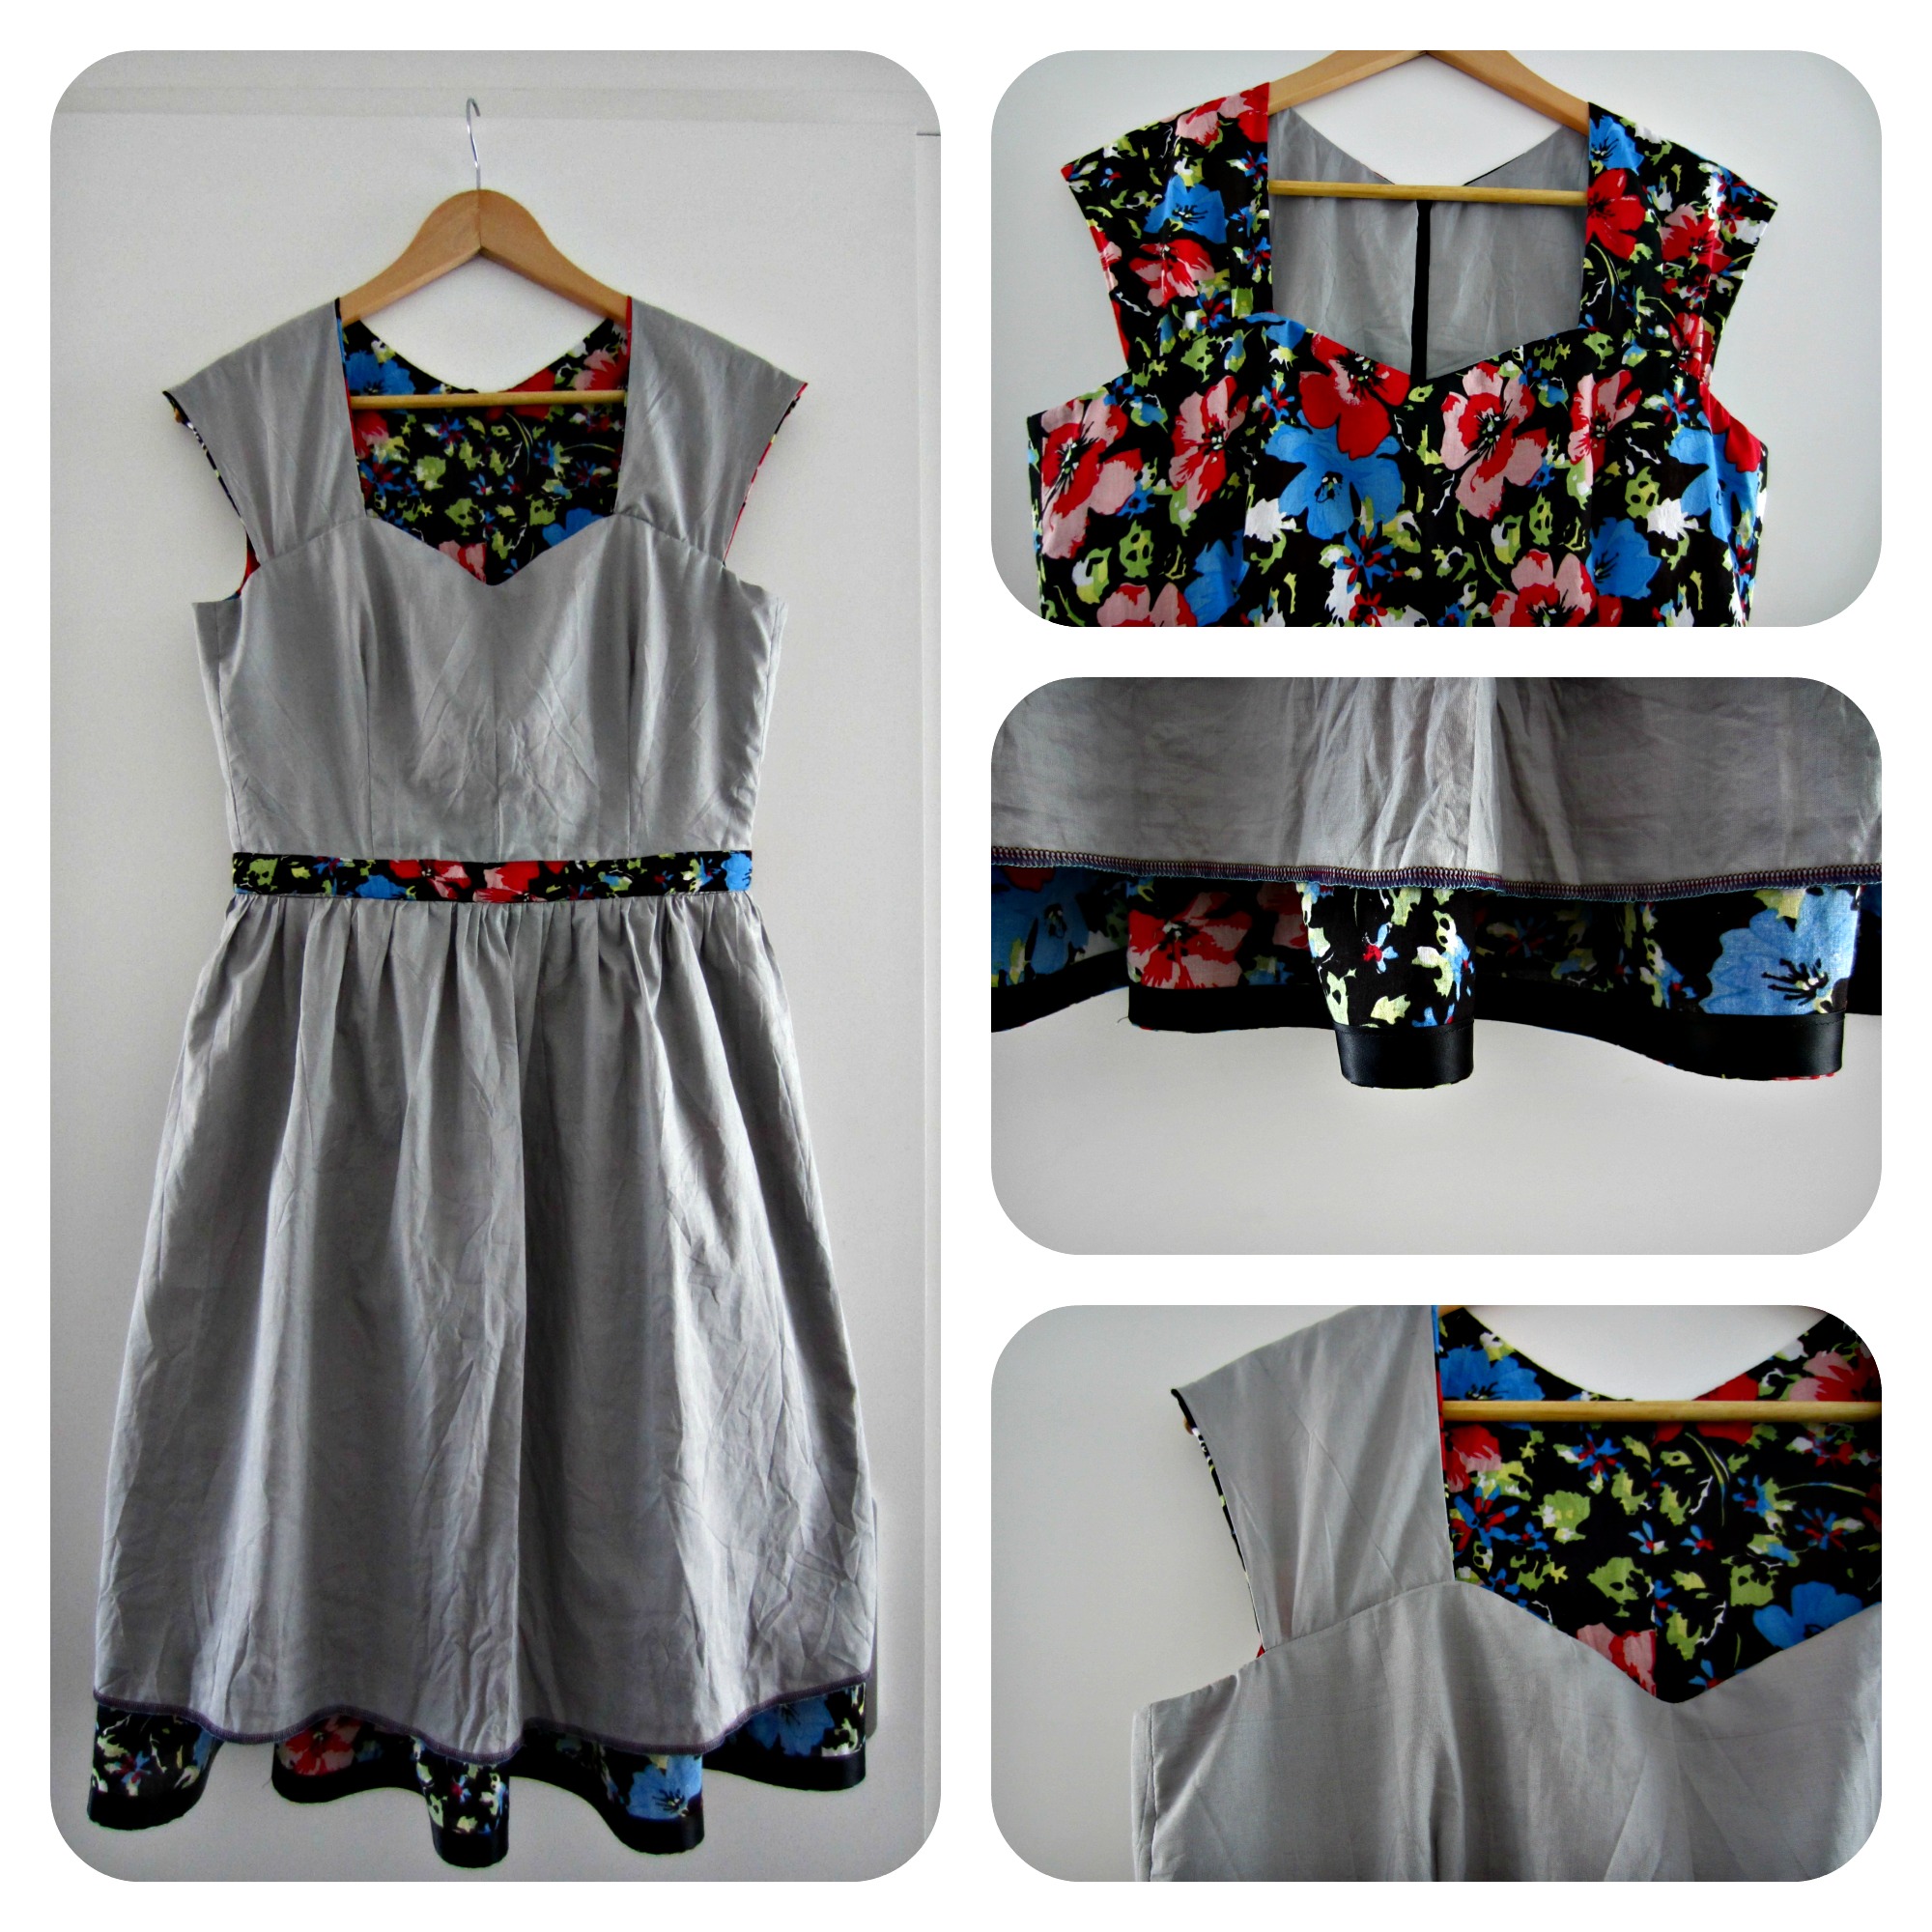
Oh ja, different directions? Was het je al opgevallen? Nee? Gelukkig! Ik heb per ongeluk het bovenlijfje ondersteboven uit de stof geknipt. Oeps! Laten we het een ‘design feature’ noemen 😉

Oh, and what about those different directions? Did you notice? No? Yay! I accidentally cut the bodice with the print upside down. Oops! Let’s just call it a design feature 😉

The ‘love story’ dress a.k.a. #SewDollyClackett

Sew Dolly Clackett, een sewalong cq. wedstrijd ter ere van het aankomende trouwen van de koningin van de jurken, Roisin. Georganisserd door haar vriendin Sarah. Wat een fantastisch en lief idee! En aangezien ik ook wel van een leuk jurkje hou, doe ik graag mee 🙂

Sew Dolly Clackett, a sewalong and contest in honour of the upcoming wedding of the queen of dresses, Roisin. Brainchild of her friend Sarah. What a great and thoughtfull idea! And, since I quite like a nice dress myself, I’m in 🙂

SewDollyClackett6

Gister was het de allereerste lentedag, wat was het heerlijk! ’s Ochtends kwam Marijn met het idee om een dagje naar Amsterdam te gaan, om een beetje slenteren en een bezoekje te brengen aan Artis. Goed idee! En, een leuke plek om wat fotootjes te schieten van mijn nieuwe jurk.

Yesterday it was the first proper spring day, and it was so lovely! Marijn, my boyfried, suggested we’d go to Amsterdam for some strolling around and a visit to the zoo. Great idea! Also, a nice place to take some pictures of my new dress.

SewDollyClackett5

De stof voor deze jurk kocht ik bij de Jan Sikkes hier in Leeuwarden. De print deed me denken aan de ‘Ms. Tree dress‘ en de ‘Home sewing is easy‘, en omdat het bestaat uit allemaal liefdestafereeltjes leek het me een hele toepasselijke.

I bought this fabric at the local fabric store. The print reminds me of the ‘Ms. Tree dress‘ and the ‘Home sewing is easy‘. It consist of love scenes so I thought it was quite apropriate for the occasion.

SewDollyClackett4

Kijk, een aap! Foto’s maken in de dierentuin is misschien niet heel handig, helemaal niet als je nog niet echt comfortabel bent met fotoshoots in het openbaar haha.

Look, a monkey!  Doing a photoshoot in the zoo is not the easiest thing to do, especially when you’re not fully comfortable posing in public haha.

SewDollyClackett3

Oh, ook een eekhoorn!

Oh, and a squirrel too!

SewDollyClackett2

Het patroon is Simplicity 2444, net als mijn ‘Succes dress‘ Om de print op het achterlijfje niet op te breken knipte ik die op ook de stofvouw en zette ik de rits in de zijnaad. Waar ik eerst fan was van middenachter-ritsen, moet ik zeggen dat ik er nu toch steeds meer naar neig ze in de zijnaad te zetten.

The pattern is Simplicity 2444, just like my ‘Succes dress‘. To prevent breaking up the print on the bodice back, I cut it on the fold too and moved the zipper to the side. I used to be a fan of the centre back zip, but lately I’m growing quite fond of the side seam ones.

SewDollyClackett1

Als piece de resistance nog een foto in Dolly Clackett stijl, met petticoat en hakken.  Ik heb flink gepuzzeld op welk plaatje op de stof ik waar wilde hebben, en uiteindelijk ben ik heel tevreden met hoe dat heeft uitgepakt. Ik wou de Aloha dame graag op de voorkant, en als ik een vest draag piept ze er precies bovenuit.

As piece de resistance a pic in true Dolly Clackett style, with petticoat and high heels. I have been playing with the pattern placement and I quite like how it turned out. I wanted the Aloha lady at the front bodice, and when I’m wearing a cardigan with this dress, she peeps out on top of it nicely.

SewDollyClackett7

En de achterkant. Excuseer de kreukels, dat krijg je van een dagje dierentuin en bijbehorende autorit 🙂

And the back view. Excusez le wrinkles, that’s what you get from a day at the zoo and the car ride 🙂

SewDollyClackettCollage

Een paar details van de plaatjes op de stof.

Some detail shots of the pictures on the fabric.

Dat is hem dus, mijn ‘love story’ dress. Proost, op de ‘love story’ van Roisin en Nic en op de aankomende zomer!

So there it is, my ‘love story’ dress. Cheers to the love story of Roisin en Nic and the upcoming summer!

CamIII

Jaja, alweer een nieuwe jurk! Afgelopen twee weken was het druk en intensief op het werk. Even achter de naaimachine is dan een fijne manier om te ontspannen. Helaas werkt het wat minder als ik nog in de ‘het moet af’-modus zit, en daar had ik wel een beetje last van dit weekend. Gelukkig is dat nu ook wel weer weg, en ben ik moe neergestort op de bank. Een goede gelegenheid om een blogpost te typen dus 🙂

Yes, another dress! The last two weeks at work were so busy and intense, and sewing is a good way for me to unwind. Unfortunately that doesn’t work so well when I’m still in ‘must.finish.everything’ mode, and that was bothering me a bit this weekend. Fortunately that is gone now and I have crashed down on the sofa. A good opportunity for some blogpost writing 🙂

Cami3-1

Dat rottige gestresste gevoel heeft me wel een mooie nieuwe jurk opgeleverd. En een vermoeide blik haha. Daarom kijk ik op de foto’s ook veelvuldig opzij of naar de grond.

That crappy stressed out feeling did give me a pretty new dress though. And a tired look haha. Hence the staring at the floor and the sides in the next pics.

Cami3-5

Voor deze jurk gebruikte ik alweer het Camí patroon, dat ik al twee keer eerder maakte (hier en hier). Voor de kraag gebruikte ik de tutorial van Andrea, dat deed ik ook al bij de Christmas Camí maar toen vergat ik het te vermelden.

This is yet another Camí dress. I used this pattern twice before (here and here). For the collar construction I used Andrea’s tutorial, which I also used for my Christmas Camí but forgot to mention in that post.

Cami33

Voor de rok gebruikte ik de volledige breedte van de stof, 1.40 m. Het is dus een flinke 🙂 De stof is heel soepel en daardoor valt ‘ie erg mooi. Laten we het ook even over de stof hebben, is het niet een mooie? Ik ben zo blij dat ik deze vond. Hij was wel wat prijzig maar er zaten een paar VVV-bonnen in mijn kerstpakket en daarmee heb ik mezelf erop getrakteerd.

Both skirt panels are made from the full width of the fabric, 1.40 m. This is a BIG skirt 🙂 The fabric is soft and drapes beautifully. Let’s talk about this fabric, isn’t it fabulous? I am so happy with it. It was a bit expensive but since I received some gift vouchers from work at christmas, I decided to treat myself to it.

cami3-4

Tsja, wat moet ik verder nog zeggen over dit patroon? Het feit dat dit de derde keer is dat ik het gebruikte zegt eigenlijk al genoeg he? Ik vind het een fantastisch patroon. Toch denk ik dat dit voorlopig de laatste versie is, want die kraag… Dat is toch niet mijn hobby. Dit keer was de staander opeens te lang, waardoor die wat gerimpeld is. Gelukkig valt de kraag zelf eroverheen en zie je er niks van.

So, what else should I say about this pattern. The fact that this is my third make from it says it all. I love it. However, I think this will be the last version of it for now, because that collar… it is not my hobby to sew them. This time the collar stand was suddenly too big, and it’s a bit wrinkeled. Fortunately the collar covers that and it doesn’t show.

Cambie3_6

Kijk, alweer een met de hand ingezette rits. Dat is toch best een leuk werkje. Bijvoorbeeld om te doen tijdens het kijken naar de livestream van de wedstrijd van Cambuur 🙂 Die overigens weer wonnen, hoera!

Look, another hand-picked zipper! I actually find it quite an enjoyable job to put them in. For example while watching the game of my favourite soccer team, Cambuur 🙂 Who won again, hurray!

cami3Collage

Zo, ik ga weer even verder chillen!

Now it’s time for some more chillaxing!

Wat is jouw favoriete manier om van stress af te komen?

What is your favourite way of relieving stress?

Succes dress

Herinner je je nog dat ik ooit schreef dat ik alleen maar zwart en donkerblauw droeg en daar graag wat aan wilde gaan doen? De laatste tijd gaat dat erg goed, maar deze jurk is toch wel de kroon op die missie!

Remember that I wrote about the days I only wore black and dark blue, and that I wanted to do something about that? Well, with this dress I can safely say: mission accomplished!

2444-2

Als je mij drie jaar geleden had verteld dat ik ooit een zelfgemaakte rode jurk zou dragen en me daar ook nog comfortabel in zou voelen, dan had ik dat nooit geloofd.

If you would have told me three years ago that one day I’d wear a handmade red dress and would be comfortable doing so, I never would have believed you.

2444-3

Het patroon dat ik gebruikte is Simplicity 2444. Ik heb zoveel goede verhalen gelezen over en voorbeelden gezien van dit patroon dat ik het al een tijdje graag wilde hebben. Uiteindelijk heb ik het van mijn schoonouders gekregen voor mijn verjaardag. Bedankt, San en Rob!

The pattern of this dress is Simplicity 2444. I’ve read such good things about this pattern and saw so many gorgeous examples of this dress that I’ve been wanting to make it for some time. Eventually my boyfriend’s parents gave it to me for my birthday. Thank you, San and Rob!

2444-4

Aangezien vandaag zo’n goede dag is (Cambuur wint de belangrijke wedstrijd van PEC Zwolle en de Nederlandse schaatsdames zijn 1 t/m 4 op de OS), besloot ik er een feestelijke outfit van te maken, mét petticoat. Die heb ik al een jaar, maar hij was véél te vol waardoor ik me net een cupcake voelde ermee. De oplossing was simpel: ik heb een van de twee lagen eraf geknipt. Nu is ‘ie perfect!

So today was such a good day (my fav soccer team won a very important match and the Dutch ladies won place 1 to 4 on the Olympics) I decided to put together a festive outfit, with a petticoat. I’ve had this one for some time now but never wore it because it was way too full. I felt like a cupcake wearing it. The solution to make it more wearable was simple: I cut off one of the two layers. Now it’s perfect!

2444-6

Uiteindelijk zal deze jurk vaker op deze manier gedragen worden 🙂 Ja, weer met zwart haha.

However, this will probably be the way I’ll wear this dress more often. Yes, with black  haha.

2444-7

Uit de reviews van anderen begreep ik dat de pasvorm van dit patroon erg goed is, en dat is ook mijn ervaring. Dit is een maat 12 (38), maar de middenachter- en zijnaden heb ik op 1 cm ipv 1,5 cm genaaid, omdat ik het idee had dat het wel wat krap zou worden allemaal. Uiteindelijk viel dat wel mee, dus een volgende keer doe ik dat denk ik niet weer.

Voor de schouders knipte ik een maat 8. De mouwen heb ik vervolgens 1,5 cm breder gemaakt, waardoor ik volledige bewegingsvrijheid heb 🙂 De halslijn voor is die van maat 4, ik hou niet van te hoge halslijnen, en is aan de binnenkant afgewerkt met een biaisbandje. De figuurnaden bij de buste maakte ik wat ovaler van vorm zodat het daar wat beter aansluit.

2444-8

This dress is made up in size 12 (38). While making it I thought it looked quite small, so I sewed the centre back and side seams with 1 instead of 1,5 cm seam allowance. In the end I’m not sure it was really neccesary, so I’ll probably won’t do that again next time.

For the shoulders and armscye I used the size 8. I widened the sleeve with 1,5 cm to give myself free range of movement 🙂 The front neckline is size 4, as I don’t like my neckline too high. I used some biastape instead of the facings. I also scooped out the bust darts a bit to fit the shape of my body better.

2444-1

Zo, Simplicity 2444, je hebt er (alweer) een fan bij!

Simplicity 2444, you have gained a (yet another) fan!

Christmas Camí

Toen ik laatst een beetje aan het webshoppen was, zag ik dit stofje. En ik wist meteen dat ik er een Camí-jurk van wilde maken. En zo geschiedde 😉

A while ago I was doing some online retail therapy and as soon as I saw this fabric, I knew I wanted to use it for a Camí dress. And so it happened 😉

ChristmasCami

Het is wel een beetje een druk printje voor mijn doen. In mijn hoofd zou het door de combinatie van stof en patroon het soort jurk worden dat Betty Draper zou dragen. En dat is het eigenlijk ook wel geworden.

The print is quite busy. In my mind the dress would be very Betty Draper-esque and I think that it did turn out that way.

ChristmasCami3

De rok heb ik vrij royaal gemaakt, met twee panelen die bijna de hele breedte van de stof beslaan. Omdat het maken van deze jurk zo goed ging en hij erg netjes in elkaar zit leek het mij een goed idee om hem onzichtbaar te zomen. Met de hand. Dat duurde in totaal ongeveer 5 uur. Wát een werk! Maar het was het waard!

It has a big skirt, made out of two panels that are nearly as wide as the fabric was. Because the making of this dress went so well, and it is very neatly made, I decided to make an invisible hem. By hand. It took about 5 hours. So. Much. Work. But it was worth it in the end!

ChristmasCami2

Het enige wat ik aan het patroon veranderde na de laatste keer is dat ik het bovenlijfje 1,5 cm langer heb gemaakt. De rok van het vorige exemplaar begint iets te hoog en als ik er dan geen riempje om draag geeft dat een klein beetje een soort zwangerschaps-look. Niet heel ernstig maar nu had ik wel de kans om dat aan te passen 🙂

The only change I made to the pattern since the previous time I made it  is lenghtening the bodice by 1,5 cm. The skirt of the previous dress starts a little too high and it creates a slight pregnancy-look. Nothing too serious but this time I had the opportunity to change it 🙂

ChristmasCami5

Verder ben ik ontzettend blij met de pasvorm. Hij zit echt perfect. En het kleine beetje rek dat in de stof zit zorgt voor veel draagcomfort. 2,5 Jaar geleden, toen ik startte met naailes, had ik nooit gedacht dat ik ooit zulke jurken zou kunnen maken, en nog zou dragen ook. Wat dat betreft is naaien erg goed geweest voor mijn zelfvertrouwen!

I’m really pleased with the fit. It’s so good. The fabric has a little bit of stretch, so it’s quite comfortable too. When I started sewing 2,5 years ago I would never have thought that I would be able to make a dress like this, let alone wear it. Sewing has really worked wonders for my selfconfidence!

ChristmasCamiCollage

Een paar close-ups van de details. Deze foto’s geven de kleuren van de stof het beste weer. De manchetten, de met de hand ingezette rits, de blinde zoom en  de kraag. Ik ben echt trots op het afwerkingsniveau. Dit is een jurk zonder compromissen 🙂

And some close-ups of the details. These photo’s represent the colours in the fabric the best. The cuffs, the hand-picked zipper, the blind hem and the collar. I’m really proud of how this dress is finished. There are no compromises here 🙂

ChristmasCami6

De binnenkant van de manchetten. Netjes he?

The insides of the cuff. Neat huh?

ChristmasCami4

Ah, ik hoor dat het kerstdiner geserveerd gaat worden. Fijne feestdagen allemaal!!

Ah, I hear Christmas dinner is being served. Merry Christmas all!

Foolproof paspelband

Momenteel ben ik bezig met een nieuwe Ceylon jurk. Ik wilde graag eens met een andere stof dan katoen werken, dus koos ik dit keer voor wooltouch, van polyester en viscose, in donkerrood. Met zwarte knopen en een satijnen paspelbandje meegestikt.

Right now I’m working on another Ceylon dress. I wanted to try something other than cotton this time, so I chose a dark red wooltouch fabric, made out of polyester and viscose, with black buttons and satin piping.

Het stikken van het paspelbandje ging niet van een leien dakje, mede omdat mijn stof niet bepaald blij werd van het strijkijzer. Zelfs een persdoekje hielp niet tegen glimmende plekken. Het was dus meten, spelden, naaien, nameten, lostornen, weer spelden, weer naaien. Om chagerijnig van te worden. Toen schoot me opeens iets te binnen wat het hele proces een heel stuk makkelijker maakte. Het leek me leuk om dit met jullie te delen. Dus bij deze: mijn eerste tutorial!

Sewing the piping was quite difficult. My fabric started to get shiny marks as soon as I even put the iron on, even a presscloth didn’t help. So measuring, pinning, sewing, remeasuring, seam ripping, sewing again it was. I even got a little grumpy. Then I figured out a way to make the whole process a lot easier, and I want to share it with you guys. So there you have it: my first tutorial!

Stap 1: meten
Step 1: measuring

1

Mijn paspelbandje is 0,5 cm. De naadtoeslag is 1,5 cm. Het stukje van het paspelbandje waar het koordje in zit wil je buiten de naad hebben, dus dat meet je niet mee.
My piping is 0,5 cm. The seam allowance is 1,5 cm. You’ll want the part of the piping that has the cord in it to be outside of the seam so you exclude that from the measuring.

Stap 2: een gidsnaad stikken
Step 2: sewing a guide seam

2

Een beetje onduidelijke foto helaas, maar ik heb dus gestikt op 1 cm van de rand van de stof, zodat ik precies weet waar het randje van de paspelband moet komen. De afstand waarop je stikt is je naadtoeslag – de breedte van het bandje.
Unfortunately the photo is a bit dark, but I’ve sewn a line on 1 cm from the edge of the fabric, so I know exactly where the edge of the piping needs to be. The distance from the edge is the seam allowance minus the width of the piping.

Stap 3: het paspelbandje aan de stof naaien
Step 3: sewing the piping to the fabric

3

Omdat ik precies weet waar ‘ie moet komen heb ik het spelden maar overgeslagen. Gebruik voor deze stap je ritsvoetje en stik nét niet helemaal tegen het koordje aan. Ik zette de naald 3 mm naar links voor deze stap.
Because I know exactly where it needs to be sewn, I didn’t pin. Use your zipper foot for this step and sew almost as close as you can get to the cord. I moved my needle 3 mm to the left for this step.

Stap 4: naai de naad
Step 4: sew the seam

4

Wederom met het ritsvoetje. Stik dit keer zo dicht mogelijk tegen het koordje aan. Ik zette de naald nu 3,5 mm naar linkts en drukte met mijn linker wijsvinger het koordje zo dicht mogelijk tegen het voetje aan.
Again, use your zipper foot. This time, sew as close as you can get to the cord. I put my needle 3,5 mm to the left here and used my left index finger to push the cord against the zipper foot.

Stap 5: persen of doorstikken
Step 5: press or topstitch

5

Omdat mijn stof dus niet zo goed met het strijkijzer overweg kan, koos ik voor doorstikken. En dan is het klaar! Zie je hoe mooi gelijkmatig het paspelbandje zit?
Because my fabric can’t handle the iron I opted topstitching. And then you’re done! Do you see how nice and even the piping is?

Hopelijk heb je hier wat aan! Nu ben ik ook wel benieuwd: wat is jouw favoriete manier om een paspelbandje te stikken?

I hope this is helpful to you! And, because I’m curious, what is your go-to way of stitching piping?

Pauline Alice’s Camí dress

De laatste tijd komen steeds meer bloggers met hun eigen patronenlijn. Zo ook Pauline Alice, vorige week presenteerde zij haar Camí dress. Ik vond ‘m meteen leuk, en na het zien van Lisa en Roisin’s versies was ik helemaal om. Voor ik het wist was het patroon uit de printer gerold. Oke, dat is niet helemaal waar, want onze printer is ‘made in hell‘ en het duurde dus vrij lang voor het patroon daadwerkelijk geprint was.

Lately a lot of sewing bloggers start their own pattern line. Pauline Alice also did this, last week she presented het Camí dress. I immediately liked it, and after seeing Lisa and Roisin’s beautiful versions I was sold. Before I knew it I was printing out the pattern. Ok, that’s not entirely true as our printer is made in hell and it took a while before it actually started to print.

Gelukkig was dat geen voorteken, en ben ik erg in mijn nopjes met het resultaat.

Fortunately that wasn’t an omen and I’m quite pleased with the resulting dress.

Camí3

:o)

Ik wilde graag een zwarte jurk om te combineren met gekleurde panties. Deze stof had ik al, eigenlijk zou ik er een Ceylon van maken. Het is een silicon poplin, een beetje aan de stijve kant maar wel heel geschikt voor dit patroon.

Camí 1

I wanted a black dress to pair with coloured tights. This fabric was originally intended for another Ceylon dress. It’s a silicon poplin, a bit on the stiff side but very well suited for this pattern.

Camí2

Uh oh, an orb in my sewing room!

Bij het uitknippen van het patroon vond ik de figuurnaden wel erg lang lijken, dus die heb ik met 1,5 cm ingekort. Dat bleek een goede greep, ze zijn nu precies goed. Dit is een maat 38, met net als bij de Edith jurk maat 36 armsgaten en schouders. De mouwen maakte ik een cm breder, omdat ik nogal gespierde stevige bovenarmen heb. De diagnose van mijn naai-juf voor het probleem dat ik bij mijn Ceylon had was namelijk dat het armsgat te ver naar de zijkant zat en de mouw te smal was. Er was in totaal wel genoeg ruimte maar de verdeling was verkeerd en daarom kon ik mijn armen niet omhoog doen. Bij deze jurk heb ik daar geen last van!

Ik ben érg blij met hoe deze jurk past. Zelfs bij de schouder/mouwkop naad, wat normaal nogal een pijnpuntje is.

While cutting out the pattern the bust darts seemed a bit long, so I shortened them by 1,5 cm. That turned out great, as they are just right. I used the 38 size with, just like in my Edith dress, size 36 at the armscyes and the shoulders. The sleeves are widened by a cm because I have quite muscular chubby upper arms. I asked my sewing teacher about the issue I had with my Ceylon dress and she told me that the armscye was too far to the side and the sleeve was too narrow. There was enough room in total but it was distributed wrong. That’s why I couldn’t lift my arms.

The fit turned out great, even at the shoulder/sleeve head seam, which is usually someting I fiddle with.

Camí8

De taille zit precies op de goede hoogte en het bovenlijfje is wijd genoeg om comfortabel te zijn, maar strak genoeg om slank af te kleden. Win!

The waistline hits right at my natural waist and the bodice is wide enough for comfort and tight enough for a slim look. Win!

Camí5

Details

Camí Collage

Het was vrij lastig om knopen uit te kiezen voor deze jurk. Gelukkig wilde mijn naailes-groepje wel helpen, en kwamen ze met het idee om bijpassend garen te gebruiken om te voorkomen dat het een saai geheel zou worden. Uiteindelijk heb ik dat langs de knoopsgaten gedaan en bij de manchetten. Precies genoeg om op te vallen, en niet teveel. Ik heb nog een beetje getwijfeld om het ook bij de kraag te doen, maar daar heb ik van afgezien.

Choosing buttons for this dress was not easy. Fortunately the other people in my sewing class were happy to help. They suggested these buttons along with matching topstitching, to prevent the dress from being too boring. I did the topstitching on the buttonplackets and the cuffs. Enough to add a nice touch and also not too much. I contemplated topstitching the collar too but in the end chose not to.

Camí7

Dit was de eerste keer dat ik een kraag met een kraagstaander maakte. Dat was niet makkelijk, maar door de goede instructies prima te doen. Het resultaat ben ik erg trots op!

This was the first collar with collar stand I ever made. It was no picnick, but the clear instructions made it possible to make it succesfully. I’m pleased with how it turned out!

Camí6

Omdat ik geen fan ben van het inzetten van ritsen in de zijnaad, besloot ik ‘m met de hand in te zetten. Anthea vertelde me laatst dat ze het altijd zo doet en dat dat heel goed lukt, dus ik dacht, laat ik het eens proberen. Een strijkbeurt zou geen overbodige luxe zijn maar hij zit prima dacht ik zo.

Because I’m not a fan of sewing in side zippers I decided to hand pick this one. Anthea told me a while ago that she always does it this way and that it’s not that hard, so I decided to give it a try. It needs a visit from the iron but other than that it’s not too bad.

Al met al was dit een patroon dat best bewerkelijk en ingewikkeld was met de kraag, de manchetten en de rits in de zijnaad. Uiteindelijk heeft het me niet alleen een mooie nieuwe jurk opgeleverd maar voor mijn gevoel ook weer een stap vooruit in mijn naai-skills. Hoera, en dank je wel Pauline Alice!

So all in all this pattern wasn’t easy, with the collar stand, the cuffs and the hand-picked zipper. In the end I don’t only have a pretty new dress, but also made a step forward in my sewing skills. Hurray and thank you, Pauline Alice!

Edith muslin & give-away

Nou, het bleek geen toevalstreffer, dat proefmodel dat ik maakte van de culottes. Het beviel wel goed, om eerst een testexemplaar te maken. Daarnaast heb ik het idee dat ik steeds meer ga snappen van het aanpassen van patronen. En zie hier, het proefmodel van MariaDenmark’s Edith dress!

Edith dress 2


It wasn’t a one hit wonder, the muslin I made for my Culottes. I quite liked a testrun before making the final garment. And I’m starting to get the hang of getting patterns to fit my body. So I present to you, the wearable muslin of MariaDenmark’s Edith dress!

Edith dress 4

Meteen toen ik het patroon zag leek het me het perfecte patroon om een blouse mee te maken van de rode gestippelde double gauze die ik in Japan kocht. Ook daarom wilde ik graag een proefmodel kocht, want als die niet goed zou passen, dan was mijn mooie stofje verprutst, en zou ik niet zo makkelijk nieuwe kunnen kopen. Of het zou een goed excuus zijn om weer naar Japan te gaan, hehe.

As soon as I saw the pattern it seemed the perfect pattern to make a blouse of the red polkadotted double gauze I bought in Japan. Another reason to make a muslin, because the blouse needed to fit as I couldn’t just get new fabric if it didn’t. I would give me a good excuse to go back to Japan though, hehe.

Hmmm... I think my plant needs water

Hmmm… I think my plant needs water

De pasvorm van deze jurk is dikke prima. Gezien de ‘problemen’ die ik vaak heb bij de halslijn en achterkant van de armsgaten, heb ik een variatie aan maten gebruikt. De schouders zijn mt 36, de buste mt 42, taille tussen 36 en 38 en heupen mt 40. De kleinere maat voor de schouders werkte erg goed, meestal zijn die wat te ruim en deze keer precies goed, hoera! Voor de rest was het toch ietsje aan de ruime kant, wat ik heb opgelost door de figuurnaad op het achterpand wat in te nemen. Ik denk dat ik het achterpand aan de bovenkant, en het rokdeel een maat kleiner maak, en dat dat het probleem ook verhelpt. Ook ga ik wat wijdte weghalen uit het stuk tussen de schouders en buste, omdat het daar wat flodderig is.  Verder ga ik het bovenlijfje ietsje korter maken want de taille zit ietsjes te laag. Ondanks deze opsomming vind ik dit exemplaar prima draagbaar 🙂

Edith Collage 2

The fit of this pattern is quite good. Seeing as I usually have some struggles with the neckline and the back of the armholes I used a mishmash of sizes: 36 for the neck and shoulders, 42 at the bust, between 38 and 40 at the waist, and 40 at the hips. It turned out to be a good idea to use a smaller size for the shoulders, they fit very well, whereas in other dresses I made they’re always a bit big. The rest of the dress turned out a little bit roomy, so next time I’ll make the upper back and the skirt part in a smaller size. This time I deepened and elongated the back dart and that did kind of fix the problem too. Next time I’ll also take some excess fabric out of the front bodice between the bust and the shoulders, and raise the waist about a centimeter. Despite all these things, I think this dress turned out quite wearable 🙂

Edith Collage

Omdat het toch een proefmodel was heb ik wat gespeeld met details. Mede omdat de stof een beetje theedoekachtig aandoet 🙂 De naden zijn met rode draad en de driedubbele steek doorgestikt en de knopen zijn ook rood, met ankertjes erop. Beetje marine-achtig. Vind het best leuk geworden!

Since this is a muslin I decided to play around with some detailing. also because the fabric looks a bit like a teatowel 🙂 I topstitched using red thread and the triple stitch. The buttons are also red and have little anchors on them. A bit marine-like. 

Edith is het derde patroon van MariaDenmark dat ik heb gemaakt, eerder maakte ik al de Winnie wide legged trousers en ik heb ook een Kirsten Kimono tee gemaakt. Ze heeft nog veel meer leuke patronen, fijne basics met een (in ieder geval die die ik heb gemaakt) goede pasvorm. Ook schrijft ze een leuke nieuwsbrief met naaitips, informatie over nieuwe patronen en aanbiedingen (wie houdt er nou niet van een leuke aanbieding?). Hier kun je je aanmelden, als je dat leuk vindt.

Edith is the third MariaDenmark pattern I’ve made. First there were the Winnie wide legged trousers and I also made a Kirsten kimono tee. She has lots of other patterns, great basics with a great fit. She also writes a great newsletter, with sewing and fitting tips, information about new patterns and offers (who doesn’t love a good offer?). You can sign up for it here if you’d like.

Give away

Vorige week was mijn blog jarig! Alhoewel ik niet altijd even vaak post, ben ik toch heel blij met mijn eigen webplekje. Daarom vind ik dat de verjaardag gevierd moet worden, en vieren doe je natuurlijk samen. Ik kan jullie niet allemaal hier thuis uitnodigen voor een feestje, en dus vier ik het op de geëigende blog-verjaardag-manier: met een give-away! Je kunt je eigen pdf-exemplaar van Edith winnen, het enige wat je hoeft te doen is een reactie achter te laten vóór 1 september 12:00, waarin je me laat weten welke stof je zou gebruiken voor jouw Edith blouse of jurk. Dat is alles!

Last week it was my blog’s birthday! Although I may not always post very regularly, I’m really happy to have my own little place in cyberspace. That’s why I want to celebrate this, and celebrating should be done together. I can’t invite you all for a party in my house, so I celebrate in true blog-birthday style: with a give-away! You can win your own pdf-copy of Edith. All you have to do is leave a comment below, before 1 september 12:00 (GMT +2:00), in which you tell me which fabric you would use to make your Edith blouse or dress. That’s all!

Edith dress 3

Cambie #2

Jullie zullen me wel een beetje gek verklaren, naaien met deze hitte. Maar mijn naaikamer is de koelste ruimte in huis, dus daar heb ik me vandaag maar even teruggetrokken. Tenslotte hoefde ik alleen nog de tailleband door te stikken en de zoom te naaien, mooie klusjes om rustig aan te doen. Het ging dan ook prima, tot ik de zoom moest strijken…

Cambie2_1

You’ll probably think I’m a bit crazy, sewing in this heat we’re having at the moment. My sewing room just happens to be the coolest room in the house, so that’s where I’ve spent the biggest part of the day. I only had to topstitch the waistband and hem the dress, nice things to do slowly. It went very well, untill the hem needed to be ironed…

Cambie2_4

Toen moest ik toch even koud douchen, voor ik deze foto’s kon nemen 🙂

Then I had to take a cold shower before I could take these photos 🙂

Cambie2_2

Goed, over de jurk. Jullie hadden het vast al geraden, het is een Cambie! De eerste was zo’n succes dat ik er nog wel eentje wilde. Ook deze ben ik erg blij mee, ik vind ‘m misschien nog wel mooier dan de eerste.

Cambie2_5

Right, now over to the dress. It is, as you have probably guessed by now, another Cambie!  The first one I made was such a big succes I wanted more. This one came out just as good, and just maybe I like it even better.

Cambie2 Collage

De vorige was een beetje krap bij de armsgaten op het achterpand. Ik heb dat wat uitgediept door het patroon daar aan te passen naar een maat 4, waarbij ik de onderkant op maat 8 liet. Dat maakt deze jurk een stuk comfortabeler dan de andere. Verder maakte ik de rok in maat 0, en heb ik voor de voering geen rokdelen geknipt maar gewoon een stuk stof van zelfkant naar zelfkant. De vorige Cambie die ik maakte heeft een erg volle rok en alhoewel ik dat erg mooi vind, vind ik die een beetje té voor dagelijks gebruik. Meer een jurk voor speciale gelegenheden. De lengte van de rok is die van de grootste maat, bij mij is dat precies op knielengte. Hij is omgezoomd met een satijn biaisbandje.

Cambie2 Collage3

The previous one I made was a little tight in the backside of the armholes. So this time I scooped the back armhole to a size 4, leaving the armpit part on the size 8. It worked wonderfully well, and makes the dress much more comfortable. I also cut the skirt down to a size 0, and used just a piece of the full width of the lining fabric as skirt lining. The previous Cambie has a very full skirt and while I love the look of it, I find it a bit too much for daily wear. More something for a special occasion. The length of the skirt is that of the biggest size, which hits me right at kneelenght. I hemmed it with a satin biastape.

Cambie2 Collage2

Ik ben zo blij met hoe ‘ie geworden is dat ik het niet kon laten een klein vreugdedansje te doen :o)

I’m so happy with how this dress turned out that a little happy dance was in order :o)

Cambie2_3

Wat ik beter niet had kunnen doen, want ik had het meteen weer warm!

Which it was way too hot for!

Als uitsmijter nog een foto van de gezusters Cambie. Welke vind jij het leukst?

And to finish: a photo of the Cambie sisters. Which do you like best?

Cambie2_6

Heppiedepeppie

Dat ben ik zeker met deze jurk! Afgelopen weekend was een productief weekendje, waarin ik twee jurken afmaakte. Mijn Ceylon jurk en deze, de Cambie van Sewaholic. Op andere blogs las ik er heel veel enthousiaste verhalen over. En terecht, want het is een fantastisch patroon!

Cambie

I am so happy with this dress! Last weekend was a very productive one, I finished two dresses. My Ceylon dress and this one, Sewaholic’s Cambie. This pattern has received a lot of raving reviews around the blogosphere. Well deserved, it is a fabulous pattern!

Cambie8.jpg

Ik geloof niet dat ik ooit eerder een jurk maakte die zo goed paste. Sewaholic maakt naaipatronen speciaal voor peervormige dames. Nu ben ik dat niet helemaal, maar omdat de rok zo wijd is maakt dat niet zo veel uit. Dit is een maat 8, met maat 6 schouders en ietsje aangepaste coupenaden. Die twee kleine aanpassingen aan het patroon deed ik nadat ik, jawel, een proefmodelletje had gemaakt. Van de voering, dat dan weer wel, maar hé, een proefmodel is een proefmodel!

Cambie4.jpg

This is the best fitting dress I have ever made. Sewaholic patterns are made for pear-shaped ladies. I’m not entirely pear-shaped, but because of this full skirt that didn’t matter. This is a size 8, but the soulder seams are a size 6. I also scooped the bust darts a bit. I made those two small changed after, you won’t believe this, making a muslin. I used the lining piece for it but still, a muslin is a muslin!

Cambie7.jpg

Deze stof kocht ik op Marktplaats, speciaal voor dit patroon. Het is een heel dun katoentje, batist denk ik. De voering is ook van katoen, dat kocht ik bij de Stoffenkraam in Heerenveen. Geen idee wat voor soort, maar het is heerlijk zacht en was hartstikke goedkoop. Ideaal dus!

I bought the fabric on Marktplaats, especially for this pattern. It’s a very lightweight cotton, I think a batiste. The lining is also cotton, bought at ‘de Stoffenkraam‘ in a neighbour town. No idea what kind, but it is very soft and was very cheap. Perfect combination!

Cambie6.jpg

Omdat ik er al een tijdje naar uit keek om deze jurk te maken, besloot ik om hem ook zo mooi en netjes mogelijk af te werken. Daarom heb ik de zoom met een lint afgewerkt, en heb ik zelfs het garen van mijn lockmachine verwisseld. Dat doe ik echt nooit. Ik lock alles in zwart. Dat is geen luiheid, dat is mijn signature 😉 maar omdat deze stof een beetje doorzichtig is, was ik bang dat de zwarte draden zichtbaar zouden zijn.

Cambie3.jpg

Because I was looking forward to making this dress for some time, I decided to make it as pretty as possible. I used ribbon to hem it, and even changed the thread on my overlocker. Guys, I never change the thread of my overlocker, I only use the black thread. That’s no laziness, it is my signature 😉 but since this fabric is a bit see through, I was worried that the black thread would show through.

Cambie5.jpg

Om even te laten zien hoe ingenieus het patroon is: de zijnaad met zakken zit niet aan de zijkant, maar een stukje naar voren zodat je je handen er een stuk comfortabeler in kunt steken. Ook zorgt het ervoor dat het niet propperig wordt op je heupen.

To show how ingenious this pattern is designed: the side seams with the pockets are not exactly on the sides, but a little more to the front so that it is way more comfortable to put your hands in. It also eliminates bulk on the hips.

Cambie Collage

De instructies bij dit patroon, aangevuld met die op de website, maken het zo makkelijk om deze jurk zo netjes af te werken. Echt, ik kan niets negatiefs zeggen over dit patroon of deze jurk. Oké, één klein kanttekeningetje: de armsgaten aan de achterkant zijn wat krapjes. Maar dat heb ik al aangepast op het patroon voor de volgende versie. Want met zo’n fantastisch patroon laat ik het echt niet bij één exemplaar! De stof ligt al klaar…

The instructions of this pattern, especially together with those on the website, make it extremely easy to give this dress a very neat finish. Really, there is nothing negative to say. Ok, one liiitle thing, the armholes are a bit too tight in the back. But I already adjusted them on the pattern for the next version. Because with such a great pattern, there is no way that this is the only one I’m making. I already have the fabric…