Maxi mania

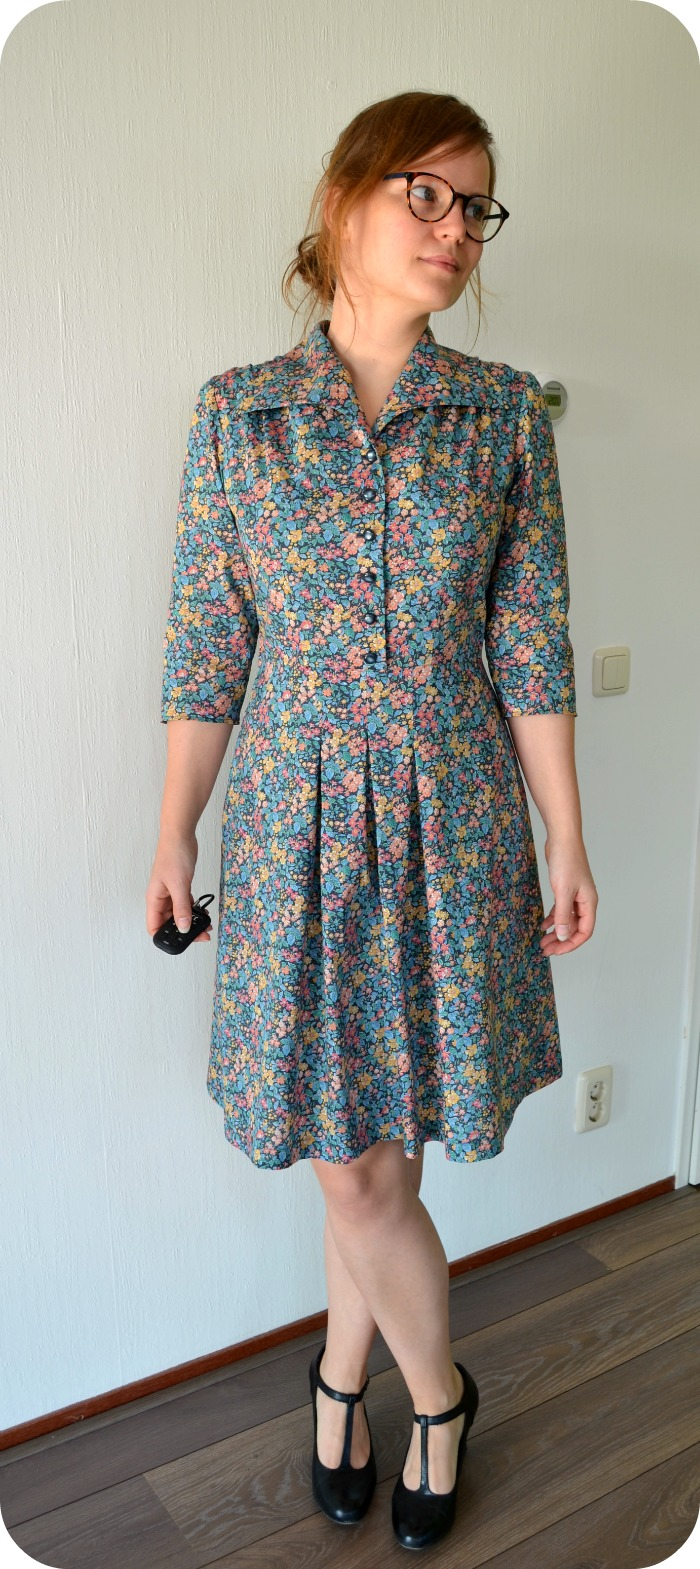
Twee jaar geleden maakte ik een maxi rok. Die draag ik nog steeds regelmatig. Zodra de zon schijnt en het is een beetje warm trek ik m uit de kast. Ideaal ook als het mooie weer je een beetje overvalt en je hebt je benen nog niet geschoren 🙂 Zo ook afgelopen donderdag. Toen realiseerde ik me dat ik er eigenlijk nog wel eentje wilde. Of twee, of drie, je weet hoe dat gaat. Vanaf het werk bestelde ik een paar viscose tricot stofjes zodat ik in het lange weekend lekker aan de slag zou kunnen. Vrijdag had ik ze al in huis, en op zondag ging ik er mee aan de slag.

Two years ago I made this maxi skirt. It gets worn quite regularly. As soon as the sun shines and the temperatures rise it goes into heavy rotation. Maxi skirts are also very convenient when you are a bit overtaken by warm weather and haven’t shaved your legs yet 🙂 I wore that skirt last Thursday and realised that I needed another one. Or two or three maybe, you know how that goes. At work I ordered some viscose jersey fabrics so that I could get to work in the long weekend we’re having. The fabric arrived on Friday and I sewed these skirts up on Sunday. How’s that for instant gratification?


Maxi_06

Maxi_08

Maxi_07


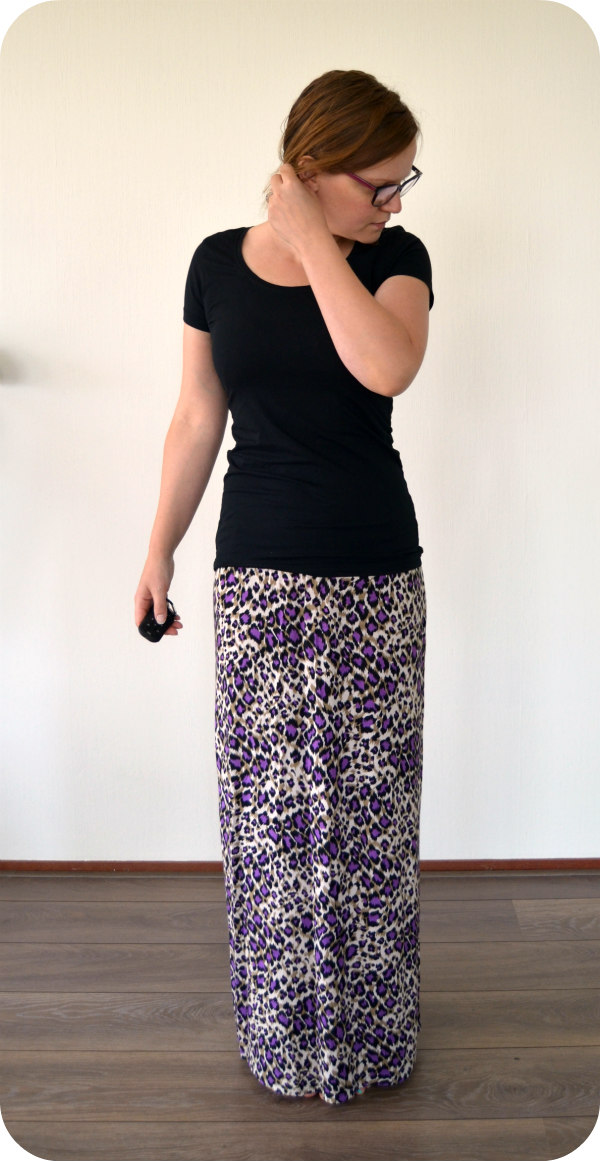
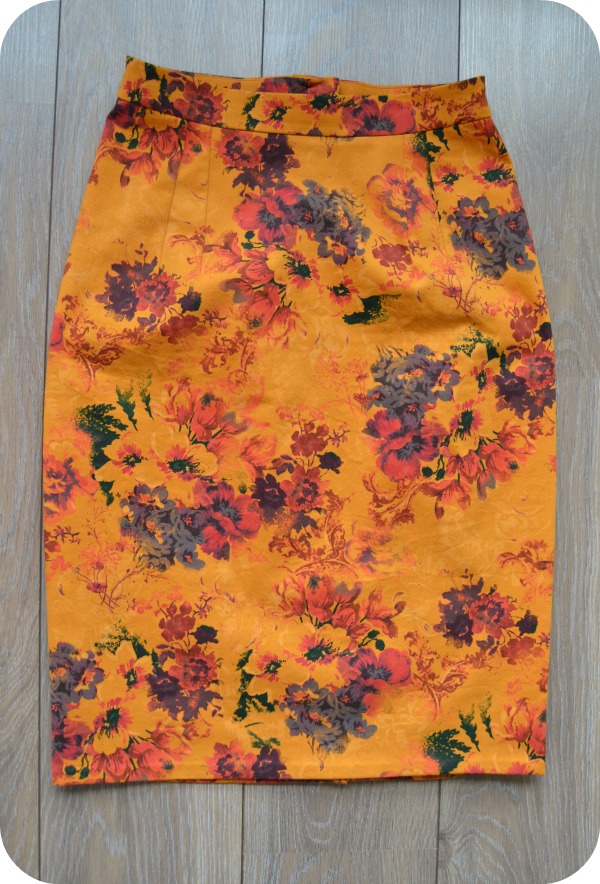
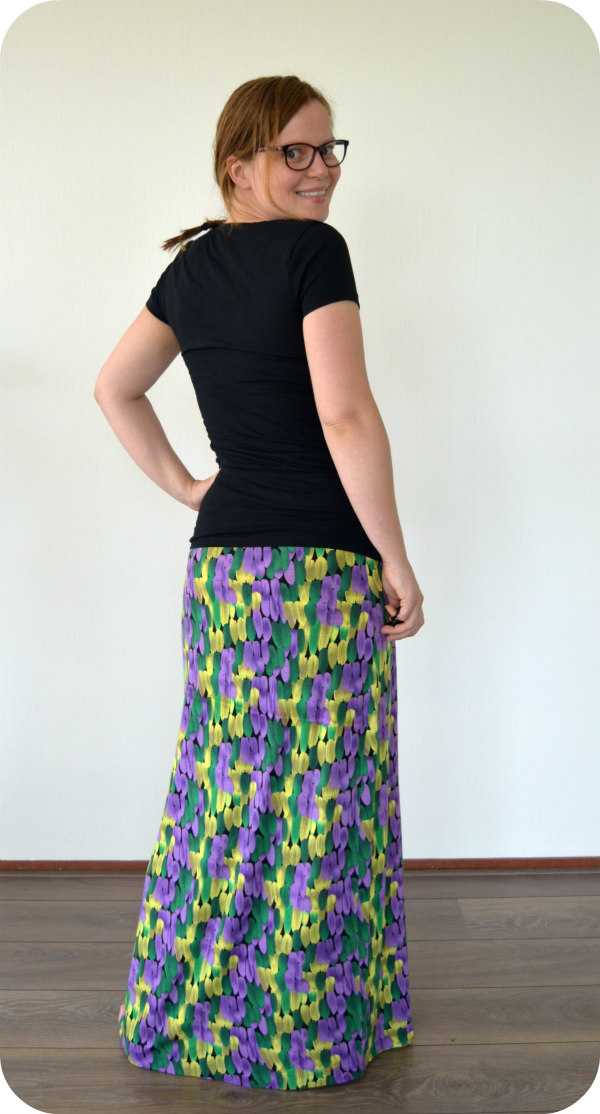
Ik begon met deze paarse. Mijn collega’s vonden deze stof verschrikkelijk, maar ik vind ‘m mooi van lelijkheid 🙂 Ik had per ongeluk wat te weinig van deze stof besteld, maar gelukkig had ik nog een stuk breed elastiek liggen en was er een groot genoeg stuk over om daar een tunnel voor te maken. Het is niet heel netjes, maar dat zie je toch niet aan de buitenkant.

This purple panter print one was first. My co-workers really disliked this fabric but I think it’s pretty because it’s so ugly 🙂 I accidentally ordered too little fabric. but fortunately I had a piece of wide elastic and a big enough scrap to make a casing. It’s not the neatest one ever but it doesn’t show on the outside.


Maxi_09

Maxi_13


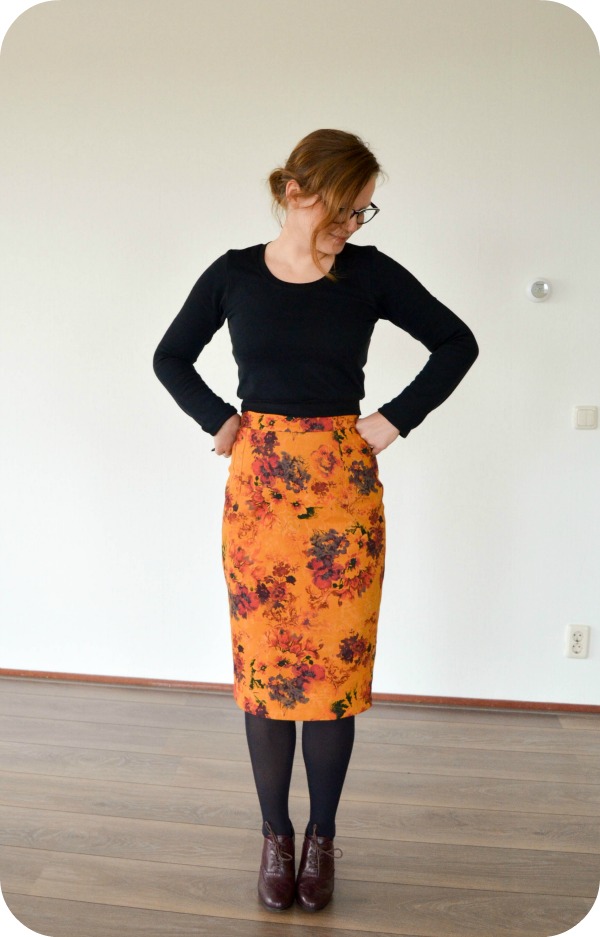
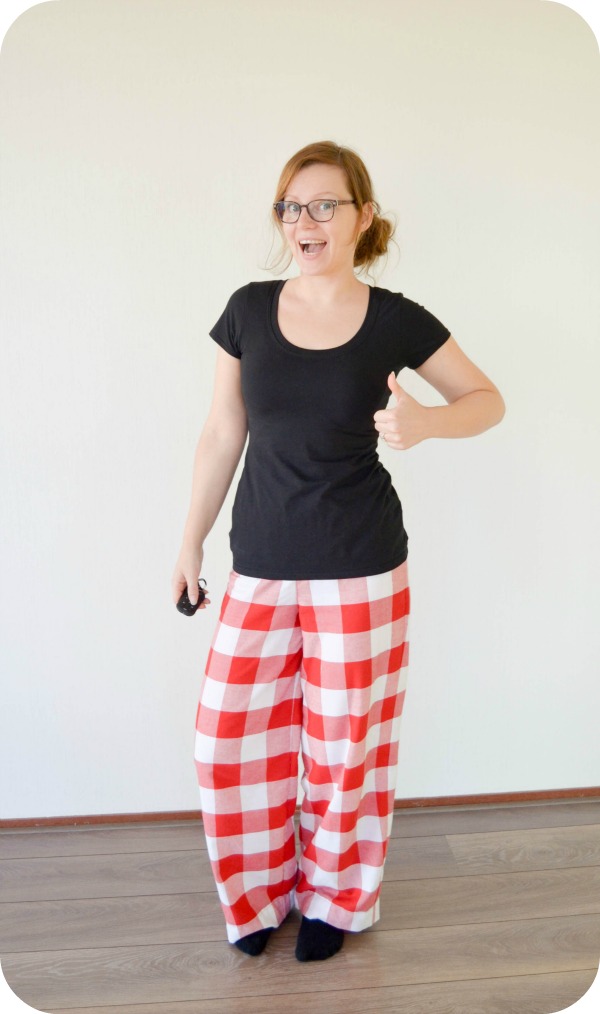
Vervolgens ging ik aan de slag met dit exemplaar:

Next up was this one:


Maxi_01

Maxi_03

Maxi_05


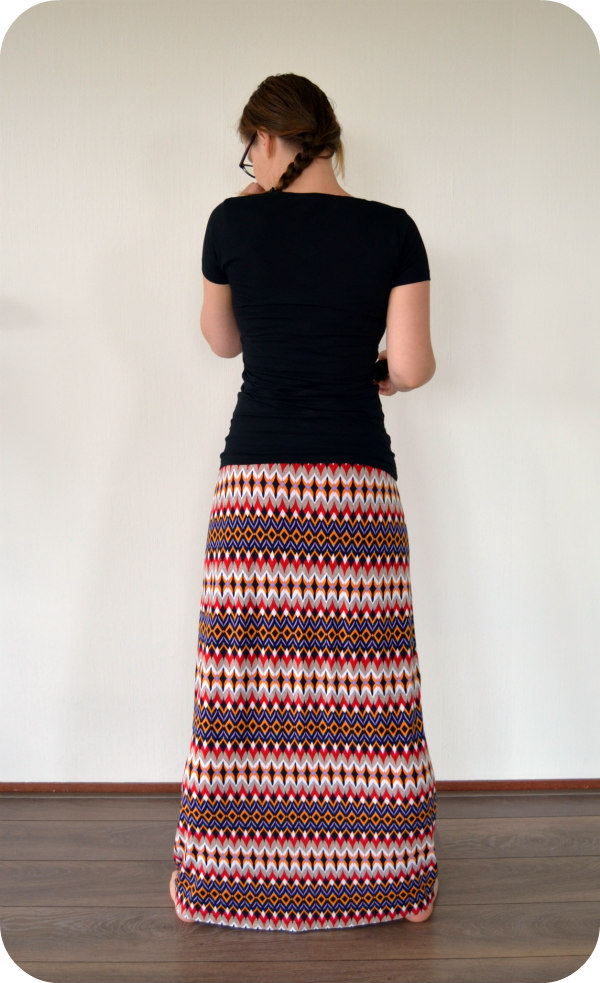
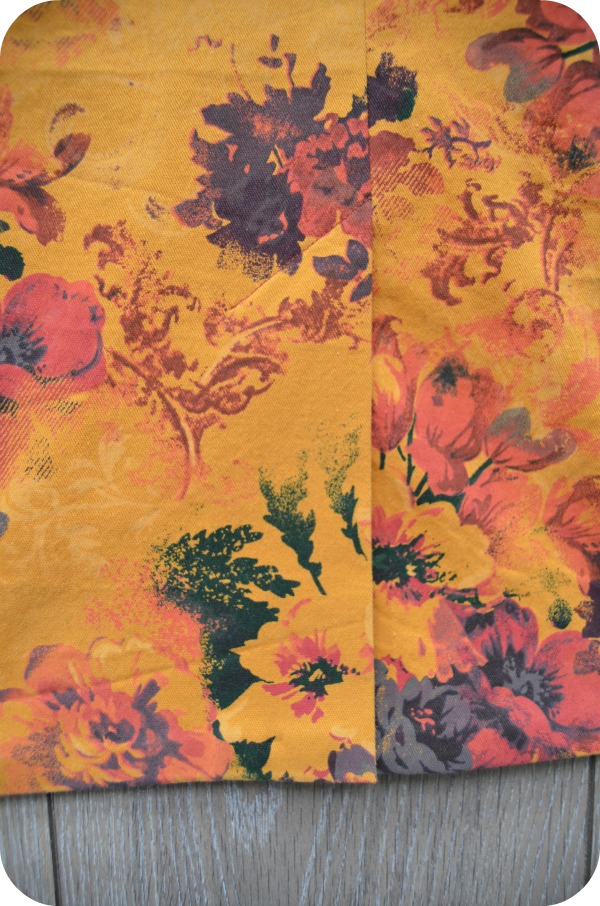
De doorlopende strepen zijn vrij geslaagd al zeg ik het zelf 🙂

The pattern matching worked out fine if I may say so myself 🙂


Maxi_04

Maxi_14

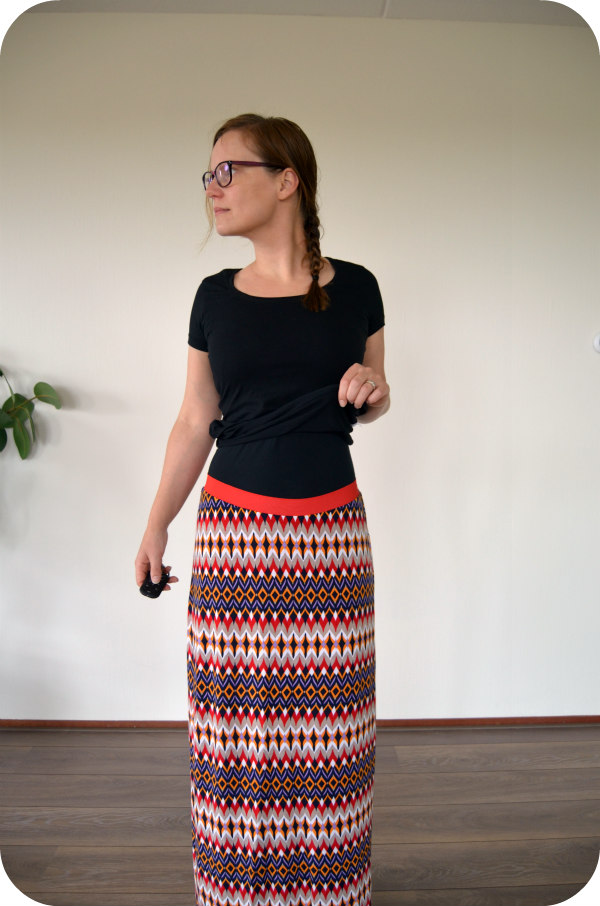
Deze heeft een bijpassende elastieken tailleband zonder tunnel. Lekker makkelijk, snel klaar.

This one has a matching elastic waistband without a casing. Very easy and quick.


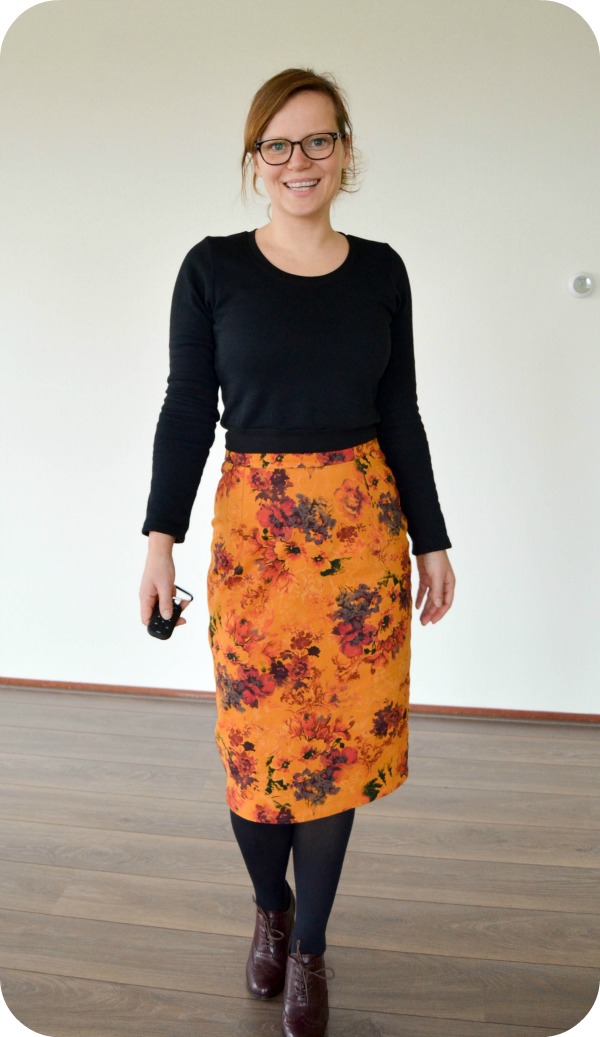
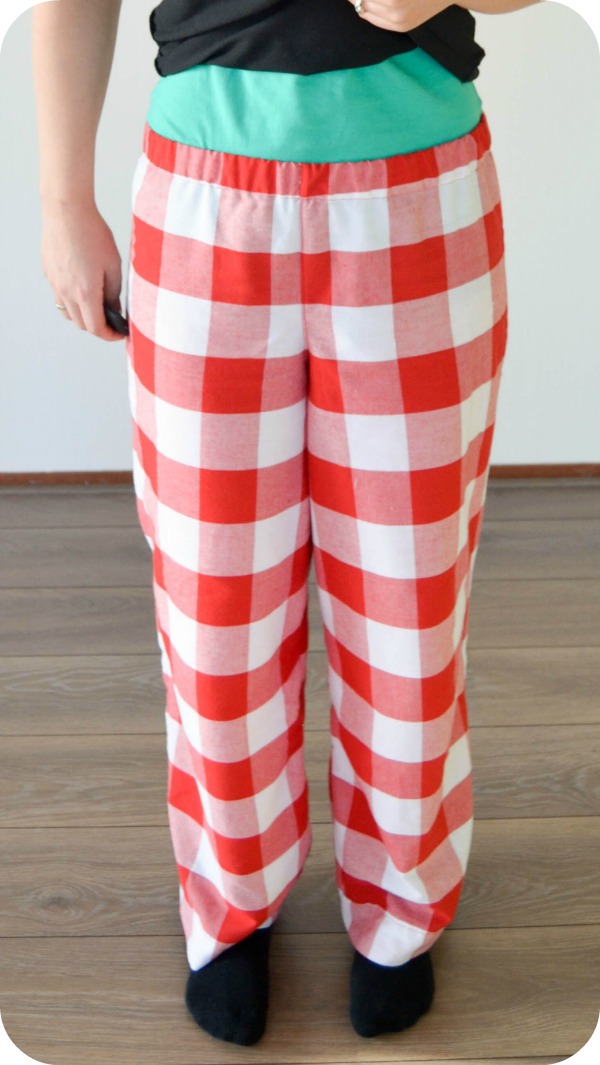
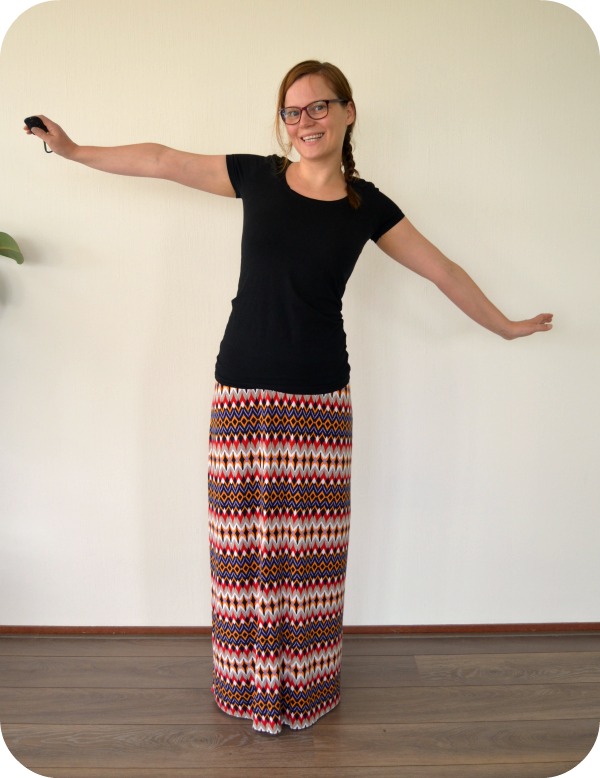
Last but not least ging ik met deze aan de slag:

And last but not least I started working on this one:


Maxi_10

Maxi_11


Deze heeft een tailleband van een dubbelgeslagen stuk stof. Die kun je gewoon zo dragen maar je zou hem ook omgeslagen kunnen dragen, als bij een yoga broek. De realiteit is echter dat ik mijn band niet helemaal recht van draad knipte en dat ‘ie dan niet helemaal mooi wil zitten.

This one has a yoga-style waistband. It’s tight enough to wear it as is, but it can also fold over. Reality though is that I cut it a bit off grain and it doesn’t look good folded over.


Maxi_12

Maxi_16


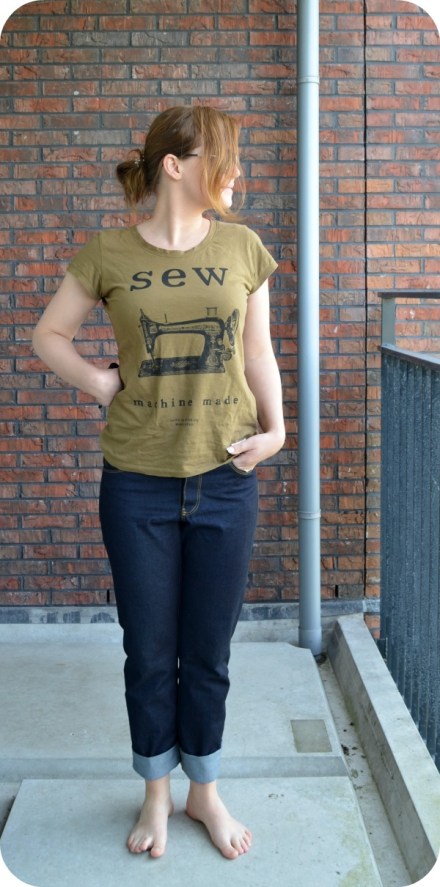
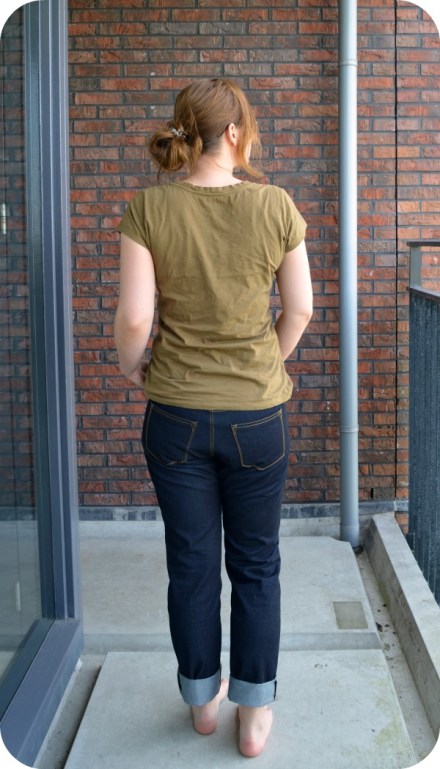
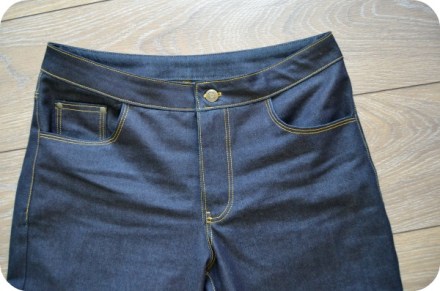
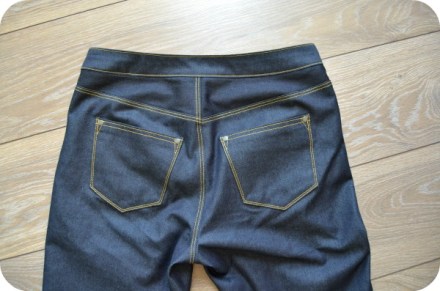
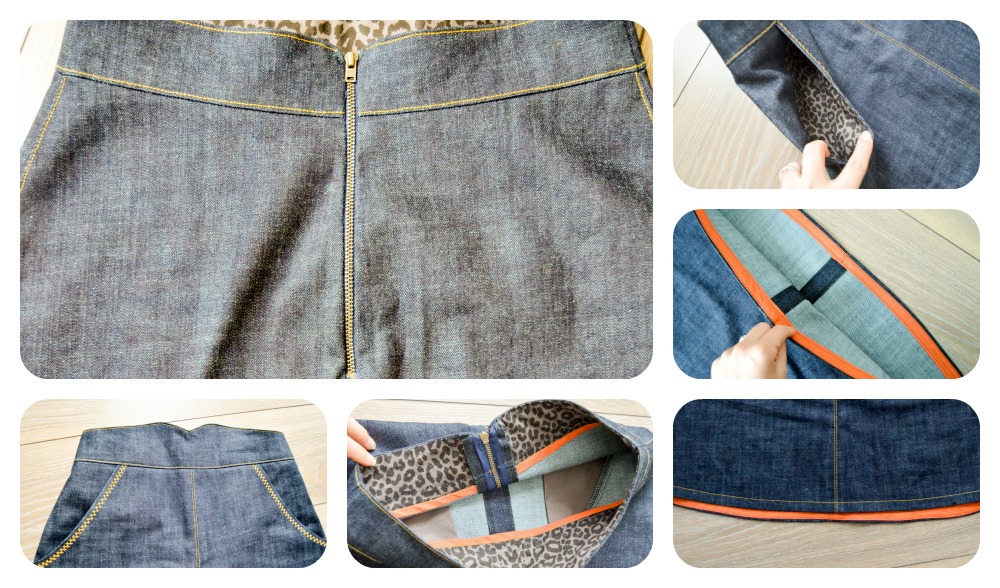
In totaal heb ik denk ik 4 uurtjes werk gehad aan deze drie rokjes. Zijnaden en taillebanden op de lockmachine (behalve de rode, die deed ik op de naaimachine ivm de strepen) en de zoom op de coverlock. Ik koos bewust voor stoffen waar iets van zwart in zit zodat ik de draden niet hoefde te wisselen. Lekker simpel en snel, daar had ik ook wel even zin in na twee spijkerbroeken!

In total these skirts took about four hours. The side seams and waistbands are sewn on the loverlocker (except for the red one, which is made on the sewing machine because of the stripe matching) and hemmed on the coverlock. I deliberately chose fabrics with some black in it so I wouldn’t have to change the threads. Easy and fast, just what I needed after making two pairs of jeans! 


Maxi_02


Laat de zomer nu maar komen! Wat is jouw favoriete zomerse kledingstuk?

Yes, I’m ready for summer now! What’s your favourite summer outfit?


Morgan boyfriend Jeans

Goedemiddag! Het lijkt erop dat het voorjaar eindelijk begonnen is hier in ons kikkerlandje. Stralende zon en ik zit heerlijk op ons balkon deze post te typen. De hele zomer ligt nog voor ons. Wat wil je nog meer?

Good afternoon! It looks like spring has finally arrived in all its glory. The sun is shining and I’m writing this post sitting on our balcony. We have the whole summer ahead of us. What more could you wish for?

Toen ik laatst door mijn blogroll aan het lezen was zag ik de aankondigingspost van de Morgan Jeans van Closet Case files. Ik heb nooit echt het voornemen gehad om spijkerbroeken te gaan maken. Wel eens een mooi stukje spijkerstof gekocht als ik het tegenkwam maar altijd voor ‘ooit’. Ik had wel in mijn achterhoofd het idee om een oude spijkerbroek die ik ooit had na te maken, maar dat plan was veilig weggestopt in de vakjes ‘te veel werk’, ‘ik weet niet hoe dat moet’ en ‘ooit als ik er tijd voor heb’ in mijn hoofd. Tot ik dit patroon zag dus, toen realiseerde ik me dat een losser model spijkerbroek mist in mijn kast én dat ik dit patroon misschien wel kon gebruiken om die ene spijkerbroek na te maken.

When I was reading through my blogroll the other day I saw the announcement post for the Morgan Jeans from Closet Case files. I have never really had the intention to make jeans. I did buy the odd length of denim fabric when I ran into it but it was always for ‘someday’. There was also an idea in the back of my mind to recreate a pair of jeans I once had but that plan was safely tucked away in the ‘too much work’, ‘I don’t know how to do that’ and the ‘someday when I have the time’ folders of my mind. Until I saw this pattern, and suddenly I realised I wanted a pair of loose fit jeans and that I could perhaps use this pattern to recreate those jeans I once had.


Morgan jeans 1

Tadaa! Ik maakte van een restje spijkerstof een proefmodelletje en naar aanleiding daarvan voegde ik wat lengte toe aan de kruisnaad aan de voor- en achterkant, en verwijderde wat wijdte aan de bovenkant van de achterkant. Ook deed ik een ‘knock knee adjustment’ omdat mijn knieën wat naar binnen staan. Het kruis is aan de voorkant wat te lang maar dat liet ik zo, omdat ik graag een wat relaxte look wilde.

Ta daa! I made a quick muslin from a denim remnant and then lengthened the crotch curve on both front and back a bit, and took out some widht at the back yoke. I also did a knock knee adjustment. The front crotch is not fitting right but since I wanted a relaxed fit I decided to leave it as is.

Morgan jeans 3

Hier de achterkant. Ook vrij losjes, maar de kruisnaad is nog wel een beetje te kort hier.

The back side. Loose fit but the crotch seam is a little too short here.

Qua pasvorm is het ongetwijfeld geen perfecte spijkerbroek te noemen maar afgezien van die te korte achterkruisnaad (3x woordwaarde :D) is het wel precies zoals ik in gedachten had. Kortom: hoera, de perfecte casual spijkerbroek om onder andere even snel mijn pyjamabroek te vervangen voor een tripje naar de supermarkt! Hij zit heerlijk, en ik denk dat de spijkerstof met de tijd ook nog wat soepeler gaat worden, dus het kan alleen maar nog beter worden.

Fit-wise this is not a perfect pair of jeans, but the short back crotch aside, it is just as I intended. So: yay! The perfect pair of jeans to for example change into for a quick trip to the supermarket! It’s really comfortable and I think the fabric will only get softer with wear so it can only get better right?

Even een paar details, omdat ik erg trots ben hoe het er allemaal uitziet 🙂

Here are a few detail shots, because I’m quite proud of how they runed out 🙂

Morgan jeans 4

Morgan jeans 5

Morgan jeans 6

Zoals je ziet gebruikte ik in de lockmachine hetzelfde kleur garen als voor het doorstikken. Dat had ik toevallig liggen, en ik hou van dat soort details. De zakken zijn uiteraard gemaakt van een stofje met bloemenprint. En last but not least liet ik de riemlusjes erbij zitten. Ik draag nooit een riem, dus de riemlusjes op mijn spijkerbroeken zijn een beetje als mannentepels: compleet overbodig.

As you can see the overlocking threads have the same colour as the topstitching thread. I’m a sucker for little details like that. The pockets are abviously made of a floral fabric. Is there any other way really? Last but not least, I omitted the belt loops. I never wear a belt with jeans, so the belt loops are to me a bit like a man’s nipples: completely unneccesary.

Morgan jeans Collage

Deze foto’s heb ik een stuk lichter gemaakt zodat je de ‘foutjes’ in de pasvorm goed kan zien. Ik heb nog een aantal aanpassingen gedaan aan het patroon en die getest, maar ik krijg die extra stof bij het kruis maar niet weg. Tijd om wat nieuws te proberen dus, en ik heb nog de Sandra jeans van Style Arc liggen. Ik denk dat ik die nu maar eens uitprobeer, om te kijken of ik daar die ene spijkerbroek van lang geleden mee kan namaken. Het was een bootcut model dus er zijn wel wat aanpassingen nodig, maar we zullen zien!

I brightened these pictures so the fit issues are more obvious. I did some more adjustments and muslined them but I just can’t get the front crotch right. So, time to try something else, and I remembered I also had the Sandra jeans pattern from Style Arc. I think I’ll give that one a go to see if it’s the right pattern to use to recreate the other pair of jeans. It was a bootcut one so it’s gonna need some modifications but first I want to get that crotch seam right! 

Vintage pledge: Simplicity 2549

Hierbij de tweede jurk die ik voor de Vintage pledge maakte: Simplicity 2549. En ja, ook bij dit patroon was de kraag datgene waar ik voor viel.

Here is my second Vintage pledge dress: Simplicity 2549. And yes, it was again the collar that sold me on this pattern.


Simplicity2549

Simplicity2549_01


Om het patroon passend te krijgen tekende ik, net als bij Butterick 6869, de kraag op mijn basispatroon. Ook splitste ik de figuurnaad in de taille op in twee figuurnaden, net als het patroon heeft. Dat had voor het zicht niet gehoeven, je ziet het bijna niet in deze donkere stof. Maar ja, je maakt een patroon na of je doet het niet he? 🙂

To get the pattern to fit me I just drew the collar on my basic bodice, just like with Butterick 6869. I also split the waist dart into two darts. It doesn’t really show in this dark fabric but hey, you recreate a pattern or you don’t, right? 🙂


Simplicity2549_02

De rok die bij het patroon hoort bestaat uit duizend-en-één plooitjes. Ik was heel erg van plan om die te gebruiken, tot ik de patroondelen met al die plooitjes zag. Mijn prefrontale cortex ging vol in de ankers en ik besloot om een gerimpelde rok te maken in plaats van al die plooien. De rok bestaat uit twee volledige stofbreedtes van 1.40 m en is dus erg vol.


pleated pattern pieces. Just no.

            Pleated pattern pieces. Just no.

The skirt pattern has a thousand and one small pleats. I completely intended to use the pattern pieces but when I saw them my brain froze and I decided to go with a gathered skirt instead. It’s made of two widths of fabric so it’s very full.


Simplicuy2549_06


De kraag en het kleine knoopsbiesje eronder zijn mijn favoriete onderdelen van deze jurk. De knopen had ik nog liggen, ik haalde ze van mijn New Look 6000 jurk voordat ik die weggooide. Ze passen perfect bij deze stof. Het duurde even voordat ik besloot welke stof ik wilde gebruiken voor dit patroon. Uiteindelijk bestelde ik deze omdat een maritieme touch me wel een goed idee leek bij deze grote kraag.

The collar and the little button placket are what I like the most about this dress. The buttons came from stash, I took them off of my New Look 6000 dress before I threw it away. They’re perfect for this fabric. It took a while to decide which fabric to use. Eventually I ordered this anchor fabric because I thought a nautical theme would suit the big collar.


Simplicity2549_04


Simplicity2549_05

De zij- en achterkant. Ik draag hier een petticoat onder de rok maar dat zie je bijna niet eens, zo vol is ‘ie.

Side and back view. I’m wearing a petticoat but you can hardly tell because of the fullness of the skirt.


Zoals ik al zei is de kraag één van mijn favoriete dingen aan deze jurk. Maar stiekem is dit wat ik er het leukste aan vind:

As I said the collar is what I like most about this dress. But secretly this is my favourite feature:


Simplicity2549_03


De boze stiefmoeder van Sneeuwwitje nadoen!

Impersonating Snowwhites’ wicked stepmother! 


Vintage pledge: Butterick 6869

butterick 6869 07


Een tijdje terug kocht ik dit patroon op Etsy. Ik wilde al een poos een jurk met een ‘wing collar’ (geen idee wat de Nederlandse naam daarvoor is, vast geen vleugelkraag 😉 ) maken, maar wist niet precies hoe ik daar een patroon voor moest maken. En dus kocht ik er maar eentje.

A while ago I bought this pattern on Etsy. I wanted to make a dress with a wing collar for some time now but didn’t know how to draft one myself. So I bought a pattern that has one.


Vervolgens lag het een poos te wachten op actie. Eigenlijk alle jurken van gewoven stoffen die ik de afgelopen tijd heb gemaakt zijn op basis van mijn basispatroon. Gegarandeerd passend dus. Van deze jurk wist ik dat niet en moest ik een proefmodelletje maken. In mijn hoofd Heul Erg Moeilijk (in werkelijkheid niet, uiteraard). Ook wist ik niet zo goed welke stof ik wilde gebruiken. Het liefst één met een klein bloemetje op een donkere of rode achtergrond, maar vind dat maar eens. Ik moest er uiteindelijk helemaal voor naar Antwerpen (hè, wat vervelend). Daar bezocht ik samen met Hanne Julija’s en kocht er deze prachtige Liberty print. De duurste stof die ik ooit kocht, maar dat mag de pret niet drukken.

Then it laid around for a while waiting for action. Pretty much every dress I’ve made from a woven fabric recently was based on my basic bodice. So I knew the fit would be good. This pattern would need a muslin and probably some adjustments, in my mind Very Difficult (but in reality not, of course). Also, choosing a fabric was difficult. I wanted a small scale floral with a dark or a red background, but that was impossible to find. In the end it took a trip to Antwerp to find it. I visited Julia’s shop with Hanne and bought this lovely Liberty print. The most expensive fabric I even bought but who cares (beside my bank account).


https://www.instagram.com/p/BCkjS9PEe6v/?taken-by=ingefrwrd


Uiteraard moest ik wat aanpassingen doen aan het patroon. Het verschilde zó van mijn basispatroon, vooral in de lengte, dat ik de kraag daar maar op getekend heb. Vervolgens roteerde ik de figuurnaad aan de zijkant van het voorpand naar de schouder en veranderde hem in rimpels. De vorm van het armsgat behield ik voor het grootste deel. Het proefmodel paste vervolgens wel vrij oké, ik heb alleen het armsgat een centimeter verhoogd en 1,5 centimeter wijdte toegevoegd aan de mouw. Ook haalde ik nog ietsje lengte uit de rimpels bij de schouders. De rok heb ik opgemeten en die leek wel goed te passen, dus daar veranderde ik behalve flink inkorten niks aan.

Of course I had to make some changes to the pattern. It was so different from my basic bodice, expecially in length, that I decided to just put the collar on my bodice and transfer the bust dart to the shoulder seam and turn it into gathers. I kept the shape of the armscye for the biggest part. The muslin fitted quite okay, all I did was raise the armhole by a centimeter and do a 1,5 centimeter full bicep adjustment. I also took a bit of lenght out of the shoulder gathers. When I measured the skirt it seemed to be fine so I didn’t make any changes there, beside shortening it.


butterick 6869 01.jpg


Dit is ‘m uiteindelijk geworden! De knoopjes had ik nog in mijn voorraad, ooit een keer gekocht op een rommelmarkt.

This is how it turned out! The buttons are from stash, once bought at a flea market.

De mouw en armsgat aanpassingen waren precies goed, wat kijk eens wat ik kan:

The sleeve and armscye adjustments were just right because look at what I can do:


butterick 6869 02

butterick 6869 003


En dat op comfortabele wijze zonder dat het ook maar ergens krap voelt. Hoera! Hoera voor de hele jurk ook, hij zit heerlijk, en wat leuk is het om van een vintage patroon te naaien. Zulke leuke details, die de pasvorm beter maken: een figuurnaadje in de schoudernaad aan de achterkant (die ik wel overnam trouwens), drie figuurnaadjes in de mouw ter hoogte van de elleboog. De vorm van de rok vind ik ook mooi, die ga ik denk ik vaker gebruiken.

And very comfortably too, no tightness whatsoever. Yay! Double yay for the entire dress too, it’s so comfortable and so much fun to sew a vintage pattern. Such fun little details, for a lovely fit: a dart in the back shoulder seam (which I did transfer to my bodice), and three darts at the elbow. I also really like the shape of the skirt, which I’ll probably use again.


don't be fooled by the cranky look on my face :)

don’t be fooled by the cranky look on my face 🙂


Een paar kleine dingetjes die ik een volgende keer anders zou doen: de rok wat langer laten, een inimini beetje meer ruimte bij de buste en een forward shoulder adjustment. Dat doet niks af aan hoe blij ik ben met deze jurk, maar hey, er moet altijd wat te verbeteren overblijven toch?

A few small changes I would make to this pattern for the next time: leave the skirt a bit longer, a slight FBA and a forward shoulder adjustment. This doesn’t affect my overall hapiness at all but hey, there’s Always room for improvement right?


butterick 6869 04


De achterkant. Het grappige van het kraagje vind ik dat ‘ie middenachter rechtopstaand is, en pas omvouwt bij de schouder.

Back view. I like how the collar stands up at CB and doesn’t fold over untill the shoulder seam.


Naast de duurste jurk die ik ooit voor mezelf gemaakt heb, is dit ook de eerste helft van mijn Vintage Pledge. Ik besloot om daar aan mee te doen als een stok achter de deur, zodat ik niet twee mooie (en dure!) patronen zou kopen en vervolgens in de la zou laten liggen. Dat heeft al voor de helft gewerkt dus 🙂

So, besides the most expensive dress I’ve ever made for myself, this is also half of my Vintage Pledge. I decided to join Marie and Kerry to motivate myself to actually sew those two wonderfull (and expensive!) patterns that I bought. So far it worked 🙂


butterick 6869 06


Uiteraard moest ik ook even het plaatje op het patroon nadoen. Wat is het duurste dat jij ooit hebt gemaakt voor jezelf? En wat voor bedrag per meter geef jij nog met een gerust gevoel uit aan stoffen?

Obviously I had to imitate the pattern picture. What’s the most expensive thing you have ever made for yourself? And how much money are you willing to spend comfortably on a fabric?

Gertie’s pencil skirt

Sommige patronen bevallen zo goed dat ze een ‘go to’ worden voor een bepaald type kledingstuk. De kokerrok uit ‘Gerties new book for better sewing’ is zo’n patroon voor mij. Ik maakte hem al drie keer eerder: één met ruitjes, één met een tropische print, en één die anoniem in de kledingkast is verdwenen 🙂 Dit keer maakte ik ‘m van een stretch keper katoen, afgewerkt met een of ander laagje waardoor de goede kant van de stof bijna als een soort suede aanvoelt. Dat was niet wat mij zo trok in dit stofje – dat was de kleur en de print.


pencilskirt2


Some patterns just fit so well they become a TNT – Tried and True. For me, the pencil skirt from Gerties new book for better sewing is one of those patterns. It’s my go-to pencil skirt pattern. I made it three times so far: a plaid one, a loud tropical print one and an unblogged one. This time I used a stretch cotton twill with some sort of finish on the right side of the fabric that makes it feel a bit suede-like. That’s not what drew my  attention to this fabric though – it was the colour and the print.


pencilskirt6


Na de drie eerdere versies besloot ik een kleine wijziging te doen aan het patroon. Ik haalde wat lengte van de bovenkant van het voorpand af. Anderhalve centimeter middenvoor, uitlopend tot niks aan de zijkanten. Daar bobbelde het bij mijn andere rokjes namelijk een beetje. Ik heb dat wel vaker bij rokjes.

After the previous three versions I decided to do a little alteration to the pattern. I took out some lenght at the top of the front. 1.5 Centimeter at center front, tapering to nothing at the side seams. On the other skirts I noticed there was some excess fabric there.


pencilskirt3


Verder veranderde ik de loopsplit in een verdekte loopsplit. De split in mijn Oonapalooza rokje is een paar keer gescheurd en dat wilde ik liever niet nog een keer.  Bovendien ziet het er ook een beetje sjieker uit, al zeg ik het zelf.

I also changed the slit at the CB into a walking vent. The slit of my Oonapalooza skirt tore a few times and I didn’t want that to happen again. It also looks a bit more fancy I think.


pencilskirt7


Verder heb ik eigenlijk niet zoveel te vertellen over deze rok… Ja, nog dat de knopen aan de tailleband van de 100 yen shop in Japan komen. Heerlijke sneupwinkeltjes zijn dat!

There’s not much more to say about this skirt really… Just that the buttons on the waistband are from the 100 yen shop in Japan. Great places to snoop!


pencilskirt4


pencilskirt5


De print vind ik echt heel tof, maar ik heb bij het knippen van het patroon wel even opgelet dat ik geen schaamlap-boeketje creëerde 🙂

I love the print, but I did pay attention to avoid making a floral fig leaf while cutting the fabric 🙂

pencilskirt1


Ik denk dat een kokerrokje, naast de halve cirkel, toch wel één van mijn favoriete rok-soorten is. Wat is jouw favoriete roksoort en/of -patroon?

I think a pencil skirt is one of my favourite skirt styles, along with a half circle. What’s your favorite skirt style and/or pattern?

the perfect t-shirt…dress!

Dat is dus het doel, het perfecte t-shirt patroon. De eerste testversie zie je hier. Op basis daarvan paste ik het patroon wat aan. En om die aanpassingen te testen maakte ik een jurk. Logisch toch 🙂

So, the perfect t-shirt pattern, that’s the goal. You can see the first try here. Based on that one I adjusted the pattern a bit. And to test those changes I made a dress. Makes sense, right? 🙂


tshirtdress3


Om een jurk te maken van het patroon verlengde ik het voor- en achterpand vanaf de taille met 60 cm, zodat de zoom net boven mijn knie valt. De zijnaden deed ik vanaf de taille wijd uitlopen en maakte ik ook 60 cm lang. Vervolgens een zoom tekenen met een flauw boogje en klaar is Kees.

To make a dress from the pattern I lengthened the front and back bodice by 60 cm, starting at the waist. For me that’s the perfect length to make it end just above the knees. The side seams flare out from the waist down and are also lengthened bij 60 cm. Then I added a hemline with a slight curve et voila!


tshirtdress4


De stof komt van de Jan Sikkes hier in Leeuwarden. Deze maand hadden ze een aanbieding waarbij je bij aankoop van minimaal 5 meter stof 25% korting kreeg. Aangezien ik begin januari jarig was vond ik dat ik daar wel gebruik van mocht maken 🙂 Ik kocht deze stof met de Lady Skater in gedachten, maar omdat er een vrij duidelijke horizontale lijn in de stof zit zag ik daar toch maar vanaf. Door de vorm van het rokdeel krijg je dan namelijk dit effect en dat vind ik niet zo mooi:


paint

The fabric is from my local fabric store. They have a january sale: buy at least 5 metres of fabric and get 25% off all of them. Since my birthday was at the beginning of january I figured the only thing to do was to take advantage of that! I bought this fabric with the Lady Skater in mind but because the print has a horizontal line in it, I decided wasn’t the right pattern for this fabric. The shape of the skirt causes what you can see in the above image and I don’t like that.


tshirtdress5


Hier zie je de stof wat beter. Het donkere is heel donkerblauw. Het is een soort jaquard jersey, van buiten heel zacht, maar aan de binnenkant zit een soort gaas en dat is wat stugger. Wel heel lekker warm!

You can see the fabric a bit better here. The dark is a very dark blue. It’s some kind of jaquard jersey, very soft on the outside but the inside is a bit more rigid. It’s nice and warm!


tshirtdress1


tshirtdress2


Er zit een naad middenachter, dat kon niet anders vanwege de stoflengte. Het was heel goed gelukt om het patroon te laten doorlopen, maar ik moest de onderrug een beetje innemen en daardoor valt er op dat stuk net een stukje weg. Ik probeerde om het patroon ook door te laten lopen op de mouwen maar zoals je ziet was die poging minder geslaagd 🙂

There is a center back seam, because I didn’t have enough fabric to cut it on the fold. I patternmatched the CB seam and it worked out great, but then I had to take in the lower back a bit and that threw it a bit off. I also tried to pattern match the sleeves but as you can see that attempt was less succesfull 🙂


De jurk zelf vind ik wel erg geslaagd en de patroonaanpassingen die ik aan mijn t-shirt patroon deed (iets bredere schouder, iets meer wijdte bij de buste) ook. Ik kan weer verder met de T-shirts en als klap op de vuurpijl heb ik er een fijne jurk bij!

The dress in itself and the alterations to the t-shirt pattern however (little bit wider shoulders and a little extra width at the bust) were succesfull. I can carry on with the tees and have a nice new dress to boot, yay!

Naaigenaardigheden

Eigenaardigheden, die hebben we allemaal wel toch? Ik wel in ieder geval! Zo ook bij het naaien.

Oddities, we all have them right? I know I have! Sewing oddities too.


Bijvoorbeeld met locken. Ik heb het allerliefst dat de bovenkant van de gelockte naad zichtbaar is, en niet de onderkant. Vind ik mooier.

Take overlocking. I want the upper part of the overlocked seam to be visible, and not the bottom part. Because I think it looks better.


JungleJanuary08

Zo zie ik het graag!

This is how I like it!


Dit weekend bedacht ik me dat deze zelfopgelegde regel eigenaardigheid maar flauwekul was en ik het mezelf moeilijker maakte dan nodig. En dus probeerde ik tijdens het maken van een sweater om het los te laten. Dat voelde heel raar en daarom besloot ik mezelf gewoon m’n eigenaardigheid te gunnen. Waarom ook niet?

This weekend I told myself that this self-imposed rule sewing oddity was silly and I was only making this hard on myself. And so I tried to let it go while making a sweater. It felt really weird and I decided that it was just ok to have some oddities. Nothing wrong with that, right?


Heb jij ook naaigenaardigheden? Zo ja welke? Heb je er soms ook last van of haal je je schouders erover op?

Do you have sewing oddites too? If so, what are they? Do they bother you or are you just fine with them?


Hello Japanese kitties


Japanesekitties01


Bestaat er een betere souvenir dan stoffen? Ik denk het niet. Het is weer een beetje vakantie als je er thuis iets van maakt, en elke keer als je dat draagt word je herinnerd aan die fijne vakantie. Deze stof kocht ik in Japan, toen we daar vorig voorjaar waren. De winkel heet Mihama Cloth en verkoopt allemaal coupons van stoffen, in verschillende lengtes.

Is there a better souvenir than fabric? I don’t think so. It’s a bit like the holiday again when you’re sewing, and every time you wear your garment you are reminded of a wonderful trip. This fabric was bought in Japan, last spring. The store is called Mihama Cloth and sells pre-cut lengths of all sorts of fabrics.


fabric store


Eigenlijk wilde ik een ander patroon gebruiken voor deze stof, de Edith van Maria Denmark. Ik was alleen even vergeten dat ik maar 2.00 x 1.10 meter stof had en dat paste dus niet. Helaas pindakaas. Wat wel paste, was mijn eigen basispatroon met een gerimpelde rok. Hetzelfde patroon als ik voor het bovenlijfje van de Flamingo-jurk gebruikte. En voor nog een paar anderen, maar die zijn niet op mijn blog beland.

At first I wanted to use another pattern for this fabric, Maria Denmark’s Edith dress. However I forgot that there was only 2.00 x 1.10 meter of fabric and I coulnd’t make that work. My basic bodice came to the rescue and I added a gathered skirt. It’s the same bodice as the Flamingo dress, and some other dresses that haven’t made it to the blog.


Japanesekitties Collage 2


Na -tig versies van dit bovenlijfje en elke keer weer wat schaven aan de pasvorm is het nu wel zo ongeveer perfect. Heel fijn om dit te kunnen gebruiken als basis voor allerlei andere soorten bovenlijfjes. Ik denk dat de volgende versie prinsessennaden krijgt.

After many incarnations and lots of fine-tuning it’s pretty much a perfect fit now. I love to play around and use it for all sorts of bodice shapes. Next up is probably a princess seamed version.


Japanesekitties03


De rok is dus een gerimpeld exemplaar, bestaande uit twee rechthoeken van zelfkant tot zelfkant. De randen heb ik als naadtoeslag gebruikt en zijn dus nog zichtbaar aan de binnenkant.

So the skirt is a gathered one, I just cut two rectangles of the full width of the fabric and used the selvedges as seam allowances, which means that they are visible on the inside.


Japanesekitties04

Japanesekitties05


De stof is vrij stevig en ik denk dat dat de oorzaak is dat de onderkant van het bovenlijfje wat naar voren uitsteekt, zoals je kan zien op de foto hierboven. Als ik geen vestje aantrek dan doe ik denk ik een riempje om, zodat het wat beter afkleedt.

The fabric is pretty firm (a cotton broadcloth maybe?) which I think causes the front bodice to stick out a little at the bottom. You can see it on the picture above. If I’m not wearing a cardigan I’ll probably wear a small belt with this dress, to tame the sticking-out a bit.


Japanesekitties02


Afgezien van dat maakt deze jurk me vrolijk. Wie wil er nou niet een jurk met Japanse gelukspoezen?

Aside from that this dress makes me happy. Who doesn’t want a dress with Japanese Lucky cats?


Japanesekitties Collage


Nog een paar kleine details: de hals en armsgaten zijn afgewerkt met een beleg van biaisband en de zoom is met een kantje afgewerkt. Daar had ik precies genoeg van, op de centimeter af. Zou dat de invloed van de gelukspoezen zijn?

And some details: the neckline and armholes are faced with bias binding, and I used some lace tape for the hem. I had exactly the length needed in my stash. Maybe the Lucky cats had anything to do with that?


Japanesekitties07


Hier moest ik ook wel even om lachen. Cat-matching is een ding toch?

This made me laugh, too. Cat-matching is totally a thing right?

Ginger, take two

ColetteGinger11


Dat lijkt er meer op! / That’s more like it!


Nog steeds een beetje ruimte maar ja, je wil ook wel eens eten/zitten/autorijden etc 🙂

Still a bit of room but hey, you might just want to eat/sit/drive a car etc 🙂


ColetteGinger14


Na de vorige maakte ik het patroon een maatje kleiner (nu een 6), en nam ik wat extra breedte én lengte weg ter hoogte van de buik. Want het vorige rokje is niet alleen wat te groot, maar het had ook dit:

After the previous version I made the pattern a size smaller (now a 6) and also took a bit of extra width and length away at the belly. Because the previous one was not only too big, it also had this:


ColetteGinger13


Een poeltje stof dat daar niet hoort. Toen ik erop ging letten zag ik dat dat bij heel veel versies aanwezig is. Zou het te maken hebben met het feit dat het patroon geen figuurnaadjes heeft maar dat die in de middenvoor-naad verwerkt zitten? Gelukkig was de oplossing vrij simpel: halve cm breedte weg en een cm lengte, die ik er aan de onderkant weer aanplakte. Toen was het weg!

A bit of fabric pooling. It looks like a lot of the Ginger skirts on the internet have this. Maybe this has something to do with the waist darts being blended into the center front seam? The solution was very easy: I removed half a cm of width and a cm of length, which I added back at the cf hem. Pooling gone!


ColetteGinger12

not a flattering shot but you can see here that the pooling is all gone


De stof was een coupon van de Jan Sikkes hier, een mooie stevige stof voor nog geen tientje. Ik heb genoeg over om nog een rokje of korte broek te maken, dus het was flink waar voor m’n geld!

The farbric is a remnant from my local fabric store, it’s sturdy and a bit heavy and cost me less than € 10. I have enough left to make another skirt or a pair of shorts, so that’s a lot of value for my money!


ColetteGinger08


Verder voegde ik steekzakken toe aan het patroon, die ik versierde met een sierstiksel. Het was voor het eerst dat ik echt doorstikgaren gebruikte en dat maakt echt wel een wereld van verschil.

I also added slash pockets, and used a decorative stitch on them. This was the first time I used proper topstitching thread and it makes a world of difference.


ColetteGinger10


Verder zit er aan de achterkant een zichtbare rits. Een echte zeg maar, niet eentje die er gewoon vanaf de buitenkant opgestikt is. Ik gebruikte daarvoor deze tutorial maar maakte het mezelf moeilijk door de naad waar de rits komt met een lange steek vast te naaien in plaats van beide kanten te ‘staystitchen’. Oeps. Daardoor rafelt de stof een beetje aan de onderkant van de rits. Ik heb er een extra stiksel overheen genaaid waardoor het niet verder rafelt. Probleem opgelost 🙂

The zipper is an exposed one. A proper exposed one, not just one sewn on on the outside as I’ve done up untill now. I followed this tutorial but made things hard for myself by basting the seam where the zipper goes instead of staystitching both sides. Oops. It caused a bit of fraying at the bottom of the zip. I sewed a bar tack on it and it doesn’t unravel. Problem solved 🙂


ColetteGinger Collage 2


En, gewoon omdat het leuk is, is het ook een stiekem Jungle January rokje geworden. Het restje stof komt van mijn allereerste Jungle January project, dat al lang geleden in de prullenbak belandde. Het restje stof heb ik wel altijd bewaard en dat kwam nu goed van pas. De zoom is (weer) afgewerkt met een biais bandje en gestikt.

And, just for fun, it’s secretly a Jungle January skirt. There was some fabric left from my first Jungle January project, which was binned a long time ago. I did keep the fabric and decided to use it now. The hem is faced with bias tape (again) and topstitched.


ColetteGinger07


En bij een spijkerrokje horen natuurlijk cowboylaarzen. Eigenlijk zou ik er nog een rood-wit geblokt bloesje bij moeten maken, om de look af te maken. Hmm… wat een mooi excuus voor nog wat meer stoffen shoppen!

And with a denim skirt one obviously needs to wear cowboy boots. I should really make a red-white checkered shirt, to complete the look. Hmmm… what a lovely excuse for some more fabric shopping!

Sew it up: baby it’s cold outside

Laatst droeg ik een spijkerbroek naar het werk. Een aantal collega’s waren erg verbaasd mij in een broek te zien. Ik vond dat dan weer raar: ik draag toch regelmatig een broek? Tot ik bedacht dat dat vooral ’s avonds en op vrije dagen is, en dan met name een pyjamabroek. En dat zien mijn collega’s natuurlijk niet! Pyjamabroeken zijn erg favoriet hier in huize Ingemaakt, dus toen ik het Sew it up-thema van januari zag wist ik meteen wat ik ging maken: een pyjamabroek!

Recently I wore a pair of jeans to work. Several co-workers were surprised to see me in pants. That was a surprise to me: it feels like I’m wearing pants quite regularly. Untill I realised that those pants are actually PJ pants which I obviously don’t wear at work! Clearly PJ pants are a favorite chez Ingemaakt. So when I read the january theme at Sew it up, I knew immediately what to make: PJ pants!


not this cold fortunately!

not this cold fortunately! it was very pretty here though.


Het thema is ook wel toepasselijk: vorige week hadden we hier in Friesland 4 dagen code rood vanwege ijzel. Daardoor kon ik de hele week niet naar het werk. Thuiswerken is dan een prima oplossing maar op een gegeven moment had ik toch echt niet veel meer te doen. Mooie gelegenheid om nog maar even achter de naaimachine te kruipen dus. En wat maak je dan? Iets met rood natuurlijk.

It’s a very appropriate theme: last week we had code red for four days due to freezing rain and dangerously slippery roads. There was no way to get to work. Working from home was a perfect solution but at some point all work I could do was done. So a perfect opportunity to get some more sewing done. And what do you make then? Something in red, ofcourse.


pyjamabroek1


Goed, een pyjamabroek dus. Ik had deze stof nog liggen, een lekker zachte katoen-polyester mengeling. Een patroon voor een pyjamabroek had ik echter niet en dus sloeg ik zelf aan het tekenen. Mijn patroon-teken-cursus-instructieboek vertelde me dat overwijdte niet nodig is voor een pyjamabroek. Dat leek me sterk en dus rekende ik wel wat mee. Toch is deze broek best strak geworden bij de heupen. Dat zie je niet, want de twee dagen voorafgaand aan deze foto’s heb ik volledig doorgebracht in deze broek en daardoor is ie een beetje uitgezakt.

On to the PJ pants. This fabric was in my stash, it’s a cotton/polyester mix and is nice and soft. I didn’t own a PJ pattern and so I made my own. The instruction book of the pattern drafting class I took told me that there was no need for ease in these pants. I thought that was a bit weird so I added a little. Still they turned out a bit snug in the hips. You probably can’t tell from these pictures because I have been wearing these puppies the two days before I took the pictures and they bagged out a bit.


pyjamabroek3


Ruiten matchen like a boss is gemakkelijk als ze zo groot zijn.

Pattern matching like a boss is easy with a giant plaid like this.


pyjamabroek4


En de achterkant. Het lijkt een beetje op een tafelkleed, deze broek. Dat kan mij niet schelen. Wat mij betreft geldt voor pyjamabroeken: hoe lelijker, hoe beter 🙂

And the back. It looks a bit like a table cloth. I don’t care. When it comes to PJ pants, I say the uglier, the better 🙂


pyjamabroek6


De taille is afgewerkt met een elastiek in een tunnel. Het zwarte shirt is trouwens de eerste poging om het perfecte t-shirt te maken. Er moet nog wel wat aan geschaafd worden maar voor een eerste poging ben ik helemaal niet ontevreden.

The waist is an elastic in a casing. The shirt is the first step towards making the perfect t-shirt pattern. It needs some tweaking but all in all it’s not bad for a first try.


pyjamabroek5


Hier nog een plaatje van de pyjamabroek in zijn natuurlijke habitat 😉 Kijk hoe comfortabel. Hoera voor de pyjamabroek!

Here’s a picture of the PJ pants in their natural habitat 😉  They are so comfy. Hurray for PJ pants!